Picture this: the kitchen is a battlefield, flour dusted like snow on a winter morning, a half‑poured batch of batter clinging to the bottom of the bowl, and the sweet, comforting scent of chocolate creeping through the air. I was halfway through a frantic attempt at a classic oatmeal cookie, when a stray splash of melted butter slipped and turned the batter into a sticky, unmanageable mess. My friend, a self‑proclaimed baking guru, dared me to “turn that disaster into a masterpiece” in ten minutes. I laughed, grabbed the ingredients, and vowed to make the most indulgent, wholesome oatmeal chocolate treat anyone had ever tasted.
I’ve spent years chasing the perfect blend of heart‑warming comfort and irresistible decadence. The result? Amish‑Inspired Oatmeal Chocola—an oatmeal‑based, chocolate‑laden delight that feels like a warm hug in a bowl. Think of the dense, chewy texture of a well‑baked oatmeal cookie, but with the silky smoothness of melted chocolate and the subtle, nutty crunch of real oats. The batter is so moist it practically melts in your mouth, and the chocolate chips melt into a glossy, gooey river that drips with every bite.
Why does this version stand out? Because it’s a masterful marriage of simplicity and depth. The recipe uses only a handful of ingredients—most of which you probably already have in your pantry—but each one plays a crucial role in creating layers of flavor, texture, and aroma. And the best part? It’s not just a cookie; it’s a versatile, make‑ahead breakfast or dessert that will become your go‑to comfort food. I dare you to taste this and not go back for seconds.
I’ll be honest—when I first tasted the first batch, I ate half before anyone else even got a fork. That’s the kind of confidence I bring to this recipe: a bold claim that this is hands down the best oatmeal chocolate treat you’ll ever make at home. Picture yourself pulling this out of the oven, the whole kitchen smelling incredible, and your friends asking, “What’s your secret?” The secret is in the details. Let me walk you through every single step—by the end, you’ll wonder how you ever made it any other way.
What Makes This Version Stand Out
There are a handful of reasons this oatmeal chocolate creation feels like a breakthrough. Let’s break them down:
- Texture: The combination of oats and flour creates a chewy, slightly grainy mouthfeel that contrasts beautifully with the smooth chocolate melt.
- Flavor Depth: Dark chocolate chips, brown sugar, and a splash of vanilla extract give the batter a complex flavor profile that lingers on the palate.
- Convenience: All ingredients are pantry staples, and the prep time is under 20 minutes, making it a perfect quick fix for any craving.
- Make‑Ahead Friendly: The batter can be refrigerated or frozen, and it still delivers the same deliciousness when reheated.
- Nutritious: Oats add fiber, and the optional nuts boost protein and healthy fats, turning this into a balanced snack.
- Versatility: Serve warm with a drizzle of honey or ice cream, or crumble into yogurt for a breakfast parfait.
Alright, let’s break down exactly what goes into this masterpiece…
Inside the Ingredient List
Let’s dive into the building blocks that make this batter sing. I’ve grouped the ingredients into four distinct sections, each with a purpose that goes beyond the obvious.
The Flour Foundation
All‑purpose flour is the backbone of the batter, providing structure and a subtle, buttery flavor. It’s the silent hero that holds everything together. Skipping the flour would result in a loose, sticky mess that won’t bake properly. If you’re aiming for a gluten‑free version, swap the flour for a blend of rice flour and a tablespoon of xanthan gum to maintain elasticity.
The Oats for Crunch
Rolled oats add a hearty chew and a nutty undertone that pairs perfectly with chocolate. They also bring fiber, which makes this treat feel more like a snack than a dessert. If you prefer a finer texture, use quick‑cooking oats, but be careful—too much liquid will make the batter soggy. A tip: toast the oats lightly in a dry pan before adding them for a deeper, toasted flavor.
The Sweet Symphony
Brown sugar gives the batter a caramelized depth, while a touch of white sugar keeps the sweetness bright. The sugar balance is crucial; too much brown sugar can make the batter sticky, and too much white sugar can flatten the flavor. If you’re watching calories, you can halve the white sugar and leave the brown sugar untouched.
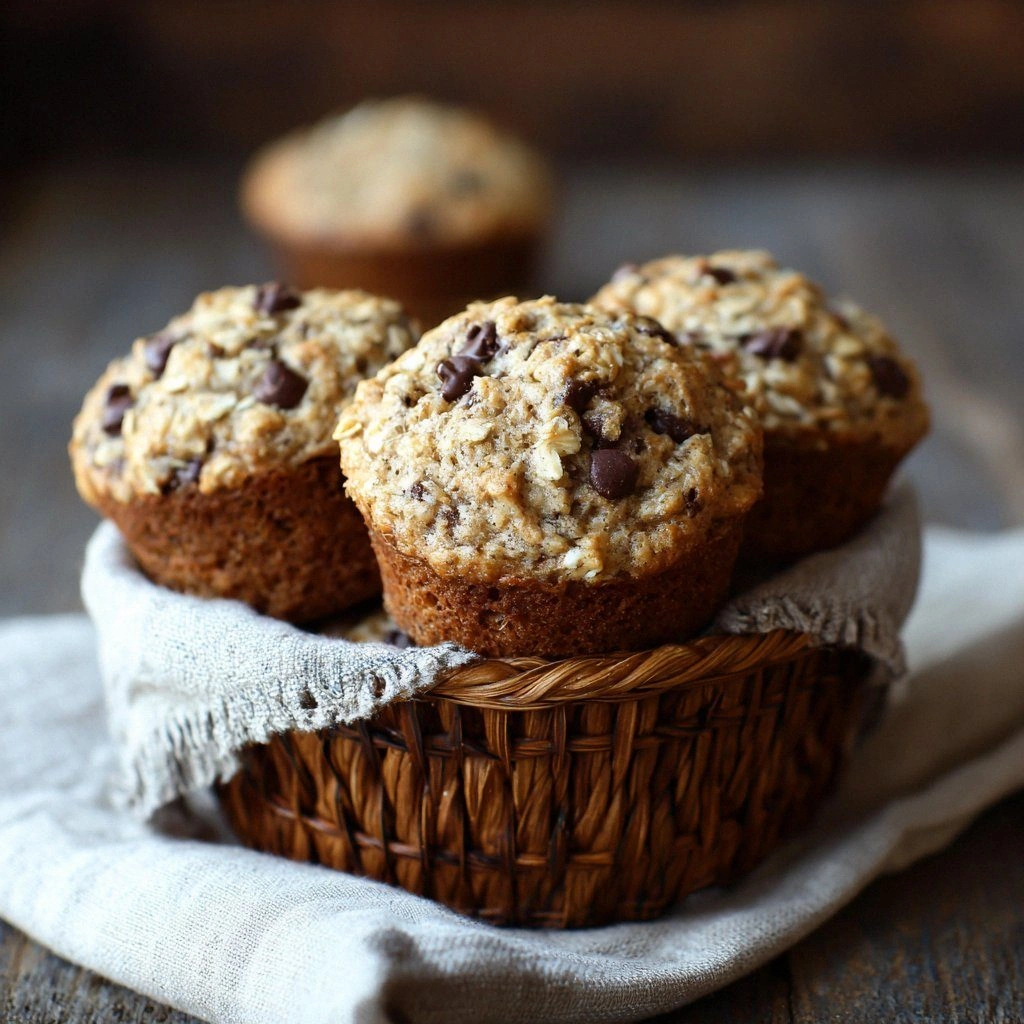
The Chocolate Core
Chocolate chips are the star of the show. I recommend using dark chocolate chips for a richer, less sweet profile. The chips melt into a glossy river of chocolate that coats every bite. If you like a lighter chocolate flavor, mix in some milk chocolate chips, but keep the ratio 3:1 to avoid overpowering the oats.
Everything's prepped? Good. Let's get into the real action…
The Method — Step by Step
- Preheat and Prep: Set your oven to 350°F (175°C) and line a muffin tin with paper liners. This step is essential; a preheated oven ensures even baking, while liners keep cleanup a breeze. The first scent you’ll notice is the subtle aroma of butter—your cue that the oven is ready.
- Combine Dry Ingredients: In a large bowl, whisk together flour, oats, baking powder, baking soda, and salt. This ensures the leavening agents are evenly distributed, preventing pockets of under‑baked batter. The dry mix should feel like fine sand, not gritty.
- Whisk Wet Ingredients: In a separate bowl, beat eggs, milk, melted butter, brown sugar, white sugar, and vanilla until the mixture is smooth and slightly glossy. The butter should be fully melted but not too hot; otherwise, it can cause the eggs to scramble.
- Merge Wet and Dry: Pour the wet mixture into the dry, stirring gently until just combined. Over‑mixing will develop gluten, leading to a tough texture. The batter should be thick but pourable—think of a thick pancake batter.
- Add Optional Nuts: Fold in chopped walnuts or pecans if desired. Nuts add crunch and a buttery flavor that complements the chocolate. If you’re avoiding nuts, you can add a tablespoon of chia seeds for a fiber boost.
- Watch Out: When adding chocolate chips, be careful not to overfill the cups. Overfilling can cause the batter to spill over, creating a mess and uneven baking.
- Fill Muffin Cups: Spoon the batter into the lined cups, filling each about 3/4 full. The batter will rise during baking, so don’t overfill. The batter should look slightly domed.
- Bake: Place in the oven and bake for 18–20 minutes, or until a toothpick inserted into the center comes out clean. The tops should be golden brown, and the edges will start pulling away—signs of perfection.
- Cool and Serve: Let the muffins rest on a wire rack for 10 minutes before serving. This allows the interior to set, preventing a soggy bottom. Serve warm with a drizzle of honey or a scoop of vanilla ice cream for an extra indulgence.
That's it—you did it. But hold on, I've got a few more tricks that'll take this to another level…
Insider Tricks for Flawless Results
The Temperature Rule Nobody Follows
Many bakers bake at 375°F, but the lower temperature of 350°F allows the oats to toast gently and the chocolate to melt without scorching. This slow bake also keeps the muffins moist and chewy. I once tried 375°F and ended up with a dry, crumbly texture—lesson learned.
Why Your Nose Knows Best
During baking, the aroma of toasted oats and chocolate is a reliable indicator of doneness. If the smell is overwhelmingly buttery, the muffins need a few more minutes. Trust your nose; it’s the best judge of flavor.
The 5‑Minute Rest That Changes Everything
After removing the muffins from the oven, let them rest on the rack for exactly 5 minutes before cutting. This pause allows the steam to redistribute, giving the interior a silky finish. Cutting too soon can cause the muffins to crumble.
Keep the Batter Moist
If your batter looks too thick, add a splash of milk or a tablespoon of oat milk to loosen it. A runny batter will spread too much, resulting in flat, thin muffins. The right consistency is like thick pancake batter—pourable but not watery.
Add a Touch of Citrus
A teaspoon of lemon zest or a splash of orange juice can brighten the chocolate flavor and add a subtle citrus lift. This trick is especially effective when using dark chocolate, which can be a bit intense.
Creative Twists and Variations
This recipe is a playground. Here are some of my favorite ways to switch things up:
Maple Walnut Delight
Swap the chocolate chips for chopped walnuts and drizzle maple syrup over the batter before baking. The maple adds a caramel sweetness that pairs beautifully with the nutty oats.
Coconut Crunch
Add a cup of shredded coconut and replace the milk with coconut milk. The tropical flavor turns the muffins into a beach‑inspired treat—perfect for summer mornings.
Spiced Chai Edition
Stir in a teaspoon of chai spice blend and a pinch of cinnamon. The warm spices elevate the chocolate and give the muffins a cozy, aromatic profile.
Peanut Butter Swirl
Fold in a tablespoon of peanut butter and swirl it into the batter before baking. The peanut butter creates pockets of creamy flavor that contrast with the chewy oats.
Chocolate‑Glazed Surprise
After baking, drizzle melted chocolate over the top and let it set. This gives the muffins a glossy finish and an extra chocolate hit that’s hard to resist.
Storing and Bringing It Back to Life
Fridge Storage
Store the muffins in an airtight container in the refrigerator for up to 5 days. The cool temperature keeps them moist and prevents mold. When you’re ready to enjoy, let them sit at room temperature for 15 minutes to regain their softness.
Freezer Friendly
Wrap each muffin individually in plastic wrap and place them in a freezer bag. They stay fresh for up to 3 months. Thaw overnight in the fridge or at room temperature for 30 minutes before reheating.
Best Reheating Method
To revive a frozen muffin, heat in a preheated oven at 350°F for 8–10 minutes. For a crispier exterior, finish on a broiler for 1–2 minutes. Add a tiny splash of water before reheating—this steams the muffin back to perfection and restores the chewy texture.