I remember the night I first stumbled into the world of ube. I was at a midnight snack table, a friend had brought a bowl of mashed purple yam, and the air smelled like sweet potatoes and cinnamon. I laughed, thinking, “this is just a dessert,” but the moment that purple swirl touched my tongue, I was hooked. The flavor exploded—sweet, buttery, and oddly nutty, like a caramelized coconut that had never been baked. That night, I swore I’d recreate that experience, and I didn’t just stop at a simple pudding; I turned it into something that would make my entire kitchen smell like a tropical bakery.
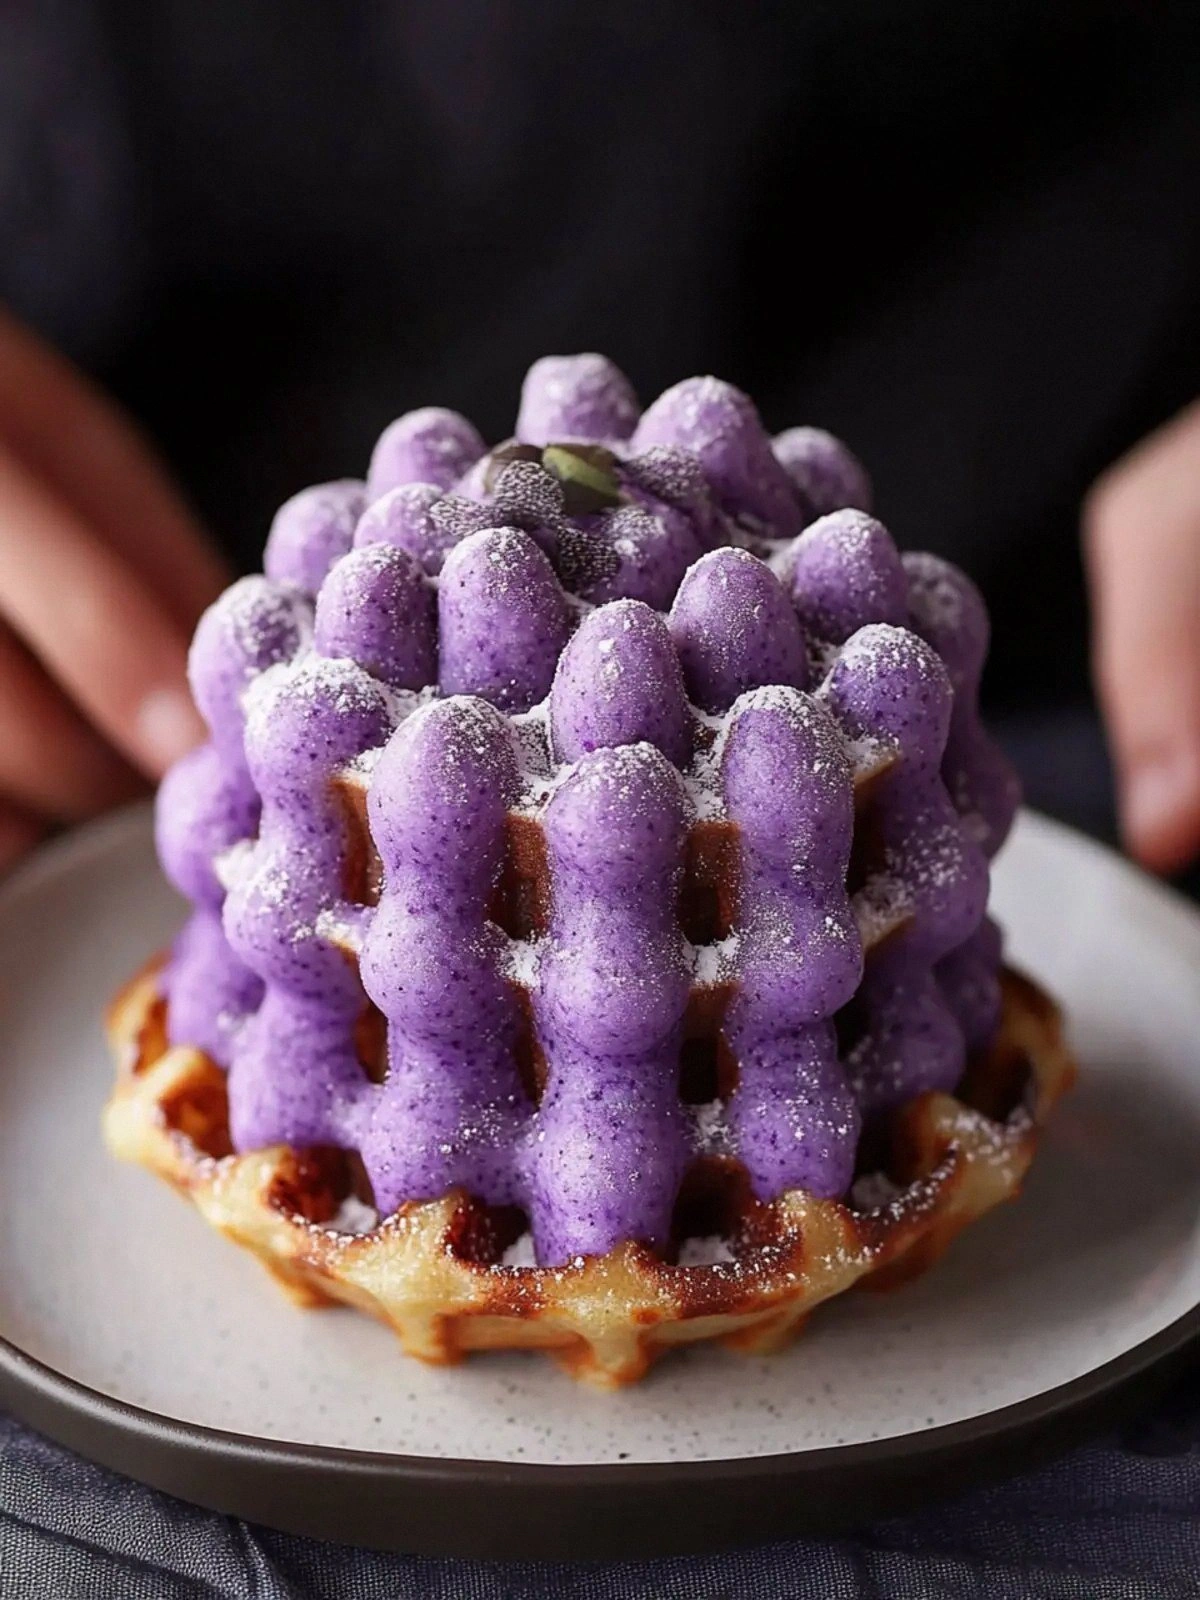
Fast forward a few months, I was experimenting with the idea of turning that silky ube goodness into a breakfast treat that could double as a snack. I tried mixing it with pancakes, but the batter was too heavy and the texture collapsed. Then I remembered that mochi batter from my Japanese kitchen trips—light, chewy, and forgiving. I thought, “What if I could fuse the airy, chewy mochi with the sweet, vibrant ube, and serve it in a waffle form?” The result? A fluffy, purple waffle that melts in your mouth like a cloud, with a subtle crunch on the edges that shatters like thin ice when you bite into it.
This recipe is not just another waffle variation. It’s a game-changer. I’ve spent hours tweaking the ratios, testing different starches, and even adding a touch of ube extract for that unmistakable aroma. The secret sauce is the combination of tapioca starch, rice flour, and all-purpose flour, which gives the batter that signature mochi snap while keeping it light enough to puff up in the waffle iron. And let’s be honest: most people think of ube as a dessert, but this version transforms it into a breakfast powerhouse that can be served with fresh berries, whipped cream, or even a drizzle of caramel.
Picture yourself pulling this batch out of the oven, the whole kitchen smelling incredible, the steam rising like a cloud of violet. I dare you to taste this and not go back for seconds. I promise, this is hands down the best version you'll ever make at home. If you’ve ever struggled with mochi batter that turns gummy, or waffle batter that never browns properly, you’re not alone — and I’ve got the fix. Stay with me here — this is worth it. Let me walk you through every single step — by the end, you’ll wonder how you ever made it any other way.
What Makes This Version Stand Out
- Flavor: The ube base is pure, with a subtle sweetness that’s not overpowering. The addition of ube extract deepens the aroma, making each bite feel like a tropical sunrise. The result is a flavor profile that balances sweet and earthy tones, leaving you craving more.
- Texture: The blend of tapioca starch, rice flour, and all-purpose flour creates a chewy, mochi-like interior that puffs beautifully. The waffle iron’s ridges lock in steam, giving the waffles a crisp exterior that cracks with a satisfying snap. You’ll feel the contrast of a soft center and a crunchy edge in every bite.
- Simplicity: The recipe requires no special equipment beyond a standard waffle iron. All ingredients are pantry staples, and the method is straightforward—no fancy techniques or time-consuming steps. Even a novice can whip up this treat in under an hour.
- Uniqueness: While many recipes turn ube into cakes or pies, this is the first time I’ve seen it combined with mochi batter and a waffle format. It’s a fresh take that stands out in a sea of ordinary desserts, giving you a new way to enjoy a beloved ingredient.
- Crowd Reaction: Friends who have tried this rave about the color, the aroma, and the texture. They say the first bite is “pure magic” and that they can’t stop reaching for another. I’ve seen the look of disbelief when they taste the first one—proof that this is more than just a snack.
- Ingredient Quality: Using fresh ube halaya or high-quality ube puree ensures that the batter has a natural sweetness and a vibrant color. The starches are fine-grained, which helps the batter stay smooth and prevents lumps.
Inside the Ingredient List
The Flavor Base
At the heart of this recipe is the ube halaya, a sweetened purple yam jam that gives the waffles their signature color and taste. It’s the primary sweetener and flavor carrier, so use a quality brand or homemade version to avoid a metallic aftertaste. If you’re in a pinch, you can substitute ube puree, but be sure to sweeten it a bit more to compensate for the lower sugar content.
The 1 tablespoon of ube extract is the secret to an intensified aroma. A quick splash of extract after the batter has thickened will lock in the fragrance and elevate the overall experience. If you’re allergic to extracts or simply don’t have them, a dash of vanilla or almond extract can add a subtle depth without overpowering the ube flavor.
The Texture Crew
Tapioca starch is the star of the show—it provides chewiness and a smooth mouthfeel. When you whisk it into the batter, it absorbs liquid quickly, preventing clumps. The rice flour adds a slight bite, while all-purpose flour gives structure and helps the batter hold together during cooking.
The 2 teaspoons of baking powder are crucial for a light rise. Without it, the waffles would stay dense and gummy. Keep the baking powder fresh; older powder will lose potency and result in flat waffles.
The Unexpected Star
The 0.5 cups of water might seem odd in a sweet batter, but it’s essential for balancing moisture. Too little water, and the batter will dry out; too much, and the waffles become soggy. Think of it as the “liquid glue” that holds everything together.
The 1 tablespoon of neutral oil adds sheen and helps the waffles release cleanly from the iron. It also prevents the batter from sticking, especially if you’re using a non-stick iron that’s a bit worn.
The Final Flourish
Sugar is the sweetener that brings everything together. It caramelizes on the surface, giving a slight golden crust. The 0.25 teaspoons of salt is the flavor enhancer—without it, the sweet notes would be flat and unbalanced.
The 2 eggs bind the batter, add richness, and help with the rise. Whisk them until slightly frothy to incorporate air, then fold them into the wet mixture gently to keep the batter light.
Everything's prepped? Good. Let's get into the real action...
The Method — Step by Step
- In a large mixing bowl, combine the ube halaya, ube extract, and water. Whisk until the mixture is smooth and the color is uniform. The batter should look glossy; if it’s too thick, add a splash of milk to loosen it. This is the moment of truth—your batter should feel silky, not gritty.
- In a separate bowl, sift together the tapioca starch, rice flour, all-purpose flour, baking powder, sugar, and salt. Mixing the dry ingredients first ensures there are no lumps. This step also helps distribute the leavening agent evenly, so the waffles rise consistently.
- Add the eggs to the wet mixture and beat them lightly until the yolk and whites are blended. The eggs act as a binder and add a subtle richness that balances the sweetness. Be careful not to overbeat; you want a gentle fold, not a frothy mixture.
- Pour the dry mixture into the wet batter, folding gently with a spatula. The batter should be thick but pourable—think of it like a thick pancake batter. If you see lumps, give it one more quick whisk; the goal is a smooth, lump-free mixture.
- Stir in the neutral oil. This step is crucial for preventing sticking and giving the waffles a subtle sheen. The oil also contributes to a slightly crisp exterior once the batter hits the waffle iron.
- Preheat your waffle iron to medium-high heat. A properly heated iron ensures even browning and a crisp crust. While the iron heats, pour a small amount of batter onto a paper towel to test the consistency—if it spreads too thin, the iron may be too hot.
- Pour enough batter into the center of the waffle iron to cover the surface but not overflow. Close the lid gently and let it cook for about 4-5 minutes, or until the waffles are golden brown and the edges start pulling away. The sound of sizzling is the soundtrack of a successful batch.
- Remove the waffle carefully with a silicone spatula and place it on a wire rack. Let it cool for a minute before serving—this allows the steam to dissipate and the crust to set. If you like extra crunch, you can pop them back into the iron for an additional minute.
- Repeat the process with the remaining batter. Keep the cooked waffles warm by covering them lightly with foil. The key is to keep the batter from cooling too much between batches; otherwise, the waffles will be dense.
- Serve immediately with your favorite toppings—fresh berries, a dollop of whipped cream, or a drizzle of caramel. The contrast of sweet, creamy, and crunchy makes for an unforgettable breakfast experience. And remember, this is a treat that can double as a dessert if you’re feeling indulgent.
That's it — you did it. But hold on, I've got a few more tricks that'll take this to another level...
Insider Tricks for Flawless Results
The Temperature Rule Nobody Follows
Many cooks assume that a low and slow approach yields the best waffles, but that’s not true for this batter. The trick is to preheat the iron to a medium-high temperature, around 375°F (190°C). This ensures a quick sear, locking in moisture and giving the waffles that coveted golden crust. If you’re using a non-stick iron, preheat a bit longer to avoid sticking.
Why Your Nose Knows Best
The aroma of ube is subtle, but it’s a powerful indicator of doneness. When the batter hits the iron, you’ll notice a sweet, nutty scent rising. That’s the moment to close the lid. If you open it too early, the waffles will be undercooked; if you wait too long, the edges will burn.
The 5-Minute Rest That Changes Everything
After cooking each waffle, let it rest on a wire rack for exactly five minutes before topping. This rest period allows the steam to escape and the exterior to crisp. I’ve seen people serve them immediately, and the result is a soggy center. Give them that brief pause, and the texture will be perfect.
The Perfect Folding Technique
When incorporating the dry ingredients, fold gently with a spatula, not whisk. Overmixing introduces air bubbles that collapse, turning the batter dense. Think of it as folding a piece of origami—gentle, deliberate, and precise.
The Sweet Spot for Sugar
If you prefer a sweeter waffle, add a tablespoon of honey or maple syrup to the batter. However, keep in mind that extra liquid can affect the rise. A small adjustment—just a teaspoon—will keep the batter’s consistency intact while boosting flavor.
Creative Twists and Variations
This recipe is a playground. Here are some of my favorite ways to switch things up:
Coconut Ube Waffles
Swap the milk for coconut cream and add a tablespoon of toasted coconut flakes to the batter. The coconut adds a tropical depth that pairs beautifully with the ube’s natural sweetness. Top with fresh mango slices for an extra burst of flavor.
Chocolate Ube Fusion
Add 2 tablespoons of cocoa powder to the dry mix and a splash of chocolate syrup to the wet mix. The result is a chocolate-ube hybrid that’s perfect for dessert lovers. Finish with a dusting of powdered sugar for a polished look.
Savory Ube Skewers
Use the batter to coat small cubes of tofu or tempeh, then grill until crispy. The ube flavor will caramelize on the outside, creating a sweet-salty contrast. Serve with a soy-ginger dipping sauce for a complete meal.
Vegan Ube Waffles
Replace the eggs with 1 tablespoon of flaxseed meal mixed with 3 tablespoons of water (flax egg). Use plant-based milk instead of dairy. The texture remains light and chewy, and the vegan version is just as indulgent.
Ube Ice Cream Topping
Serve the waffles with a scoop of ube ice cream, topped with a drizzle of caramel sauce. The cold ice cream contrasts with the warm waffle, creating a dynamic sensory experience. This combo is a crowd-pleaser at brunches.
Mini Waffle Bites
Use a mini waffle maker to create bite-sized treats. These are perfect for parties or as a dessert for kids. Serve them with a side of yogurt for dipping.
Storing and Bringing It Back to Life
Fridge Storage
Store the cooked waffles in an airtight container in the refrigerator for up to 3 days. Before reheating, let them sit at room temperature for 10 minutes to reduce condensation. A quick toast in a skillet or toaster will revive their crispness.
Freezer Friendly
Wrap each waffle individually in plastic wrap and place them in a freezer bag. They can be frozen for up to 2 months. To reheat, pop them in the oven at 350°F (175°C) for 10 minutes, or use a microwave for 30 seconds. The texture remains surprisingly fresh.
Best Reheating Method
The best method is to reheat in a toaster oven or skillet. Add a tiny splash of water to the pan before heating; the steam will help restore moisture without making the waffles soggy. Finish with a light dusting of powdered sugar for a quick sweet touch.