I was standing in a kitchen that looked like a war zone—one minute I was whisking a bowl of chocolate chips, the next I was drenched in a sticky mess of condensed milk. The disaster started when I tried to make a classic chocolate cookie and ended up with a chocolatey, coconut‑laden blob that refused to bake. That moment, though chaotic, sparked an idea: what if I could capture the decadence of a chocolate cookie without turning on the oven? I dared myself to create a no‑bake treat that would still deliver the crunch, the melt, and the mouth‑watering chocolate glaze that makes every bite feel like a mini celebration.
I imagined the aroma of toasted coconut drifting through the kitchen, the glossy sheen of melted chocolate coating every crumb, and the satisfying snap of graham crackers as you bite into a bite‑sized treasure. The sound of the mixture bubbling in a saucepan would be the soundtrack to a sweet victory. The texture would shift from silky to crunchy in the same bite, a dance of flavors that would make your taste buds sing. I could already taste the first bite—rich chocolate, a hint of vanilla, and a whisper of coconut that lingers like a memory.
What makes this version stand out is the deliberate balance between sweetness and texture, the use of high‑quality chocolate that melts like velvet, and the clever addition of melted butter to give depth without overpowering the coconut. It’s a recipe that defies the usual expectations of no‑bake desserts, offering a glossy finish that doesn’t require a timer or a baking sheet. I dare you to taste this and not go back for seconds—because once the first bite melts, the second is a sweet addiction.
If you’ve ever struggled with a too‑dry or too‑wet no‑bake treat, you’re not alone, and I’ve got the fix. Picture yourself pulling this out of the fridge, the whole kitchen smelling incredible, and handing out bite‑sized pieces that look like little chocolate‑coconut jewels. I’ll be honest—I ate half the batch before anyone else got to try it. This is hands down the best version you’ll ever make at home, and I’m about to walk you through every single step so you’ll wonder how you ever made it any other way.
What Makes This Version Stand Out
- Flavor: The combination of dark chocolate chips and sweetened condensed milk creates a rich, buttery base that feels indulgent without being cloying. The vanilla extract lifts the sweetness, adding a fragrant depth that keeps every bite interesting.
- Texture: The dried coconut gives a subtle chew while the graham cracker crumbs provide a satisfying crunch that contrasts with the glossy chocolate. The butter smooths the mixture, preventing it from becoming too brittle.
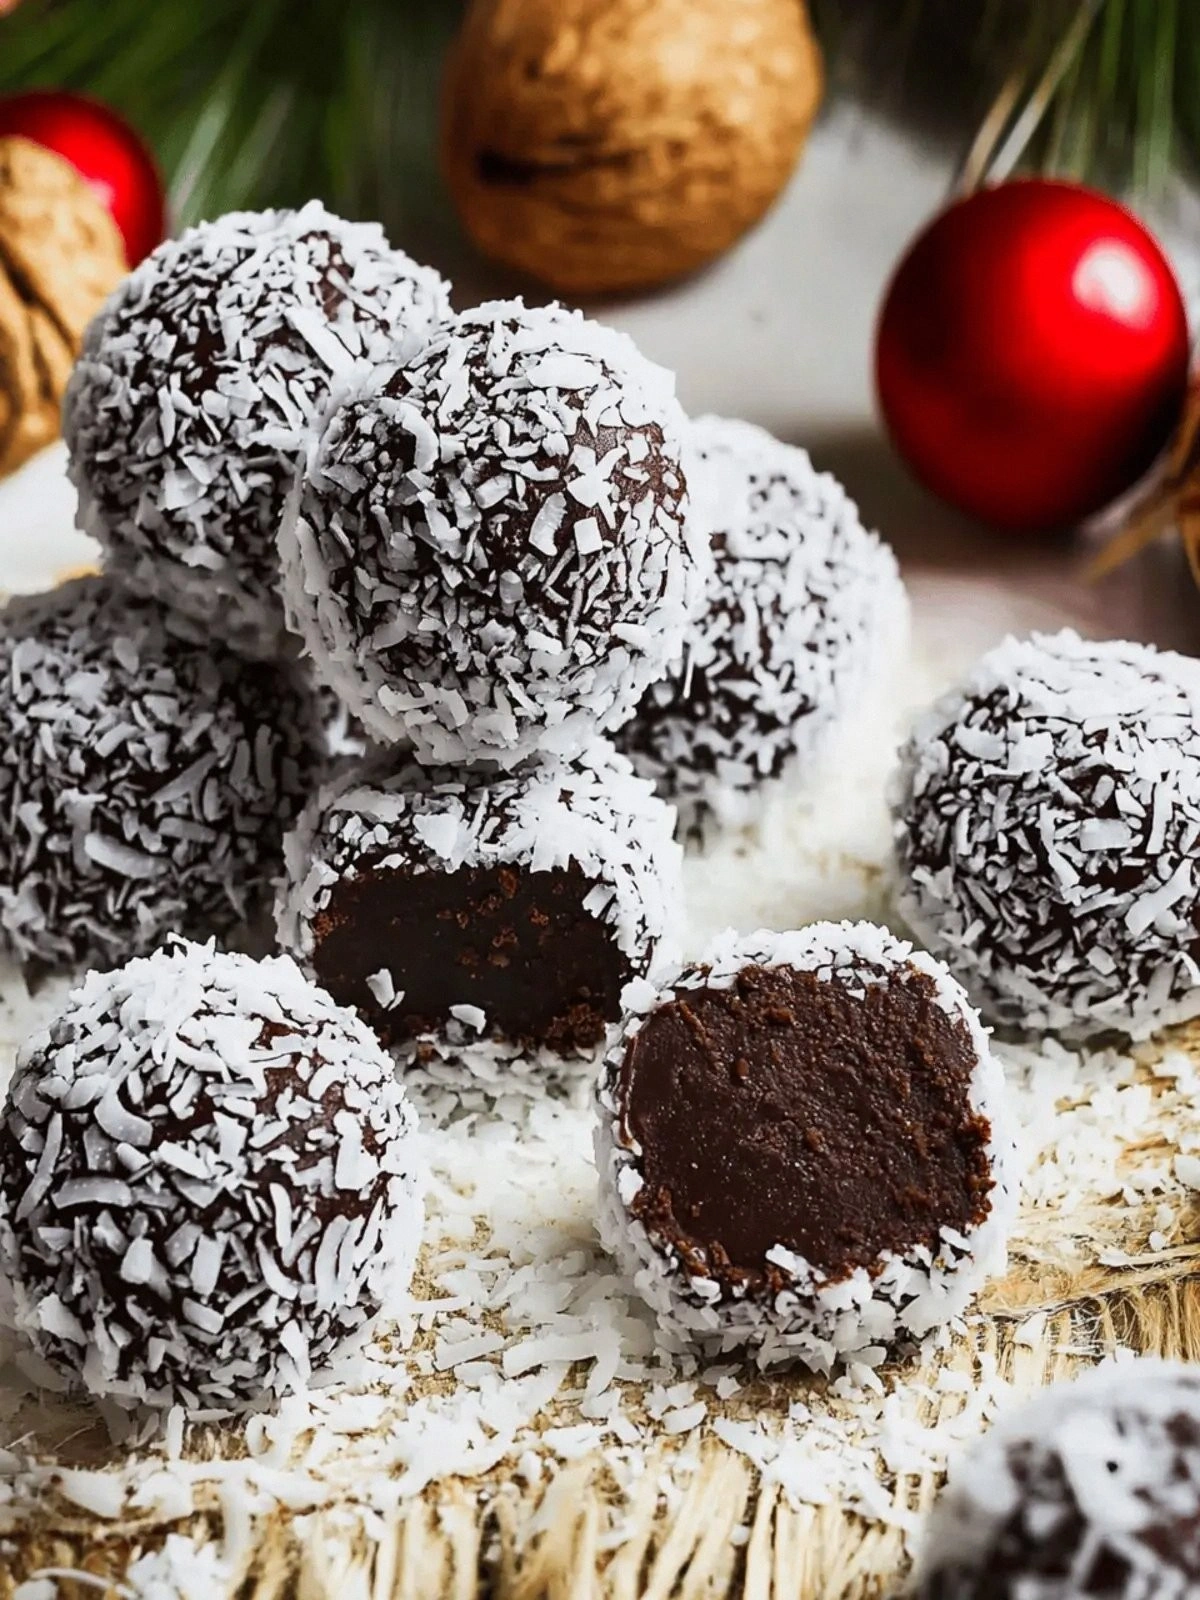
- Visual Appeal: The glossy chocolate glaze coats the crumbs like a polished gem, making the final product look as good as it tastes. The contrast between the dark chocolate and the pale coconut creates an eye‑catching presentation.
- Ease: No oven, no baking sheet, no timer—just a saucepan, a whisk, and a fridge. The recipe is designed for anyone who wants a quick, no‑fuss dessert that still feels special.
- Make‑ahead Potential: The mixture can be prepared in advance and stored in the fridge for up to a week, making it ideal for parties or last‑minute dessert needs.
- Ingredient Quality: Using high‑quality chocolate chips ensures a smooth melt, while a good can of condensed milk provides the right balance of sweetness and thickness.
- Flavor Customization: The recipe’s core ingredients are versatile, allowing you to swap in dark or milk chocolate, add a splash of espresso, or sprinkle sea salt for a savory twist.
- Health Angle: While indulgent, the recipe can be tweaked with dark chocolate and coconut to reduce sugar and add healthy fats, making it a more balanced treat.
Alright, let's break down exactly what goes into this masterpiece...
Inside the Ingredient List
The Flavor Base
Chocolate Chips: They are the heart of the dessert, providing depth, color, and a melt that coats every crumb. When melted, they release cocoa butter that creates a glossy finish. Skipping them would leave the treat bland and lacking that luxurious chocolate hit.
Sweetened Condensed Milk: This thick, sweet milk acts as the binder, turning the mixture into a pourable sauce that clings to the crumbs. It also adds a creamy sweetness that balances the bitterness of the chocolate. If you omit it, the mixture will be too dry and won't set properly.
Vanilla Extract: Vanilla lifts the overall flavor profile, adding a subtle floral note that enhances the chocolate and coconut. It’s a small amount but makes a big difference, preventing the dessert from tasting too one‑dimensional. Without vanilla, the treat can feel flat.
The Texture Crew
Dried Coconut: Coconut provides chewiness and a tropical aroma that contrasts beautifully with the chocolate. It also adds a natural sweetness and a pleasant chew. If you skip the coconut, the dessert will feel too crumbly and lack the tropical kick.
Graham Cracker Crumbs: These crumbs form the base of the dessert, offering a buttery, slightly sweet crunch. They absorb the chocolate glaze, creating a firm yet tender bite. Removing them would make the treat too mushy and lacking structure.
The Unexpected Star
Melted Butter: Butter adds richness and helps the mixture set with a smoother texture. It also prevents the chocolate from seeping out of the crumbs, keeping the bite cohesive. If omitted, the dessert might crack or separate when chilled.
The Final Flourish
Additional Graham Crumbs: These extra crumbs are sprinkled on top to create a crunchy crust that breaks with each bite. They add an extra layer of texture and help balance the sweetness. Skipping them would reduce the crunch factor and make the dessert feel more like a pudding.
Everything's prepped? Good. Let's get into the real action...
The Method — Step by Step
- Step 1: Prep the crumbs. In a large mixing bowl, combine 1 cup of graham cracker crumbs with 1/2 cup of dried coconut. Stir them together until evenly distributed. This creates a uniform base that will hold the chocolate glaze. If you prefer a lighter bite, you can pulse the crumbs in a food processor for a finer texture.
- Step 2: Melt the chocolate. Place 1 cup of chocolate chips in a heat‑proof bowl set over a pot of simmering water. Stir constantly until the chocolate is fully melted and silky. The chocolate should look glossy and have a smooth sheen. This step is crucial—any lumps will ruin the final texture.
- Step 3: Combine the sweetened milk. Add 1 can of sweetened condensed milk to the melted chocolate, whisking until the mixture is completely blended. The sauce should be thick enough to coat the back of a spoon. If it’s too thin, let it simmer for a minute longer. This creates the luscious base that will bind everything together.
- Step 4: Add butter and vanilla. Stir in 1/2 cup of melted butter and 1 teaspoon of vanilla extract. The butter adds a silky richness and helps the mixture set evenly. The vanilla deepens the chocolate flavor, giving the dessert a warm, fragrant undertone. Whisk until the butter is fully incorporated.
- Step 5: Fold in the crumbs. Gently fold the crumb mixture into the chocolate sauce. Use a spatula to combine, making sure every crumb is coated. The mixture should look like a cohesive, chocolate‑drenched batter. Watch out: if you stir too vigorously, the crumbs may break apart, causing a mushy texture.
- Step 6: Press into a pan. Line a 9‑inch square pan with parchment paper. Transfer the mixture into the pan and press it firmly with the back of a spoon or a flat spatula. The goal is an even layer that’s about 1½ inches thick. Smooth the top so it’s ready for chilling.
- Step 7: Chill. Place the pan in the refrigerator for at least 2 hours, or until the mixture is firm. The cold will set the chocolate glaze, creating a glossy, bite‑size texture. If you’re in a rush, a 30‑minute chill will still give you a decent set.
- Step 8: Serve. Once set, lift the dessert out of the pan using the parchment edges. Cut into squares or bars with a sharp knife. Serve immediately or store in an airtight container at room temperature for up to 3 days. Enjoy the contrast of crunchy graham, chewy coconut, and silky chocolate.
That's it — you did it. But hold on, I've got a few more tricks that'll take this to another level...
Insider Tricks for Flawless Results
The Temperature Rule Nobody Follows
Chocolate melts best at a steady 45–50°C (113–122°F). If you let it cool too quickly, it can seize and become grainy. Use a thermometer to keep the temperature in check, or melt it in a double boiler and let it sit for a few minutes before adding the milk. This ensures a silky finish that coats each crumb.
Why Your Nose Knows Best
Before you add the condensed milk, pause and inhale the aroma of the chocolate. If it smells too bitter, add a splash of vanilla or a pinch of sea salt to balance the flavor. Your nose is a powerful guide to flavor balance—listen to it, and the dessert will taste even better.
The 5‑Minute Rest That Changes Everything
After folding in the crumbs, let the mixture rest for 5 minutes before pressing it into the pan. This brief pause allows the crumbs to absorb the glaze fully, preventing a crumbly texture. It’s a small step that makes a huge difference.
Keep It Cool, Keep It Crunchy
If you live in a humid climate, chill the dessert in a sealed container to prevent condensation from softening the crunch. A small fan or dehumidifier can help keep the texture crisp for longer.
Use the Right Chocolate
Dark chocolate with at least 60% cacao gives a richer flavor and a more robust glaze. Milk chocolate is sweeter but can become too sweet; consider a blend of dark and milk for balance. The chocolate’s fat content also influences the glaze’s sheen.
Add a Splash of Espresso
For an extra depth of flavor, stir in 1 tablespoon of cold espresso into the chocolate mixture before adding the crumbs. The coffee enhances the chocolate notes and adds a subtle bitterness that balances the sweetness. It’s a simple tweak that turns an ordinary dessert into a café‑style delight.
Creative Twists and Variations
This recipe is a playground. Here are some of my favorite ways to switch things up:
Nutty Crunch
Swap the graham cracker crumbs for chopped almonds or hazelnuts. The added nutty flavor pairs beautifully with the chocolate, and the crunch becomes even more pronounced. A pinch of sea salt brings out the nutty sweetness.
Minty Fresh
Add 1 teaspoon of peppermint extract to the chocolate sauce for a cool, minty undertone. The mint contrasts with the rich chocolate, giving the dessert a refreshing twist that’s perfect for summer.
Spiced Delight
Stir in 1/4 teaspoon of ground cinnamon and a pinch of cayenne pepper. The warmth of cinnamon and the subtle heat of cayenne create a complex flavor profile that elevates the dessert from simple to sophisticated.
Caramel Swirl
Fold in a swirl of caramel sauce after the crumbs are added. The caramel adds a buttery sweetness that complements the chocolate. It also creates a marbled effect that looks as good as it tastes.
Sea‑Salted Caramel
Finish the top with a dusting of flaky sea salt and a drizzle of caramel. The salt brings out the chocolate’s richness, while the caramel adds a silky, buttery layer that makes each bite irresistible.
Coconut‑Lemon Twist
Add zest from one lemon to the chocolate sauce, and replace half the coconut with shredded coconut for a citrusy brightness. The lemon zest cuts through the sweetness and adds a fresh, zesty note.
Storing and Bringing It Back to Life
Fridge Storage
Store the dessert in an airtight container at room temperature for up to 3 days. Keep it away from direct sunlight to prevent the chocolate from melting. If the dessert becomes too soft, refrigerate it for 10 minutes before serving.
Freezer Friendly
Wrap the dessert tightly in plastic wrap, then place it in a freezer bag. It will keep for up to 3 months. Thaw in the refrigerator overnight before serving. The texture remains firm, and the chocolate stays glossy.
Best Reheating Method
If the dessert has set too firmly, gently warm it in a microwave at 30‑second intervals, stirring in between. Add a tiny splash of water (about a teaspoon) before reheating to create steam that restores the chocolate’s silky texture. This trick keeps the dessert moist without melting it.