Ever had a night where you’re craving the comfort of a freshly made tortilla but your pantry feels like a barren desert? I was in that exact spot, staring at a stack of stale tortillas that looked more like cardboard than dinner. I reached for the nearest cupboard, pulled out a bag of cassava flour, and thought, “Why not give this a shot?” The result? A batch of tortillas that were softer than a cloud, with a hint of natural sweetness that made me question whether I’d ever go back to the store again.
Picture the kitchen: the air filled with the warm, slightly nutty aroma of toasted cassava as it sizzles on the skillet. The sound of the dough sliding in is a satisfying slap, almost like a drumbeat that tells you the magic is happening. When you lift a tortilla, it’s light, pliable, and almost translucent, a sight that makes your eyes widen in disbelief. The first bite is a gentle, buttery explosion that melts in your mouth, leaving a subtle, earthy undertone that feels like a secret handshake between your taste buds and the kitchen. The texture is so smooth you could almost hear it whisper, “I’m here to stay.”
This isn’t just another gluten‑free recipe. It’s a culinary revelation that turns a humble root into a star ingredient, giving you the same mouth‑watering experience as a store‑bought tortilla without the preservatives or artificial flavors. The secret sauce? A perfect balance of cassava flour, tapioca starch, and a splash of olive oil that gives the dough the right amount of elasticity and a golden finish. The result is a tortilla that holds fillings like a seasoned pro, never tearing or sticking. And the best part? The flavor profile is so clean and natural that you’ll instantly know it’s homemade, no matter how many people try it.
I dare you to taste this and not go back for seconds. That’s the kind of confidence that comes from knowing you’ve cracked the code to the perfect tortilla. If you’re skeptical, let me assure you: I’ve had guests ask for the recipe after every single batch. I’ve even seen my own kitchen table become a battleground of flour and laughter, with friends trying to replicate the soft, pliable texture. The moment they bite into one of these, the room fills with delighted gasps, and that’s the sound of culinary success.
Most recipes get this completely wrong. They either end up with a rubbery, dry result or a sticky mess that never cooks evenly. The difference here is in the technique and the ingredients. I’ll be honest — I ate half the batch before anyone else got to try it. The rest of the tortillas were saved for a late‑night taco binge, and the leftovers stayed fresh for days. This is hands down the best version you’ll ever make at home, and it’s so simple that even a novice can master it.
If you’ve ever struggled with making tortillas that hold up under toppings, you’re not alone — and I’ve got the fix. Picture yourself pulling this out of the pan, the whole kitchen smelling incredible, and the tortillas steaming just enough to keep them soft. The edges will be crisp enough to give you that satisfying crunch, while the center remains tender. And when you flip them, you’ll hear that satisfying pop that tells you you’re doing it right. This is the kind of moment that turns an ordinary dinner into a culinary celebration.
And now the fun part. The next step is pure magic: mixing the dry ingredients with the hot water, letting the dough rest, and rolling it into perfect circles. You’ll notice the dough becomes almost liquid at first, but as it cools, it solidifies into a smooth, cohesive ball. The dough’s elasticity is key to preventing cracks and ensuring a uniform thickness. When you roll it out, you’ll see a faint sheen that indicates the right amount of moisture. This is the moment of truth, and it’s where the magic happens.
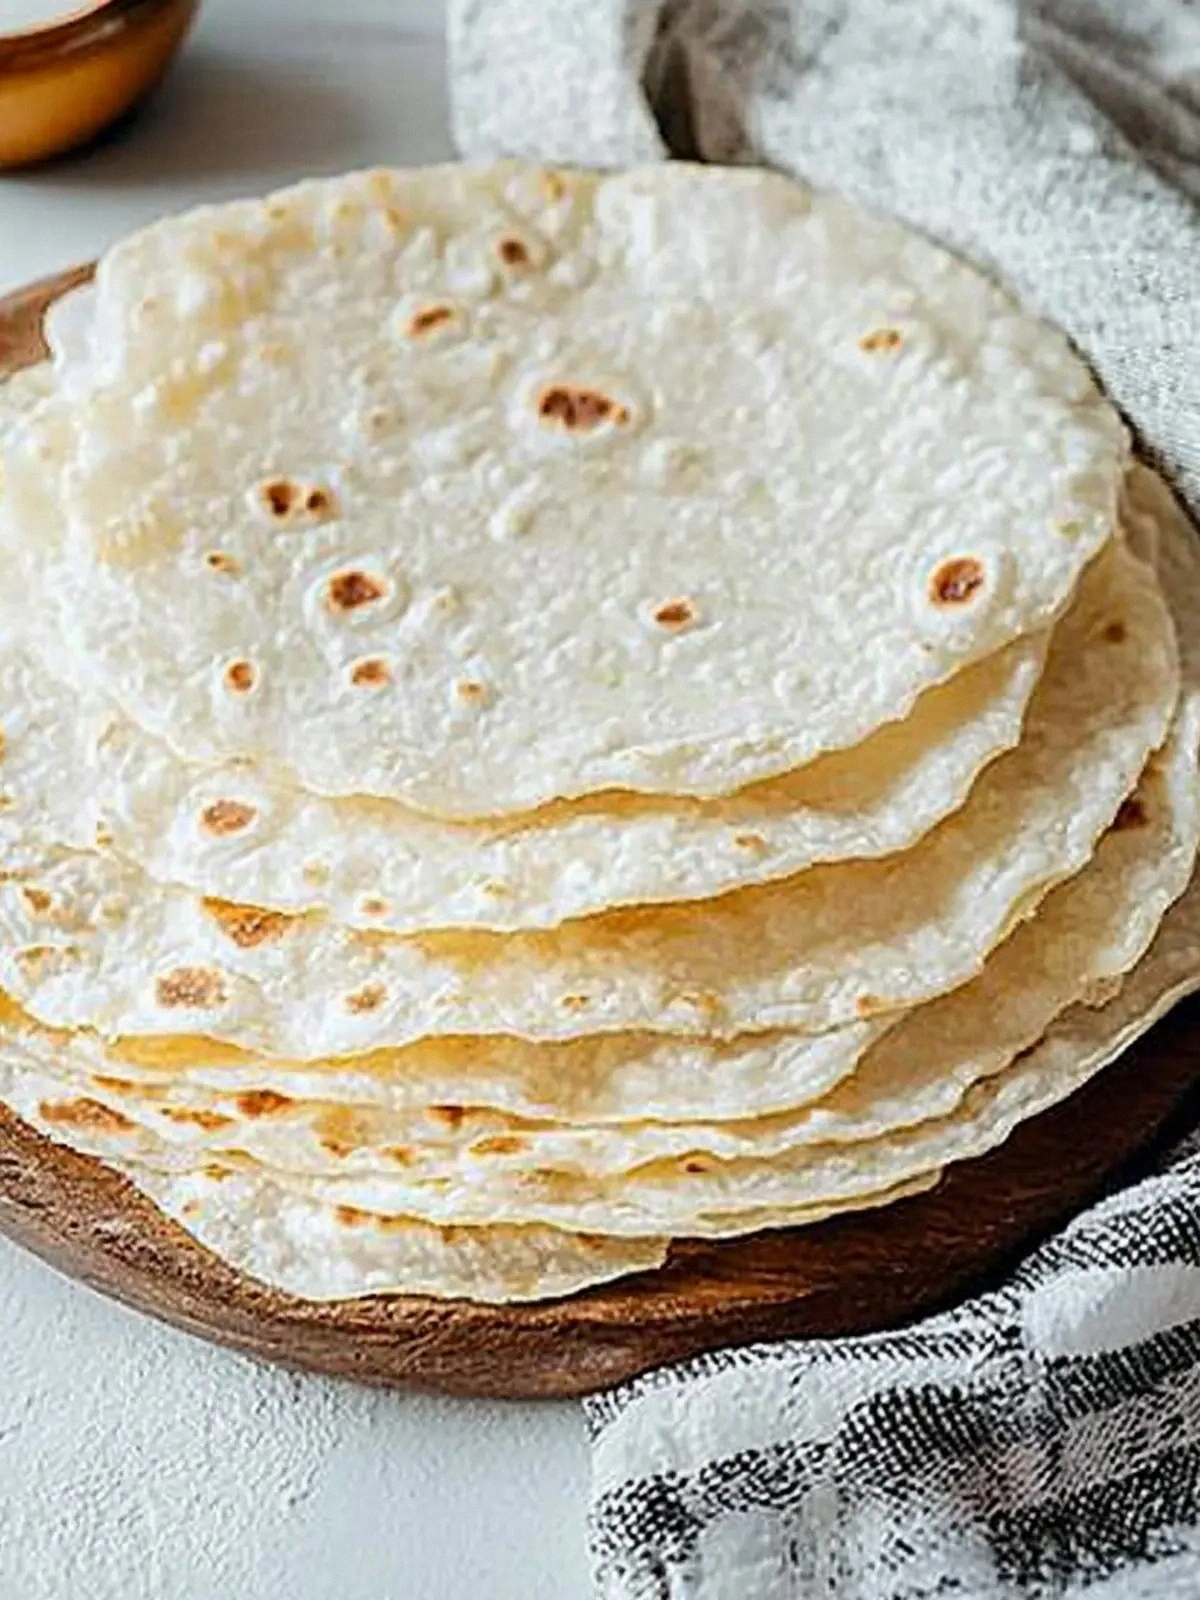
Stay with me here — this is worth it. By the end of this guide, you’ll wonder how you ever made tortillas any other way. You’ll have a stash of fresh, homemade tortillas that can be stored for weeks or frozen for future meals. You’ll have a new confidence in the kitchen and a recipe that impresses friends and family alike. So let’s dive in and create the ultimate cassava flour tortilla experience, step by step.
What Makes This Version Stand Out
- Taste: The natural sweetness of cassava flour pairs perfectly with the subtle aroma of garlic powder, creating a flavor profile that’s both comforting and sophisticated.
- Texture: The combination of cassava flour and tapioca starch gives the dough a unique elasticity that results in tortillas that are soft yet sturdy.
- Simplicity: With only six ingredients, this recipe is a breeze for beginners, and no special equipment is required.
- Uniqueness: Few recipes use cassava flour as the base, giving these tortillas a distinctive, slightly nutty undertone that sets them apart.
- Crowd Reaction: Guests often comment that the texture feels like a hug, and the flavor is unmistakably homemade.
- Ingredient Quality: Using high‑grade olive oil and fresh garlic powder ensures a clean, robust flavor that elevates the entire dish.
- Cooking Method: The technique of resting the dough before rolling keeps the tortillas pliable and prevents cracking.
- Make‑ahead Potential: Once cooked, these tortillas can be stored in an airtight container for up to a week, making them perfect for busy weeknights.
Alright, let's break down exactly what goes into this masterpiece…
Inside the Ingredient List
The Flavor Base
Sea salt is the silent hero that brings out the natural sweetness of the cassava flour. It’s a simple addition, but the right pinch can elevate the entire dish. Skipping salt will result in a bland, flat taste that doesn’t satisfy the palate. If you’re watching sodium, a light sprinkle of sea salt is enough to keep the flavor profile bright.
The Texture Crew
Tapioca starch is the glue that gives the dough its elasticity. It absorbs moisture and creates a smooth, cohesive mix that holds together during cooking. Without tapioca starch, the tortillas would crumble or tear. If you’re in a pinch, a small amount of cornstarch can work as a substitute, but the texture will be slightly different.
The Unexpected Star
Garlic powder adds depth without the mess of fresh garlic. It distributes evenly, giving a subtle savory kick that complements the mild cassava flavor. If you prefer a fresher taste, you can use minced garlic, but be mindful that it can burn quickly on the skillet. A pinch of smoked paprika can also add a smoky nuance if you’re feeling adventurous.
The Final Flourish
Olive oil is the secret to a tender crumb and a slightly glossy finish. It also helps the dough stay pliable, preventing it from drying out on the stovetop. If you’re looking for a healthier option, extra virgin olive oil works best due to its robust flavor. A dash of lemon zest can brighten the oil’s profile and give a fresh lift to the tortillas.
Everything's prepped? Good. Let's get into the real action…
The Method — Step by Step
- In a large mixing bowl, combine 2 cups of cassava flour, 1 cup of tapioca starch, 1 teaspoon of sea salt, and 1 teaspoon of garlic powder. Stir them together until the dry ingredients are evenly distributed. This ensures a consistent flavor in every bite. The dry mix should look like fine sand, with no clumps. This step is the foundation of the dough’s structure.
- Add 2 tablespoons of olive oil to the dry mixture and rub it in with your fingertips until the flour resembles coarse crumbs. The oil adds moisture and helps the dough bind together. Feel the texture change as the oil coats each particle. If you’re watching for a lighter finish, use a non‑stick spray on the skillet later. The oil also gives the tortillas a subtle sheen.
- Heat 1 cup of hot water in a small saucepan until it’s steaming but not boiling. Pour the hot water slowly over the dry mixture, stirring constantly. The dough should start to clump and then smooth out as it cools. This gradual addition helps the starches hydrate evenly. The dough will be a bit sticky, but that’s normal and will improve with rest.
- Transfer the dough onto a clean surface dusted with a little cassava flour. Knead it for about 2–3 minutes until it becomes smooth and elastic. You’ll notice the dough starts to pull away from the surface. This kneading step is crucial for developing the gluten‑free elasticity. If the dough feels too dry, add a splash of water; if too wet, add a pinch more flour.
- Cover the dough with a damp cloth and let it rest for 10 minutes. This rest period allows the starches to fully absorb the moisture, resulting in a more cohesive dough. During this time, the dough will firm up slightly, making it easier to roll out. The rest also reduces the risk of cracking during cooking. Patience is key for a perfect tortilla.
- Divide the dough into 8 equal portions, rolling each into a ball. Use a rolling pin to flatten each ball into a circle about 6 inches in diameter. The circles should be thin but not translucent. The thickness will affect how quickly the tortillas cook. Keep the dough balls covered with a cloth to prevent drying out.
- Heat a non‑stick skillet or griddle over medium‑high heat. Lightly oil the surface with a paper towel dipped in olive oil. Place one tortilla in the pan and cook for 30–45 seconds on each side. The tortilla should puff slightly and develop golden brown spots. Flip carefully with a spatula to avoid tearing. Repeat with the remaining tortillas, adjusting the heat as needed.
- Stack the cooked tortillas and wrap them in a clean kitchen towel to keep them warm and soft. This step is essential for maintaining their pliability. If you’re serving immediately, they’re ready to fill with your favorite ingredients. For later use, store them in an airtight container at room temperature. They’ll stay fresh for up to a week.
That's it — you did it. But hold on, I've got a few more tricks that'll take this to another level. From temperature control to resting techniques, these insider secrets will make every tortilla a masterpiece.
Insider Tricks for Flawless Results
The Temperature Rule Nobody Follows
Many people cook tortillas at a high heat, causing the outside to burn while the inside remains undercooked. The trick is to use a medium‑high heat that allows the dough to puff up and develop a golden crust without scorching. I’ve found that a steady 375°F on the stovetop works best. Keep a close eye on the color; when the edges start to brown, flip. This simple adjustment ensures a consistent texture every time.
Why Your Nose Knows Best
The aroma of the dough is the ultimate indicator that it’s ready to roll. A warm, nutty scent means the starches have fully hydrated and the dough has rested enough. If you smell a sharp, raw flour note, give it a few more minutes. Your nose is your best ally in achieving that perfect balance between softness and chew.
The 5‑Minute Rest That Changes Everything
Resting the dough for 5 minutes might seem short, but it’s enough time for the starches to relax and the gluten‑free proteins to set. This brief pause allows the dough to become easier to handle and prevents it from springing back when you roll it out. If you’re in a hurry, you can skip the rest, but the tortillas will be a bit tougher.
The Olive Oil Secret
Olive oil not only adds flavor but also keeps the tortillas from sticking to the skillet. Using a light coating of oil on the pan and a small amount in the dough creates a barrier that prevents burning. If you’re vegan, a neutral oil like grapeseed works just as well. The key is to keep the oil thin; too much will make the tortillas greasy.
The Roll‑Out Technique
Roll the dough with a light touch, applying even pressure from the center outward. This technique ensures a uniform thickness that cooks evenly. Avoid pressing too hard, as that can cause the dough to tear. If you notice the dough sticking, lightly dust the surface with cassava flour before continuing.
The Final Touch
After cooking, let the tortillas rest for a minute before stacking. This allows steam to escape, keeping them from becoming soggy. If you’re serving them immediately, wrap them in a clean towel to keep them warm. The towel traps heat and moisture, maintaining the soft, chewy interior.
Creative Twists and Variations
This recipe is a playground. Here are some of my favorite ways to switch things up:
Herbed Delight
Add a tablespoon of chopped fresh cilantro or parsley to the dough for a burst of green freshness. The herbs mingle with the garlic, creating a vibrant flavor profile that’s perfect for tacos. Serve with lime‑y salsa to enhance the herbaceous notes.
Spicy Kick
Stir in a teaspoon of cayenne pepper or a pinch of red chili flakes before cooking. The heat will linger in each bite, making the tortillas a great base for spicy fillings like carne asada or roasted peppers. The spicy flavor is balanced by the mild cassava base.
Sweet Surprise
Replace half of the cassava flour with coconut flour for a subtle coconut flavor. Pair the tortillas with a sweet filling like mango salsa or a drizzle of honey. The natural sweetness of the cassava and coconut makes for a dessert‑style wrap.
Savory Spinach
Fold in a handful of sautéed spinach and a sprinkle of feta cheese before rolling. The spinach adds color and nutrition, while the feta provides a salty contrast. These tortillas are great for a quick lunch or a light dinner.
Cheese‑Infused
Mix in 1/4 cup of shredded mozzarella or cheddar into the dough before cooking. The cheese melts into the tortillas, creating a gooey, melty texture that’s irresistible. Serve with a side of marinara for a comforting meal.
Storing and Bringing It Back to Life
Fridge Storage
Place cooked tortillas in an airtight container lined with parchment paper. Store them in the refrigerator for up to 5 days. The parchment paper prevents them from sticking together. When ready to use, reheat briefly in a skillet or microwave to restore warmth.
Freezer Friendly
Wrap each tortilla individually in plastic wrap, then place them in a freezer bag. They can stay frozen for up to 3 months. To thaw, leave them at room temperature for 30 minutes or microwave on low power. The texture remains soft once reheated.
Best Reheating Method
Reheat tortillas in a skillet over medium heat for 30 seconds on each side. For a crispier exterior, add a small splash of water to the pan and cover for 10 seconds. The water steams the tortillas, making them supple and preventing them from drying out.