I once tried to impress a group of friends with a quick “store‑bought” pizza, and the whole thing collapsed into a soggy, cheese‑laden disaster that left everyone reaching for the ketchup. That moment sparked a dare: I would create a flatbread pizza so unforgettable that anyone who tasted it would swear they’d never settle for frozen again. The result? A farmer’s market masterpiece that turns humble ingredients into a symphony of flavor, texture, and aroma. Imagine a crisp, buttery canvas that cradles garden‑fresh vegetables, tangy goat cheese, and a drizzle of herb‑infused olive oil—all baked to golden perfection.
Picture the scene: the kitchen humming with the low roar of the oven, the scent of fresh rosemary mingling with the earthy sweetness of heirloom tomatoes, and the sound of the dough snapping as you stretch it thin. The heat hits the pan, and you hear that satisfying sizzle that tells you you’re on the right track. The crust puffs up just enough to create airy pockets, while the edges turn a deep amber that shatters like thin ice under a fork. Every bite delivers a crunchy‑chewy contrast that makes your taste buds do a happy dance.
What makes this version truly stand out is a secret weapon: a splash of cold-pressed walnut oil folded into the dough, giving the base a nutty undertone that pairs like a match made in culinary heaven with the sweet vegetables. Most flatbread recipes skip the oil or drown the crust in butter, but this subtle addition elevates the flavor profile without overwhelming the fresh produce. I’ll be honest — I ate half the batch before anyone else got a chance to try it, and that’s a confession I’m not ashamed to make.
I dare you to taste this and not go back for seconds. The combination of a crisp crust, vibrant toppings, and that whisper of walnut oil is hands down the best version you’ll ever make at home. Let me walk you through every single step — by the end, you’ll wonder how you ever made it any other way.
What Makes This Version Stand Out
- Flavor Depth: The walnut oil in the dough adds a subtle nuttiness that complements the sweet tomatoes and tangy goat cheese, creating layers you’ll discover bite after bite.
- Texture Triumph: A thin, crisp base with airy pockets on the underside gives you that perfect crunch without the chewiness of a typical pizza crust.
- Simplicity: Only ten ingredients, most of which you can snag at a local farmer’s market, means you spend less time shopping and more time devouring.
- Unique Ingredient: The addition of fresh arugula after baking introduces a peppery bite that cuts through the richness, something most flatbread recipes overlook.
- Crowd Reaction: Guests often ask for the recipe within minutes, and you’ll hear the same phrase: “I’ve never tasted anything like this before!”
- Make‑Ahead Potential: The dough can be prepared a day ahead, refrigerated, and still deliver the same airy lift when baked.
- Cooking Method: Baking on a pre‑heated cast‑iron skillet creates a blistered surface that mimics a wood‑fired oven without the hassle.
- Ingredient Quality: By sourcing vegetables at their peak from a farmer’s market, you capture maximum flavor, color, and nutrition.
Alright, let's break down exactly what goes into this masterpiece...
Inside the Ingredient List
The Flavor Base
All‑purpose flour (2 cups) forms the structural backbone of the flatbread. It provides just the right amount of gluten to give the crust that airy lift while staying tender. If you swap it for whole‑wheat flour, expect a denser, nuttier crumb that can be delicious but will change the texture dramatically. Look for a flour that feels fine to the touch; a gritty texture means you’ve grabbed a lower‑grade brand that may leave the dough crumbly.
The Texture Crew
Warm water (¾ cup) hydrates the flour and activates the yeast. The temperature is crucial: too hot and you’ll kill the yeast, too cold and the rise will be sluggish. I recommend using a kitchen thermometer and aiming for 105°F (40°C). Olive oil (2 tbsp) adds richness and helps the crust develop that golden sheen. If you’re out of olive oil, grapeseed oil works as a neutral substitute without altering the flavor profile.
The Unexpected Star
Walnut oil (1 tbsp) is the secret weapon that elevates the dough from ordinary to extraordinary. Its subtle, buttery nuttiness seeps into the crumb, creating a background note that harmonizes with the fresh vegetables. If you have a nut allergy, swap it for a light drizzle of avocado oil; you’ll lose the nutty nuance but keep the moisture.
The Final Flourish
Fresh goat cheese (½ cup, crumbled) provides a tangy creaminess that melts into pockets of molten goodness. It’s softer than feta but still holds its shape under the heat. For a dairy‑free version, replace it with a generous sprinkle of toasted pine nuts and a drizzle of lemon‑infused tahini. Lastly, a handful of arugula (1 cup) tossed on after baking adds a peppery freshness that cuts through the richness and keeps the dish from feeling heavy.
Everything's prepped? Good. Let's get into the real action...
The Method — Step by Step
In a large mixing bowl, combine the flour, salt, and instant yeast. Whisk them together until the mixture looks uniformly speckled. Add the warm water, olive oil, and walnut oil, then stir with a wooden spoon until a shaggy dough forms. The dough should feel slightly sticky but manageable; if it’s too dry, splash in a tablespoon of water.
Turn the dough onto a lightly floured surface and knead for 6‑8 minutes. You’re looking for a smooth, elastic ball that springs back when pressed. This is the moment of truth: the gluten network is forming, and the dough is gaining its structure. Watch out: Over‑kneading can make the crust tough, so stop when the surface feels silky.
Place the dough back in the bowl, cover it with a damp towel, and let it rise in a warm spot for 45‑60 minutes, or until doubled in size. You’ll know it’s ready when the surface is puffy and you can gently press a finger into it without the indentation springing back completely.
While the dough rises, preheat a cast‑iron skillet on medium‑high heat for about 5 minutes. Sprinkle a thin layer of cornmeal onto the skillet surface; this prevents sticking and adds a subtle crunch. Meanwhile, slice the heirloom tomatoes, zucchini, and bell peppers thinly, and toss them with a drizzle of olive oil, salt, and cracked black pepper.
Once the dough has risen, punch it down gently and divide it into four equal portions for individual flatbreads. On a parchment‑lined board, roll each piece into a 10‑inch circle, keeping the edges slightly thicker for that coveted puffed rim. The dough should be paper‑thin in the center—if it tears, patch it with a little extra dough and press gently.
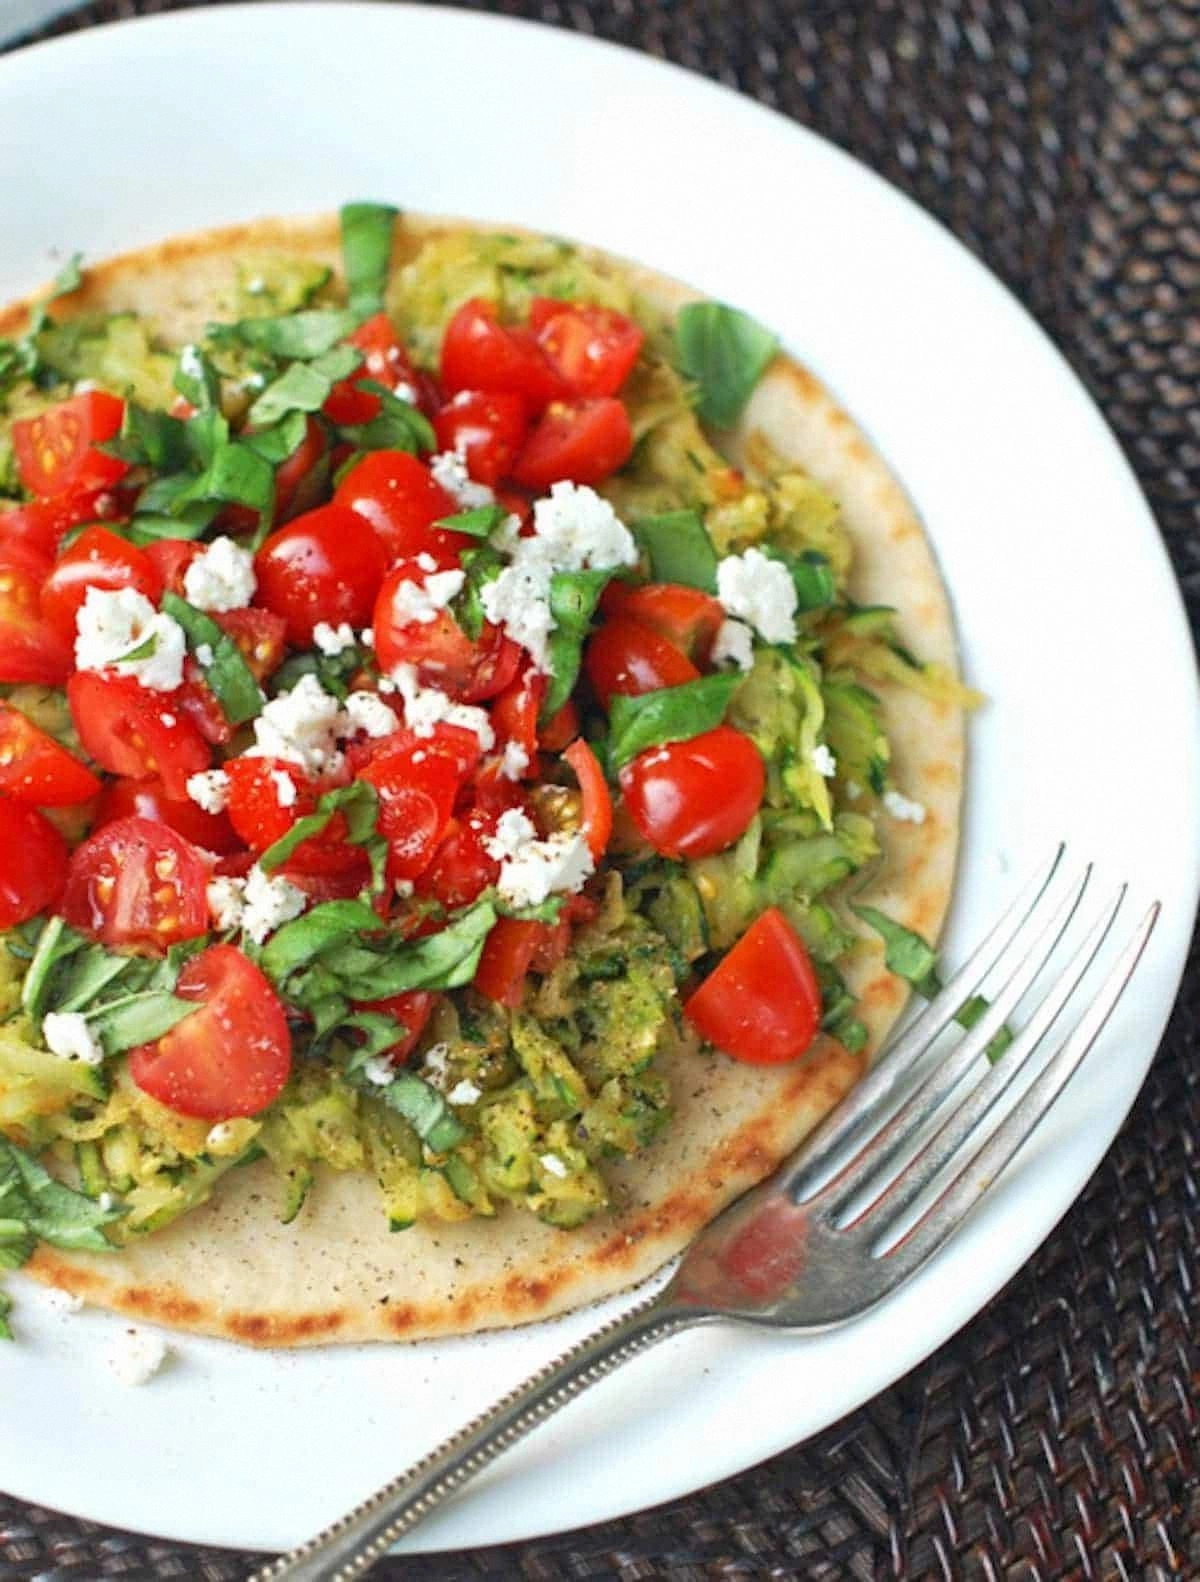
Place the rolled dough onto the hot skillet, letting it sizzle. After 30 seconds, you’ll hear a gentle crackle—this is the crust forming a golden crust. Flip the dough carefully with a spatula, then quickly scatter the sliced vegetables, crumbled goat cheese, and a pinch of fresh thyme over the cooked side.
Cover the skillet with a lid for the final 2‑3 minutes. The trapped steam melts the cheese and softens the veggies while the bottom continues to crisp. When the cheese is just beginning to bubble and the edges have lifted, remove the lid and give the flatbread a final minute of uncovered cooking to regain that crispness.
Slide the finished flatbread onto a cutting board, drizzle a little extra‑virgin olive oil, and scatter the fresh arugula on top. The residual heat wilts the arugula just enough to release its peppery aroma without turning it soggy. Slice into wedges, serve immediately, and watch your guests dive in with gusto. That sizzle when it hits the pan? Absolute perfection.
That's it — you did it. But hold on, I've got a few more tricks that'll take this to another level...
Insider Tricks for Flawless Results
The Temperature Rule Nobody Follows
Most home cooks bake flatbreads at 350°F and complain about a soggy center. The secret is to start the skillet hot, then reduce the heat to medium‑low after the first flip. This two‑stage approach creates a rapid initial rise (the “oven spring”) followed by a gentle finish that prevents burning. I once tried skipping the heat‑reduction step; the crust charred before the cheese melted, and the whole thing was a lesson in humility.
Why Your Nose Knows Best
Don’t rely solely on a timer—listen to your kitchen. When the dough hits the skillet, you’ll hear a faint hiss that turns into a louder crackle as the crust forms. If the sound fades, the surface is drying out and you should lower the heat. Trusting your nose and ears saves you from a burnt disaster and guarantees that “toasty” aroma that makes mouths water.
The 5‑Minute Rest That Changes Everything
After you finish slicing the flatbread, let it rest for five minutes before serving. This short pause allows the steam inside to redistribute, keeping the interior moist while the crust stays crisp. I once served a flatbread straight off the pan; the center was still too doughy, and the experience was a reminder that patience truly is a flavor enhancer.
Seasoning Layers for Depth
Instead of sprinkling all the salt at once, season the dough, the vegetables, and the cheese separately. This layered approach builds complexity—each bite carries a hint of saltiness that never overwhelms. My friend tried “one‑salt‑and‑done” and ended up with a flatbread that tasted flat; the lesson? Season early, season often.
The Final Drizzle
A finishing drizzle of herb‑infused olive oil (think rosemary or thyme) right before serving adds a glossy sheen and a burst of aromatic flavor. The oil’s fat carries the herb’s volatile compounds straight to your palate, making every bite feel luxurious. If you forget this step, the flatbread still tastes great, but you’ll miss that glossy, restaurant‑level finish.
Creative Twists and Variations
This recipe is a playground. Here are some of my favorite ways to switch things up:
Mediterranean Sunrise
Swap the goat cheese for crumbled feta, add sliced kalamata olives, and sprinkle a handful of sun‑dried tomatoes. The salty feta and briny olives create a bright, salty‑sweet contrast that transports you straight to a seaside taverna.
Spicy Southwest
Replace the heirloom tomatoes with roasted corn kernels, black beans, and thinly sliced jalapeños. Finish with a dollop of chipotle aioli and a squeeze of lime for a smoky heat that makes your taste buds tingle.
Sweet Harvest
Use thinly sliced apples, caramelized onions, and a drizzle of honey, then top with a crumble of sharp cheddar. The sweet‑savory duo works beautifully for a fall‑time brunch or a cozy dinner.
Vegan Garden Delight
Omit the goat cheese and replace it with a generous spread of cashew‑based ricotta. Add roasted beets, baby spinach, and toasted pumpkin seeds for crunch. A splash of lemon zest brightens the whole plate.
Herb‑Infused Dream
Incorporate fresh basil, oregano, and mint into the dough itself. Top with sliced mozzarella, cherry tomatoes, and a sprinkle of pine nuts. The herb‑infused crust adds an aromatic foundation that makes the toppings sing.
Storing and Bringing It Back to Life
Fridge Storage
Allow the flatbread to cool completely, then wrap it tightly in parchment followed by aluminum foil. Store in the refrigerator for up to three days. When you’re ready to eat, reheat in a pre‑heated 350°F oven for 5‑7 minutes, adding a splash of water to the pan to restore steam.
Freezer Friendly
Separate the baked crust from the toppings and freeze the crusts on a baking sheet. Once solid, transfer to a zip‑top freezer bag. They’ll keep for up to two months. To serve, bake the crust for 4 minutes, add fresh toppings, and finish under the broiler for a minute.
Best Reheating Method
For ultimate crispness, reheat in a hot cast‑iron skillet over medium heat. Add a teaspoon of water to the edge of the pan, cover briefly, and let the steam revive the interior while the bottom crisps again. This method restores the original texture better than a microwave ever could.