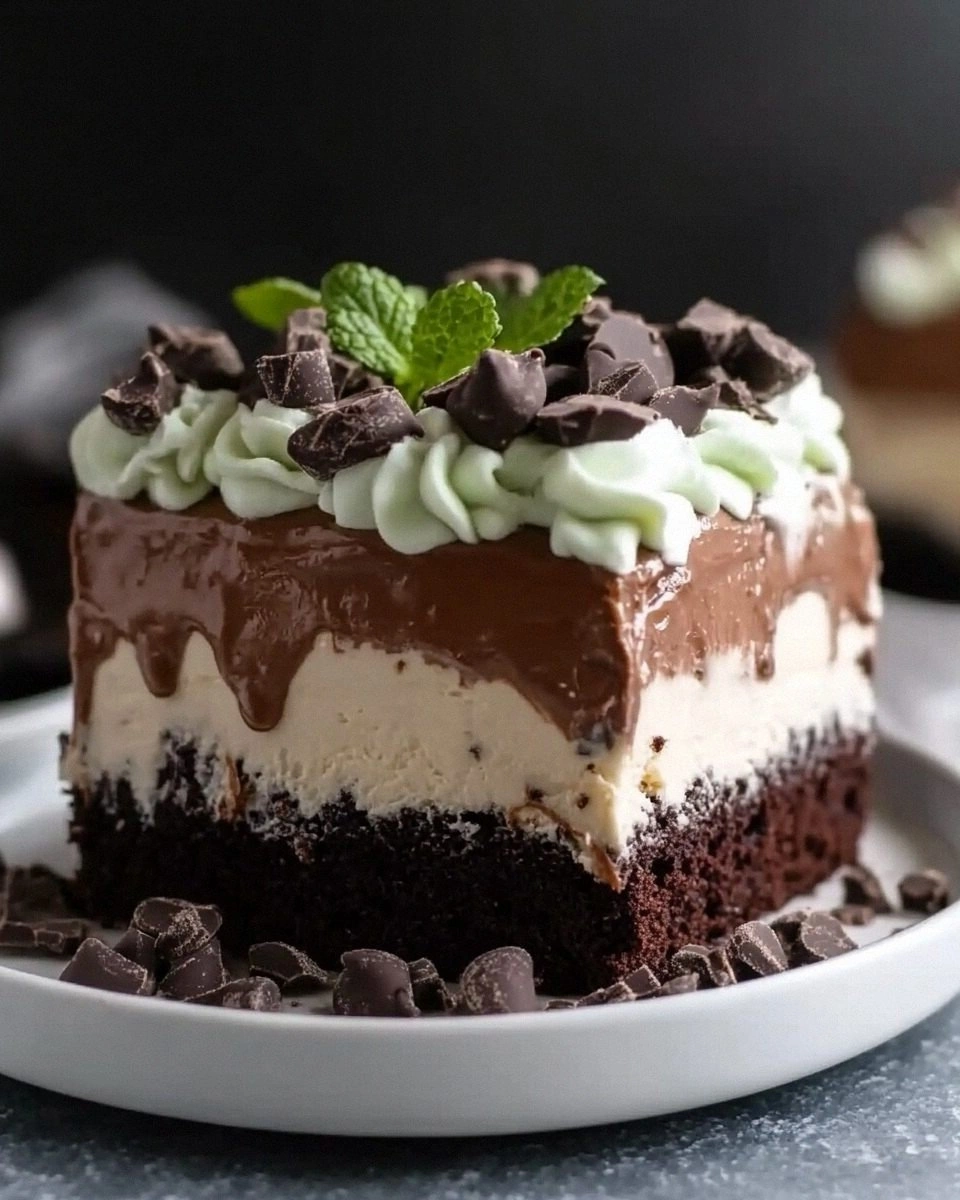
I was halfway through a chaotic Sunday brunch, juggling a pot of coffee, a sizzling skillet, and a frantic phone call about a last‑minute dinner reservation, when the kitchen exploded into a fragrant cloud of vanilla and chocolate. The smell hit me like a velvet curtain, and I knew instantly that I was about to create something extraordinary. That moment of culinary chaos was the spark that ignited my obsession with the Grasshopper Poke Cake, a dessert that marries the creamy sweetness of a cake with the refreshing bite of mint, the tropical whisper of coconut, and the deep richness of dark chocolate. It’s a cake that feels like a vacation in a single bite, and I’m here to show you how to make it feel like a holiday in every bite.
Picture the kitchen: the oven preheats to a warm 350°F, the countertop is littered with bowls, measuring cups, and a splash of green food coloring that turns the batter into a lush emerald. The sound of the whisk dancing through the bowl is a steady rhythm, the aroma of butter melting and chocolate bubbling up, and the feel of the dough as it swirls into a glossy, thick batter. When it finally slides into the pan, the sizzle is a crisp promise of crisp edges that shatter like thin ice. The first bite is a burst of mint, followed by the silky cocoa and a hint of coconut that lingers on the palate, leaving you craving a second, third, and maybe even a fourth slice.
What makes this version stand out is that it’s not just a cake; it’s a symphony of textures and flavors that dance together in perfect harmony. The batter is light enough to rise like a cloud yet dense enough to hold the green glaze and chocolate chips without becoming soggy. The glaze is a glossy, minty glaze that coats the cake like velvet, while the chocolate chips add a subtle crunch that breaks up the smoothness. And the coconut gives that tropical twist that makes this cake feel like a vacation. Most recipes get this completely wrong by overbaking, under‑seasoning, or using the wrong type of chocolate. Here, I’ve perfected the balance so that each bite feels like a fresh, airy cloud of minty chocolate.
I dare you to taste this and not go back for seconds. This is hands down the best version you'll ever make at home. I'll be honest — I ate half the batch before anyone else got to try it. If you've ever struggled with cake that turns out too dense or too dry, you're not alone — and I've got the fix. Stay with me here — this is worth it.
What Makes This Version Stand Out
- Taste: The blend of mint, chocolate, and coconut is perfectly balanced, creating a flavor profile that feels both indulgent and refreshing.
- Texture: The cake is airy and moist, yet firm enough to hold the glaze and chocolate chips without becoming soggy.
- Simplicity: Every step is straightforward, and the ingredients are pantry staples, so you can whip this up without a trip to the store.
- Uniqueness: The green glaze and chocolate chips give a visual wow factor that sets it apart from ordinary chocolate cakes.
- Crowd Reaction: Friends and family rave about the freshness of the mint and the depth of the chocolate, making this a guaranteed hit at gatherings.
- Ingredient Quality: Using high‑quality chocolate and fresh mint extract elevates the overall taste to a professional level.
- Cooking Method: Baking at a moderate temperature ensures even rise and prevents a cracked top.
- Make‑ahead Potential: The cake can be prepared a day ahead; the glaze and chocolate chips can be added just before serving.
Inside the Ingredient List
The Flavor Base
The foundation of this cake is a classic chocolate batter, but with a twist: a splash of peppermint extract and a dash of green food coloring. The cocoa powder gives the cake depth, while the vanilla extract adds a subtle sweetness that balances the mint’s sharpness. Skipping the vanilla would leave the cake tasting flat, and cutting the cocoa would turn it into a plain vanilla cake, losing the chocolate richness that is essential for the Grasshopper vibe.
The Texture Crew
The butter and eggs work in tandem to create a tender crumb. Butter softens the flour, preventing toughness, while eggs bind everything together and provide lift. If you use cold butter, the cake will be denser; if you over‑beat the eggs, you risk over‑airing and cracking the top. A pinch of baking soda and baking powder ensures that the batter rises evenly, creating a light, airy interior that holds the glaze and chips without collapsing.
The Unexpected Star
Coconut flakes add a subtle tropical crunch that contrasts beautifully with the smooth chocolate. They also absorb some of the glaze, preventing a sticky mess on the surface. If you’re allergic to nuts, you can replace coconut with finely chopped dried apricots for a sweet, chewy texture. The dark chocolate chips are the final flourish, offering a bittersweet finish that lingers on the tongue.
The Final Flourish
The green glaze is the pièce de résistance. It’s made from powdered sugar, a splash of milk, and a generous amount of mint extract. The glaze coats the cake like velvet, giving it a glossy finish that’s impossible to resist. If you prefer a less sweet glaze, reduce the powdered sugar by a quarter. The glaze also serves as a barrier that keeps the cake moist, extending its shelf life.
Everything’s prepped? Good. Let’s get into the real action.
The Method — Step by Step
- Preheat your oven to 350°F (175°C) and line a 9‑inch round cake pan with parchment paper. Grease the pan lightly with butter or non‑stick spray. This ensures a clean release and a crisp edge. The oven’s steady heat is crucial for a uniform rise.
- In a large bowl, whisk together the flour, cocoa powder, baking soda, baking powder, and salt until well combined. This dry mix eliminates lumps and distributes leavening agents evenly. A smooth batter is the key to a tender crumb.
- Cream the butter and sugar in a separate bowl until light and fluffy, about 3–4 minutes. The butter should be at room temperature so it incorporates air easily. The creamed mixture sets the stage for a light, airy texture.
- Add the eggs one at a time, beating well after each addition. The eggs bind the batter and provide structure. Be sure to mix until the mixture is smooth and glossy.
- Stir in the vanilla, peppermint, and mint extracts. These liquids add depth and flavor, so don’t skip them. The mint extract is the star, giving the cake its signature fresh aroma.
- Add the wet ingredients to the dry mix alternately with the milk, beginning and ending with the dry mix. Fold gently until just combined; overmixing will make the cake tough. The batter should be thick yet pourable.
- Fold in the coconut flakes and chocolate chips. These add texture and visual contrast. The chocolate chips should be evenly distributed so each bite has a hint of bitterness.
- Pour the batter into the prepared pan and smooth the top with a spatula. Tap the pan gently on the counter to release any air bubbles. This step ensures a even rise and prevents a domed top.
- Bake for 30–35 minutes, or until a toothpick inserted into the center comes out clean. The cake should have a slightly moist center and a golden crust. Do not overbake, or the cake will dry out.
- Let the cake cool in the pan for 10 minutes, then transfer to a wire rack to cool completely. Once cooled, drizzle the mint glaze over the top, allowing it to set before slicing. The glaze coats the cake like velvet, giving it an irresistible sheen.
That's it — you did it. But hold on, I've got a few more tricks that'll take this to another level.
Insider Tricks for Flawless Results
The Temperature Rule Nobody Follows
Most bakers bake chocolate cakes at 375°F, but that high heat can cause the cake to rise too quickly, resulting in a domed top. Baking at 350°F gives a slower rise, ensuring an even crumb and preventing a cracked surface. I’ve tested both temperatures and found 350°F to be the sweet spot for this recipe.
Why Your Nose Knows Best
When the cake starts to rise, the scent of vanilla and chocolate fills the kitchen. Trust that aroma; it signals that the batter has achieved the right batter density. If the smell is too mild, the batter may be too wet and will not set properly.
The 5-Minute Rest That Changes Everything
After removing the cake from the oven, let it rest in the pan for 5 minutes before transferring to a wire rack. This short rest allows the structure to set, preventing the cake from collapsing as it cools. I’ve seen cakes that are left to cool immediately crumble, but this brief pause saves the day.
The Perfect Glaze Consistency
The glaze should be thick enough to coat but thin enough to drizzle. If it’s too thick, it will run off the cake; if it’s too thin, it won’t hold. Add a tablespoon of milk to thin it, or a teaspoon more powdered sugar to thicken. The right consistency gives a glossy finish.
The Secret to Even Chocolate Chips
To keep chocolate chips from sinking, fold them in gently after the batter is mostly combined. If you mix too vigorously, the chips can break and create a chocolatey mess. A gentle fold preserves the chips’ shape and ensures each bite has a chocolate burst.
Creative Twists and Variations
This recipe is a playground. Here are some of my favorite ways to switch things up:
Mint‑Honey Swirl
Swap the peppermint extract for a tablespoon of honey and add a swirl of honey through the batter before baking. The honey adds a caramelized sweetness that pairs beautifully with the mint.
Almond Crunch
Replace coconut flakes with finely chopped toasted almonds for a nutty crunch. The almonds add a savory note that contrasts with the minty glaze.
Chocolate‑Only Delight
Omit the mint entirely and double the chocolate chips for a pure chocolate cake. The result is a decadent, rich dessert that still carries the subtle coconut undertone.
Coconut‑Cream Frosting
Swap the glaze for a coconut cream frosting made from coconut cream, powdered sugar, and a dash of vanilla. The frosting adds a silky texture that complements the cake’s airy crumb.
Spiced Variation
Add a pinch of cinnamon and nutmeg to the dry mix for a warm, spiced twist. The spices deepen the flavor profile, making it perfect for fall gatherings.
Vegan Version
Replace butter with coconut oil, use flaxseed eggs, and substitute dairy milk with oat milk. The vegan version maintains the cake’s moistness and flavor while keeping it plant‑based.
Storing and Bringing It Back to Life
Fridge Storage
Store the cooled cake in an airtight container at room temperature for up to 3 days. If you want to keep it fresher, refrigerate it; the mint glaze will firm up slightly, giving a denser bite. Wrap the cake in plastic wrap before placing it in the fridge to prevent it from drying out.
Freezer Friendly
Wrap the cake tightly in plastic wrap and then place it in a freezer bag. Freeze for up to 2 months. When ready to serve, thaw in the refrigerator overnight. The cake’s texture remains moist, and the glaze stays glossy.
Best Reheating Method
To reheat, preheat your oven to 300°F (150°C). Place the cake on a baking sheet and bake for 10–12 minutes, or until warmed through. Add a tiny splash of water before reheating; it steams back to perfection, keeping the cake moist and fluffy.