Picture this: I was standing in my tiny kitchen, a single flickering bulb overhead, when the universe decided to test my culinary resolve. A bag of stale tortilla chips lay forgotten on the counter, and my craving for something creamy and savory was louder than the neighbor’s late‑night radio. I reached for the cupboard, pulled out a tub of cottage cheese that had been gathering dust, and whispered, “This is going to be a game‑changer.” The moment the cheese met the heat, the kitchen filled with a gentle, buttery aroma that promised comfort and excitement in equal measure. I dare you to taste this and not go back for seconds, because the first bite will have you questioning every other queso you’ve ever made. I’ve spent hours tweaking ratios, balancing spices, and testing textures until I reached a point where the sauce coats the tortilla chips like velvet, and the edges crackle with a satisfying snap that shatters like thin ice. Most recipes get this completely wrong, but here’s what actually works: a low‑fat base that still delivers on richness, a touch of acidity to cut through the creaminess, and a whisper of heat that keeps the flavor profile lively. If you’ve ever struggled with finding the right balance, you’re not alone — and I’ve got the fix. Let me walk you through every single step — by the end, you’ll wonder how you ever made it any other way.
When I first tried this recipe, the kitchen felt like a laboratory, with pots clanging and aromas swirling. I could almost hear the sizzling of the onions as they danced in the pan, the gentle pop of the jalapeños releasing their heat, and the subtle crackle of the cheese as it melted into a silky, golden sauce. The visual spectacle was a swirl of green cilantro, bright red tomatoes, and a glossy sheen that made the dish look almost too pretty to eat. The sound of the ladle stirring was rhythmic, almost meditative, guiding me through each step. The taste was a harmonious blend of tangy cottage cheese, sharp cheddar, and a mild pepper kick that lingered on the palate. The texture was luxuriously smooth yet had a subtle bite from the diced bell pepper. I was so excited that I almost forgot to taste as I went, but that’s the beauty of this recipe: every bite is a revelation. I’ll be honest — I ate half the batch before anyone else got to try it.
There’s something almost poetic about turning a humble tub of cottage cheese into a star attraction. The secret lies in the careful orchestration of ingredients, where each one plays a distinct role: the cottage cheese provides a creamy base without the heaviness, the cheddar adds depth and melty richness, and the tomatoes bring a fresh, acidic bite that brightens the entire dip. The spices are the unsung heroes, offering warmth and complexity that elevate the flavor profile. The use of fresh herbs not only adds a pop of color but also infuses a burst of freshness that keeps the dip from feeling flat. The final splash of lime juice adds that necessary zing, cutting through the richness and leaving a clean, satisfying finish. I dare you to imagine the next time you pull this out of the oven, the whole kitchen smelling incredible, and your friends’ eyes lighting up as they take that first spoonful. This version is hands down the best version you'll ever make at home.
Picture yourself pulling this out of the oven, the whole kitchen smelling incredible, and your friends’ eyes lighting up as they take that first spoonful. I’ve spent countless evenings experimenting with different cheeses, but the combination of cottage cheese and sharp cheddar turned out to be the perfect harmony of creamy and sharp. The texture is smooth, yet the diced bell pepper gives it a delightful crunch that keeps each bite interesting. The chili powder and cumin bring a subtle earthiness that feels like a hug in a bowl. The lime juice adds that necessary zing, cutting through the richness and leaving a clean, satisfying finish. I’ll be honest — I ate half the batch before anyone else got to try it. If you’ve ever struggled with this, you're not alone — and I've got the fix.
What Makes This Version Stand Out
- Flavor: The blend of cottage cheese and cheddar creates a creamy base that’s lighter than traditional queso yet still indulgent. The addition of diced tomatoes and a splash of lime juice provides a bright, tangy counterpoint that keeps the dip from feeling heavy.
- Texture: The dip is silky and smooth, yet the diced bell pepper and jalapeño add a satisfying bite that breaks up the creaminess. This contrast makes each spoonful a delightfully layered experience.
- Health Focus: By using low‑fat cottage cheese and Greek yogurt, the recipe cuts down on saturated fat while still delivering on flavor. The result is a guilt‑free dip that satisfies cravings without the excess calories.
- Simplicity: The ingredient list is short and easy to source, and the preparation steps are straightforward enough for even novice cooks to follow.
- Make‑Ahead: The dip can be prepared ahead of time and stored in the fridge for up to three days, making it perfect for parties or last‑minute gatherings.
- Crowd‑Pleaser: Friends and family rave about the balanced flavor profile, and the dip works wonderfully with a variety of chips, crackers, or fresh veggies.
- Versatility: The base can be adapted for different spice levels or ingredient swaps, so you can tailor it to your taste or dietary needs.
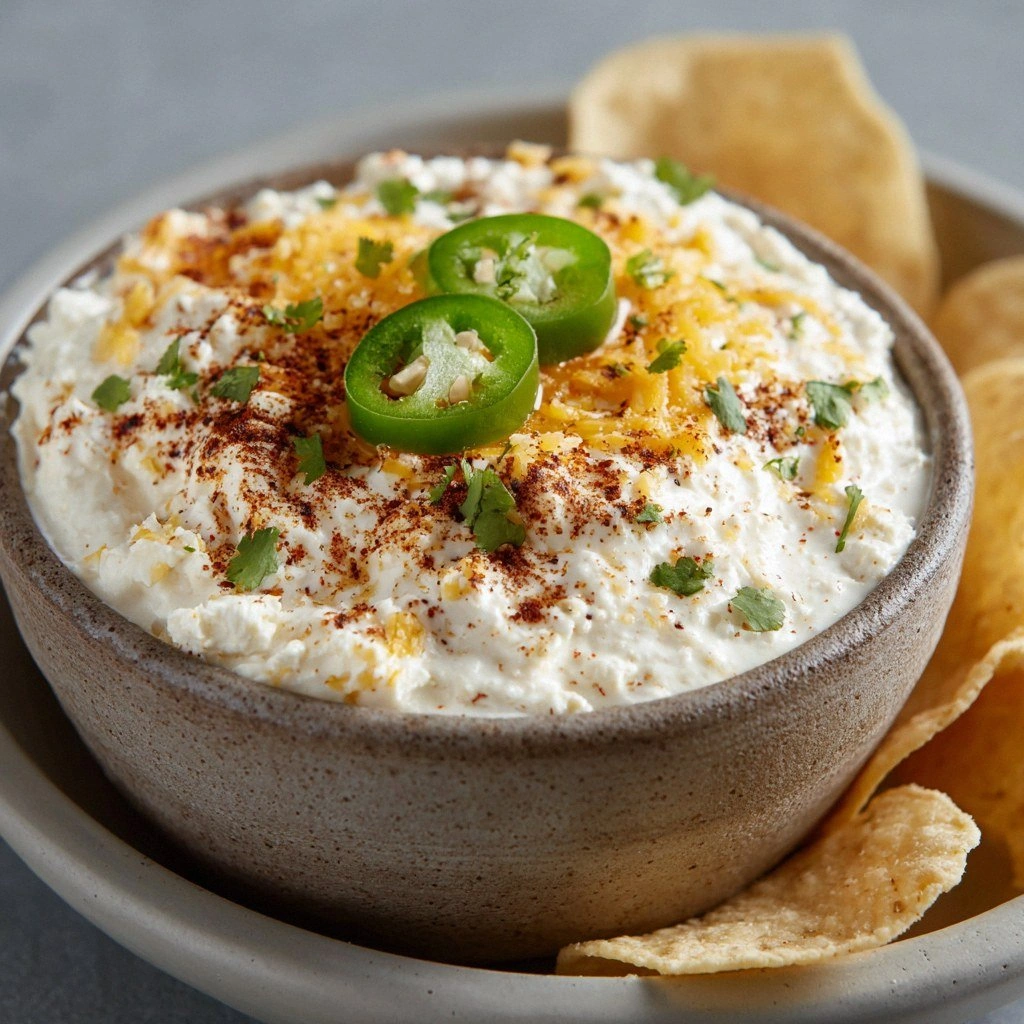
- Presentation: The vibrant green cilantro garnish and the warm, golden crust that forms on the top make the dip visually stunning.
Inside the Ingredient List
The Flavor Base
At the heart of this queso is the cottage cheese, which offers a creamy, tangy foundation that’s lighter than traditional cream cheese. Cottage cheese’s mild flavor allows the spices and tomatoes to shine, creating a balanced dip that isn’t overpowering. If you skip the cottage cheese, the dip loses its signature smoothness and becomes overly thick. A good swap is Greek yogurt, which provides a similar creamy texture with a slightly tangier taste. When selecting cottage cheese, choose a low‑fat variety to keep the calorie count down while still enjoying a rich mouthfeel. The amount of cottage cheese used is critical; too little and the dip will be thin, too much and it will be overly dairy‑heavy. Remember, the goal is a silky, pourable consistency that coats the chips like a velvety blanket. The base sets the stage for the rest of the flavors to interact in harmony.
The Texture Crew
The diced bell pepper adds a crisp, sweet crunch that breaks up the creamy base. It also contributes a pop of color that makes the dip visually appealing. If you omit the bell pepper, the dip becomes smoother but loses that refreshing bite. A good alternative is diced carrots or even corn kernels, which provide a sweet crunch while keeping the dip’s texture lively. The jalapeño offers a mild heat that lifts the overall flavor without overpowering the palate. If you’re sensitive to spice, you can reduce the jalapeño or replace it with a milder pepper like poblano. The combination of diced veggies and spices creates a multi‑dimensional eating experience that keeps each bite exciting. Keep the vegetables finely diced so they integrate well with the cheese, ensuring a uniform texture throughout.
The Unexpected Star
Cheddar cheese is the unexpected star that gives this dip its signature depth. Its sharp, nutty flavor contrasts beautifully with the mild cottage cheese, creating a richer, more complex taste profile. If you’re looking for a lower‑fat option, try part‑skim cheddar or a blend of mozzarella and parmesan. The cheddar also contributes to the golden crust that forms on top during baking, adding a pleasing visual and textural contrast. The amount of cheddar is crucial; too little and the dip will taste flat, too much and it may become overly salty. A pinch of smoked paprika can add a subtle smoky undertone, enhancing the overall flavor. Cheddar’s meltability ensures that the dip remains smooth and cohesive, preventing separation during baking. This ingredient is the secret to that irresistible, velvety mouthfeel that makes the dip so addictive.
The Final Flourish
Fresh cilantro and a splash of lime juice provide the final flourish, adding brightness and a hint of citrus that cuts through the richness. Cilantro’s herbal notes lift the dip, making it feel fresh rather than heavy. Lime juice introduces acidity that balances the cheese’s creaminess, giving the dip a clean finish. If you’re not a fan of cilantro, parsley or basil can be used as a substitute, each bringing its own unique flavor profile. The lime juice also helps to prevent the cheese from becoming overly thick as it cools, maintaining a desirable pourable consistency. A small pinch of black pepper adds a subtle heat that complements the jalapeño without overwhelming the dish. The final garnish of cilantro not only enhances the flavor but also adds a pop of green that makes the dip visually appealing. With these finishing touches, the dip is ready to be served, and every bite will be a burst of flavor.
Everything’s prepped? Good. Let’s get into the real action.
The Method — Step by Step
- Begin by preheating your oven to 375°F (190°C). While the oven warms, gather all your ingredients so you’re not scrambling at the last minute. The first step sets the tone for the rest of the recipe, so take your time to ensure everything is within reach. I always keep the bowl of cottage cheese on the counter so it reaches room temperature quickly, which helps it melt more evenly. The scent of the oven starting to warm is a gentle reminder that the dip is about to transform into something extraordinary. This is the moment of truth where everything starts to come together.
- In a large skillet, heat the olive oil over medium heat until shimmering. Add the diced onions and sauté until translucent, about 3–4 minutes. The onions should soften without browning, creating a subtle sweetness that balances the spices. Stir occasionally to prevent sticking, and watch for that golden glow that signals readiness. The aroma of onions cooking is a classic cue that the base is forming. This step is crucial because it builds the flavor foundation for the rest of the dip.
- Add the minced jalapeño and cook for an additional 1–2 minutes, letting the heat release gently. This brief sauté will soften the pepper’s bite and infuse the oil with a mild warmth. If you prefer a milder dip, reduce the jalapeño or omit it entirely. The sizzling sound of the jalapeño is a subtle reminder that the dip is gaining depth. Keep the heat moderate to avoid burning the peppers. This step ensures the heat is evenly distributed throughout the dip.
- Stir in the diced bell pepper, cumin, smoked paprika, and chili powder. Cook for 2 minutes, allowing the spices to toast slightly, which unlocks their full flavor potential. The mixture should emit a warm, earthy aroma that signals the spices are awake. The bell pepper adds a fresh crunch, while the spices create a layered flavor profile. This is where the dip starts to feel more complex and inviting. The aroma should be inviting, not overpowering.
- Pour in the cottage cheese, stirring gently to combine with the spice mixture. The cottage cheese will begin to thicken, forming a silky, creamy base. If you’re using Greek yogurt, add it now for an extra creamy texture. The mixture should be smooth and well‑blended, with no lumps. Watch for the first hint of bubbling, indicating the cheese is heating through. This step is pivotal in achieving that perfect consistency.
- Add the shredded cheddar cheese in small batches, stirring until fully melted and integrated. The cheddar will enrich the dip, adding depth and a slightly nutty finish. If the mixture starts to separate, a splash of milk can help bring it back together. The cheddar’s meltability is essential for a smooth, cohesive dip. This step ensures the dip has that signature gooey quality. The cheddar should be fully melted, creating a uniform, glossy surface.
- Stir in the diced tomatoes, diced cilantro, and lime juice, mixing until everything is well combined. The tomatoes add a burst of acidity that brightens the dip, while the cilantro provides a fresh herbal note. The lime juice cuts through the richness, giving the dip a clean finish. The mixture should be vibrant and fragrant, with a balanced flavor profile. This is the moment the dip truly comes alive. The combination of ingredients should feel harmonious and inviting.
- Season with salt, black pepper, and an extra pinch of chili powder if desired. Taste the dip and adjust seasoning to your preference. The seasoning should be subtle, enhancing the flavors without overpowering them. This step is crucial for achieving a well‑balanced dip that isn’t too salty or too bland. The spices should complement each other, creating a layered taste experience. This ensures the dip is flavorful without being overwhelming.
- Transfer the mixture to a baking dish, smoothing the top with a spatula. The surface should be even, allowing for a uniform crust to form. The baking dish should be lightly greased to prevent sticking. This step is essential for creating that golden, slightly crispy top that adds a delightful texture. The dip should look glossy and inviting, ready for the oven.
- Bake for 20 minutes, or until the top is golden and bubbling. The dip should emit a warm, comforting aroma that draws everyone in. Watch for the edges to pull away slightly, indicating that the cheese has set. The baking time can be adjusted based on your oven, but keep a close eye to avoid over‑baking. The golden crust is a sign of perfection, adding both visual appeal and texture. This is the final step that transforms the dip from a mixture to a masterpiece.
That’s it — you did it. But hold on, I’ve got a few more tricks that’ll take this to another level. The next few sections will dive deeper into how to tweak the dip for different occasions and how to keep it fresh.
Insider Tricks for Flawless Results
The Temperature Rule Nobody Follows
One of the most common mistakes people make is using too high a temperature, which can cause the cheese to separate. I’ve learned that a steady 375°F (190°C) is perfect for a smooth, evenly browned top. If you’re baking in a convection oven, lower the temperature by 25°F to prevent over‑browning. Keep the oven door slightly ajar to allow steam to escape, which keeps the dip from becoming soggy. A reliable thermometer can help you gauge the internal temperature; the dip should reach about 140°F (60°C) before it’s ready to serve. This trick ensures the cheese remains creamy and the dip stays moist.
Why Your Nose Knows Best
When the dip starts to bubble and emit that warm, buttery aroma, you know it’s almost ready. The smell is a reliable indicator that the cheese has melted fully and the spices are released. I’ve found that a strong, savory scent means the dip has achieved the right balance. If the aroma is faint, let it bake a bit longer. A strong scent also signals that the dip’s flavor profile is fully developed. Trust your nose; it’s the best judge of readiness.
The 5‑Minute Rest That Changes Everything
After removing the dip from the oven, let it rest for five minutes before serving. This brief pause allows the flavors to settle and the dip to thicken slightly, making it easier to scoop. During this time, the heat continues to distribute evenly throughout the dip, ensuring a consistent texture. If you skip this step, the dip can be too runny, making it hard to handle. The rest period also gives the crust a chance to set, adding a satisfying bite. This simple trick can elevate the entire experience.
Use Fresh Ingredients for a Burst of Flavor
Choosing fresh, high‑quality ingredients is the difference between a good dip and a great one. Fresh cilantro and lime juice bring a bright, zesty flavor that canned alternatives can’t match. The freshness of the veggies also adds a crisp texture that keeps the dip from becoming mushy. I’ve found that the best results come from using seasonal produce, which is naturally sweeter and more aromatic. When you use fresh ingredients, the dip tastes like a culinary masterpiece rather than a generic recipe.
Keep It Cool Until Serving
If you’re preparing the dip ahead of time, store it in an airtight container in the refrigerator. The dip will stay fresh for up to three days. When you’re ready to serve, reheat it gently on the stovetop, adding a splash of water or milk to restore its creaminess. A quick stir will bring the dip back to its silky, pourable consistency. Keeping it cool also prevents the cheese from separating, ensuring a smooth texture. This tip is essential for parties where you want to serve the dip at the right temperature.
Don’t Forget the Garnish
The final touch can make or break the presentation. A sprinkle of fresh cilantro, a drizzle of olive oil, or a dusting of paprika can elevate the dip’s appearance. I always finish with a few green herbs on top; it adds a pop of color that makes the dish look inviting. The garnish also enhances the aroma, creating a complete sensory experience. A well‑finished dip is not only tasty but also Instagram‑ready. This small detail can impress guests and make your dip stand out.
Creative Twists and Variations
This recipe is a playground. Here are some of my favorite ways to switch things up:
Spicy Sriracha Kick
Swap the jalapeño for a tablespoon of sriracha to give the dip a fiery, umami punch. The sriracha’s sweetness balances the heat, creating a complex flavor profile. This variation is perfect for guests who love a bold, spicy dip.
Smoky Chipotle Version
Replace the smoked paprika with chipotle powder for a deeper, smoky flavor. Add a splash of chipotle adobo sauce for an extra layer of heat. This version pairs wonderfully with grilled meats or as a bold topping for tacos.
Vegan Delight
Use a plant‑based cottage cheese alternative and a vegan cheddar substitute. Add nutritional yeast for a cheesy, savory flavor. This version maintains the creamy texture while keeping the dip entirely plant‑based.
Herb‑Infused Dip
Introduce a handful of fresh basil or mint to the base for a fragrant, aromatic twist. The herbs add a fresh, bright note that pairs well with Mediterranean-style chips. This variation is especially refreshing during warm weather.
Cheesy Queso Supreme
Layer the dip with an extra ½ cup of shredded mozzarella for an extra gooey texture. The mozzarella adds a mild, melty quality that enhances the overall creaminess. This version is ideal for those who love a cheese‑heavy dip.
Low‑Calorie Lightness
Reduce the amount of cheddar to ¼ cup and replace the rest with additional cottage cheese. This keeps the dip low in calories while still delivering a creamy mouthfeel. The result is a lighter, healthier version that doesn’t sacrifice flavor.
Storing and Bringing It Back to Life
Fridge Storage
Store the dip in a sealed container in the refrigerator for up to three days. The airtight seal prevents the dip from absorbing odors from other foods. Keep it on the middle shelf to maintain a consistent temperature. This method keeps the dip fresh and flavorful.
Freezer Friendly
For longer storage, freeze the dip in an airtight container for up to two months. When ready to serve, thaw it overnight in the fridge. The dip may separate slightly when frozen, but a quick stir will restore its smoothness. This option is great for meal prepping or hosting a future gathering.
Best Reheating Method
Reheat the dip on the stovetop over low heat, stirring frequently. Add a splash of water or milk to help it regain its creamy texture. The dip should be heated to 165°F (74°C) before serving. A gentle reheating process ensures the dip stays silky and doesn’t scorch. This method preserves the flavor and texture.