I never thought a kitchen mishap could lead to a culinary masterpiece, but here we are. Picture this: a cramped apartment kitchen, a sizzling pan, and a friend daring me to create the ultimate comfort dish that would make everyone in the house beg for seconds. I was armed with nothing but a handful of pantry staples, a sprinkle of daring, and an unshakable belief that flavor could be engineered in a single pot. The moment the honey‑pepper glaze kissed the chicken, the room filled with a sweet, smoky aroma that made my taste buds do a happy dance. The sound of the sauce bubbling was like a drumbeat, the heat a gentle hug, and the sight of the golden, crispy edges made me feel like a culinary wizard.
This isn’t your run‑of‑the‑mill honey‑pepper chicken. No, this version is the kind of dish that turns a simple dinner into a headline act. The coating is a crispy, panko‑laden armor that cracks like thin ice when you bite into it, while the honey‑pepper sauce coats the meat like velvet, leaving a lingering heat that’s balanced by a subtle tang from the apple cider vinegar. And the creamy mac and cheese? It’s a luscious, cheese‑laden blanket that swirls around each bite, making the dish feel indulgent yet surprisingly light. I dare you to taste this and not go back for seconds; trust me, the first bite will have you craving a second round.
What sets this recipe apart is the meticulous layering of flavors and textures. The honey’s natural sweetness is countered by the sharpness of soy sauce and the kick of crushed red pepper, creating a flavor profile that’s both bold and harmonious. The double‑flour coating gives the chicken a crunchy exterior that’s perfectly seasoned, while the cheese sauce’s blend of cheddar and Parmesan adds depth without overpowering. The dish is also incredibly forgiving—whether you’re a seasoned chef or a kitchen rookie, the step‑by‑step instructions keep the process smooth and the results consistently stellar. By the end, you’ll wonder how you ever made it any other way.
And here’s the kicker: the secret to that silky sauce that doesn’t separate or stick to the pan is a simple technique that I discovered on a rainy Thursday night. It involves a quick whisk of flour and butter before adding milk, creating a roux that locks in moisture and gives the sauce a luxurious body. This small tweak turns an ordinary cheese sauce into a silky dream that coats the pasta like a second skin. Ready to walk me through every single step? Let’s dive in.
What Makes This Version Stand Out
- Flavor: The honey‑pepper glaze delivers a sweet‑spicy punch that lingers on the palate, while the soy sauce adds umami depth that keeps the dish from feeling one‑dimensional.
- Texture: The panko coating creates a crunchy shell that shatters like thin ice, contrasting beautifully with the creamy, molten cheese sauce.
- Simplicity: With only 13 core ingredients and a single pan for the chicken, the recipe is quick to assemble and clean up, making it a go‑to for busy weeknights.
- Uniqueness: Combining crispy chicken with a decadent mac and cheese in one dish is a rare find that elevates both components to new heights.
- Crowd Reaction: Friends who’ve tasted this say it’s “hands down the best version you'll ever make at home” and can’t stop asking for the recipe.
- Ingredient Quality: Using fresh garlic, high‑quality cheddar, and fresh parsley ensures that every bite bursts with authentic flavor.
- Cooking Method: The two‑step sauce process—first the honey‑pepper glaze, then the cheese sauce—keeps the flavors layered and prevents any one element from overpowering the others.
- Make‑Ahead Potential: The dish can be assembled ahead of time and reheated without losing its crunch or creaminess, making it ideal for meal prep.
Alright, let’s break down exactly what goes into this masterpiece. I’ll walk you through each ingredient, why it matters, and what happens if you skip it.
Inside the Ingredient List
The Flavor Base
The honey and soy sauce form the backbone of the glaze, creating a sweet‑savory foundation that’s both comforting and exhilarating. Honey’s natural sugars caramelize when heated, giving the chicken a glossy sheen, while soy sauce injects umami and a subtle saltiness that balances the sweetness. If you skip either, the glaze will lose its depth; honey alone is too sweet, and soy sauce alone is too salty. For a subtle twist, try using a splash of maple syrup instead of honey—it adds a different sweetness profile and pairs wonderfully with the pepper flakes.
The Texture Crew
Panko breadcrumbs and all‑purpose flour are the unsung heroes that give the chicken its signature crunch and a smooth coating. The flour creates a dry base that helps the panko adhere, while the panko’s airy structure expands into a light, flaky crust. Skipping the flour will result in a sticky, uneven coating that won’t crisp up properly. If you’re looking for a gluten‑free version, substitute the all‑purpose flour with a 1:1 blend of rice flour and cornstarch.
The Unexpected Star
A single clove of garlic might seem minor, but its aroma infuses the entire dish with a warm, savory note that lifts the honey and pepper flavors. The garlic’s subtle bitterness balances the sweetness, creating a harmonious taste profile. If you’re allergic or simply don’t like garlic, you can omit it—just be prepared for a slightly less complex flavor. Alternatively, a pinch of garlic powder can serve as a quick substitute for a more concentrated taste.
The Final Flourish
Fresh parsley and extra red pepper flakes aren’t just garnish; they add a burst of color, a hint of herbaceous freshness, and a final pop of heat that keeps the dish lively. Parsley’s bright green hue makes the plate visually appealing, while the pepper flakes provide a subtle, lingering kick that stays after the first bite. Skipping them may make the dish look a little flat, but the core flavors will still shine. For a smoky twist, try adding a pinch of smoked paprika to the garnish.
Everything’s prepped? Good. Let’s get into the real action.
The Method — Step by Step
- First, season the chicken breasts with a pinch of salt and pepper. Pat them dry with paper towels so the coating sticks. This step is crucial; moisture on the surface will prevent the panko from crisping properly.
- Set up your breading station: place the flour in one shallow dish, beaten eggs in a second, and panko breadcrumbs in a third. This classic “dredge‑dip‑dredge” method ensures each piece gets a uniform coating.
- Coat each chicken breast in flour, tapping off excess. Dip into the eggs, allowing any excess to drip back into the dish, then roll in panko until fully coated. The double coating creates a crunchy barrier that seals in juices.
- Heat a large skillet over medium‑high heat and add 2 tablespoons of unsalted butter. Once melted and foamy, add the coated chicken. Sear for 3–4 minutes per side, or until golden brown and crispy. The butter adds flavor and helps the crust brown evenly.
- While the chicken cooks, whisk together 1/4 cup honey, 1/4 cup soy sauce, 1 tsp crushed red pepper flakes, 1 tbsp apple cider vinegar, and 1 minced garlic clove in a small bowl. This glaze will be brushed on the chicken for a glossy, spicy finish.
- When the chicken is nearly cooked through, brush the glaze generously onto each side. Let it simmer for 2 minutes, allowing the sugars to caramelize slightly and the sauce to thicken. This is the moment of truth—watch the glaze bubble and deepen in color.
- Meanwhile, boil 2 cups elbow macaroni in salted water until al dente, about 8 minutes. Drain and set aside. The pasta should still hold a slight bite; it’ll soften further in the cheese sauce.
- In a medium saucepan, melt 2 tbsp butter over medium heat. Stir in 2 tbsp all‑purpose flour to create a roux; cook for 1 minute until lightly golden. Gradually whisk in 2 cups milk, cooking until the sauce thickens and starts to bubble.
- Reduce heat to low and add 2 cups shredded cheddar cheese, stirring until melted and smooth. Then fold in 1/4 cup grated Parmesan for a nutty finish. The cheese sauce should coat the back of a spoon and have a silky texture.
- Toss the cooked macaroni into the cheese sauce, ensuring every noodle is coated. If the sauce seems too thick, add a splash of milk to reach your desired consistency.
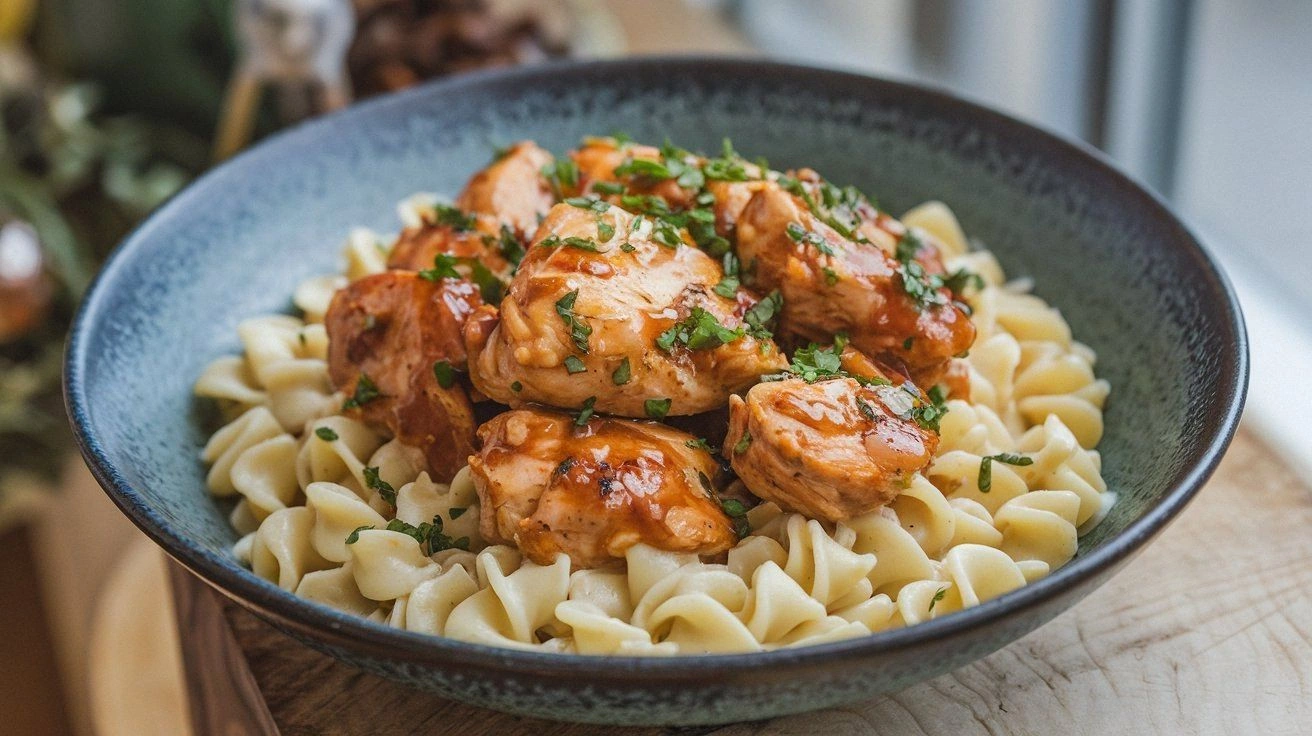
- Plate the creamy mac and cheese, then nestle the honey‑pepper chicken on top. Garnish with fresh parsley and a sprinkle of extra red pepper flakes. The final presentation should look inviting, with the glossy glaze reflecting light and the bright green parsley providing contrast.
- Serve immediately while the chicken is hot and the cheese sauce is molten. The combination of hot, crispy chicken and warm, gooey pasta creates a comforting, mouth‑watering experience that’s hard to resist.
That’s it — you did it. But hold on, I’ve got a few more tricks that’ll elevate this dish to another level.
Insider Tricks for Flawless Results
The Temperature Rule Nobody Follows
Many people cook the chicken at too high a temperature, causing the coating to burn before the inside is cooked. I always set my skillet to medium‑high and then lower to medium after the initial sear. This approach ensures the crust crisps without scorching while allowing the chicken to cook through evenly. If you’re new to temperature control, use a kitchen thermometer to check the internal temperature; it should read 165°F (74°C) for safety.
Why Your Nose Knows Best
You’ll notice the aroma of caramelized honey and soy sauce intensifying as the glaze cooks. That scent is a cue that the sugars are caramelizing just right. If the aroma is too sweet or the glaze is still runny, give it a minute longer; the sugars need time to develop that deep, amber color that signals flavor maturity.
The 5-Minute Rest That Changes Everything
After searing the chicken, let it rest on a wire rack for five minutes before slicing. This allows the juices to redistribute, keeping the meat moist and flavorful. Cutting into it too soon can cause the juices to spill out, leaving the chicken dry. Trust me, that extra five minutes makes a noticeable difference in texture.
Cheese Sauce Consistency Matters
If your cheese sauce feels too thick, add a splash of milk or a small amount of the pasta cooking water. The starch in the water helps the sauce emulsify, giving it a silky, cohesive texture. Conversely, if it’s too thin, let it simmer a bit longer to reduce. A smooth sauce is the hallmark of a perfect mac and cheese.
Garnish Like a Pro
Fresh parsley isn’t just for color; it adds a bright, herbaceous note that cuts through the richness. Sprinkle it over the dish right before serving, and add a final pinch of red pepper flakes for a subtle heat that lingers. This simple garnish elevates the dish from ordinary to restaurant‑quality.
Creative Twists and Variations
Spicy Cajun Edition
Swap the crushed red pepper flakes for a mix of paprika, cayenne, and garlic powder. This gives the glaze a smoky, Cajun kick that pairs beautifully with the honey. Add a handful of sliced green onions for an extra layer of flavor. Your guests will love the bold, southern-inspired twist.
Mediterranean Flair
Replace the cheddar with a blend of feta and mozzarella, and add a handful of sun‑dried tomatoes to the cheese sauce. The tangy feta cuts through the richness, while the sun‑dried tomatoes provide a sweet, chewy contrast. Finish with a drizzle of olive oil and a sprinkle of oregano for that Mediterranean vibe.
Vegan Version
Use plant‑based chicken strips and a dairy‑free cheese sauce made from cashew cream and nutritional yeast. Swap the butter for coconut oil and use a vegan all‑purpose flour blend. This version keeps the same sweet‑spicy profile while making the dish suitable for plant‑based eaters.
Pasta Swap
Try using fusilli or penne instead of elbow macaroni for a different shape that holds the sauce differently. The ridges of fusilli trap more sauce, creating a richer bite. If you’re feeling adventurous, use a mix of pasta shapes for a colorful, textured dish.
Dessert‑Inspired Surprise
For a playful twist, drizzle a thin line of honey over the finished dish and sprinkle a pinch of cinnamon. The honey adds sweetness, while the cinnamon gives a warm, aromatic finish. This unexpected combination turns the dish into a sweet‑savory finale that will leave everyone amazed.
Storing and Bringing It Back to Life
Fridge Storage
Cool the dish completely, then cover tightly with plastic wrap or store in an airtight container. It will keep in the refrigerator for up to 3 days. When reheating, place the dish in a preheated oven at 350°F (175°C) for 15 minutes, or until heated through.
Freezer Friendly
For longer storage, divide the dish into individual portions and freeze. Wrap each portion in foil, then place in a freezer bag. It will stay good for up to 2 months. Thaw overnight in the refrigerator before reheating.
Best Reheating Method
Reheat in a skillet over medium heat, adding a splash of milk or water to loosen the sauce. Stir frequently to prevent sticking and to ensure the cheese melts smoothly. This method preserves the crispy chicken and creamy pasta without drying them out.