Picture this: a cramped kitchen, a stack of half‑finished cookie dough, and a stubborn craving for something sweet that feels like a hug in a cup. I was standing over a burnt batch of vanilla cupcakes that had turned my oven into a smoky battlefield, when a friend dared me to make the most irresistible sugar cookie cups ever. I stared at the scorched remains, laughed at the irony, and decided that my next culinary mission would be to turn that kitchen disaster into a crowd‑pleaser that even my skeptical palates would love. The moment the dough hit the pan, the aroma of butter and sugar swirled into a heady perfume that made the whole house feel like a bakery on a sunny afternoon.
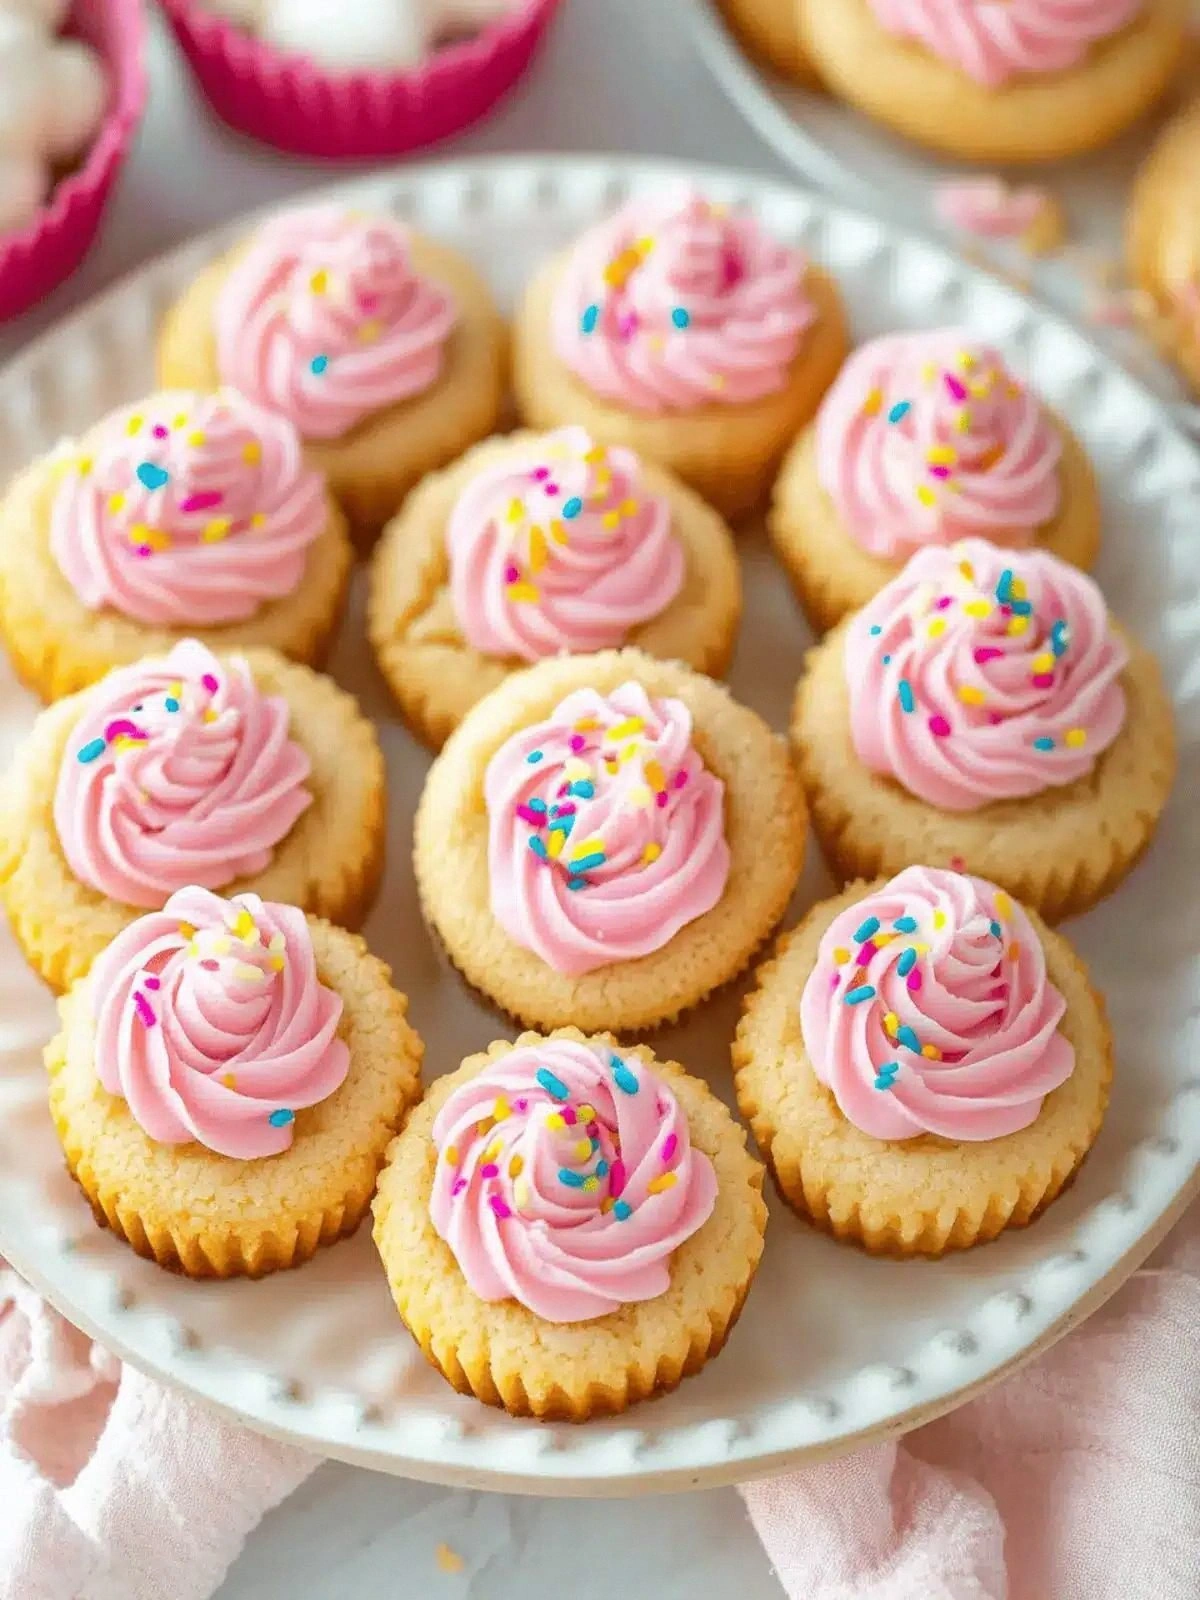
The first bite is a symphony of textures: a crisp, buttery base that cracks like a fine piece of chocolate, a silky cream cheese frosting that melts in your mouth, and a rainbow of sprinkles that add a playful crunch. The flavor is a layered experience—sweetness balanced by a subtle almond undertone, a hint of vanilla that lingers, and a touch of pink or red gel that gives the cups a blush of color that’s almost too pretty to eat. The sheer indulgence is tempered by a lightness that comes from the perfect mix of leavening agents, which give the cups a tender crumb without making them cakey. It’s the kind of dessert that makes you pause, take a photo, and then devour it before the photo even dries.
I dare you to taste this and not go back for seconds. This is hands down the best version you'll ever make at home. If you’ve ever struggled with cookie cups that fall apart or taste flat, you’re not alone—and I've got the fix. The secret? It’s in the simple, high‑quality ingredients, the precise technique, and a few insider tricks that elevate the ordinary to extraordinary. Picture yourself pulling these out of the oven, the whole kitchen smelling incredible, and the kitchen lights glowing like a summer sunset. And trust me, when the first bite lands in your mouth, you’ll wonder how you ever made it any other way.
Alright, let’s break down exactly what goes into this masterpiece. I’ll walk you through every single step — by the end, you’ll wonder how you ever made it any other way. From the first whisk to the final sprinkle, this recipe is a testament to the power of a few simple ingredients done right.
What Makes This Version Stand Out
- Taste: The blend of butter, almond, and vanilla creates a flavor profile that feels both familiar and surprising, making each cup a delicious adventure.
- Texture: The cookie base is crisp on the outside and tender inside, while the cream cheese frosting is silky yet firm enough to hold the cup shape.
- Simplicity: Only 15 ingredients, most of which you probably already have in your pantry, mean you can whip up these cups in no time.
- Uniqueness: The pink or red gel adds a splash of color that turns plain sugar cookies into eye‑catching, Instagram‑ready treats.
- Crowd Reaction: Friends and family can’t stop asking for the recipe, and I’ve seen people come back for seconds in record time.
- Ingredient Quality: Using salted butter and high‑grade vanilla extract gives the cups depth that cheap substitutes simply can’t match.
- Cooking Method: A simple bake-and-frost method that preserves the delicate structure of the cups.
- Make‑Ahead Potential: The cups freeze well, and the frosting can be prepped in advance, making them perfect for parties or last‑minute gifts.
Inside the Ingredient List
The Flavor Base
The 3/4 cup of salted butter is the heart of the cookie, providing a savory depth that balances the sweetness. Butter’s natural fats create steam pockets that lift the dough, giving the cups a light, airy crumb. If you skip butter, the cookies will feel flat and dry, lacking that buttery kiss that makes them irresistible. For a richer flavor, try using a mix of butter and a touch of ghee; the nutty aroma will elevate the experience.
The 3/4 cup of granulated sugar dissolves into the butter, forming a smooth batter that bakes into a golden crust. Sugar also caramelizes slightly, adding a subtle caramel note that pairs beautifully with the almond extract. If you prefer a lower‑sugar version, consider substituting half of the granulated sugar with brown sugar for a deeper molasses flavor, but be prepared for a slightly chewier texture.
The single large egg is the binder that holds everything together. Its proteins coagulate during baking, giving the cookies structure. Without the egg, the dough would crumble and the cups would collapse. If you’re vegan, replace the egg with a flax egg (1 tablespoon ground flaxseed mixed with 3 tablespoons water) for a similar binding effect.
The 1.5 teaspoons of vanilla extract and 0.5 teaspoon of almond extract combine to create a fragrant, complex flavor profile. Vanilla provides warmth and sweetness, while almond adds a nutty undertone that enhances the butter’s richness. Skipping either extract will result in a flatter flavor profile; if you’re allergic to almond, use a small amount of hazelnut extract instead.
The Texture Crew
The 2 cups of all‑purpose flour act as the structural framework for the cookies. They absorb the butter and sugar, forming a dough that holds its shape when baked. Using bread flour would make the cookies too dense; using cake flour would make them too soft. If you have whole wheat flour, you can replace half of the all‑purpose flour for added nutrition, but the cookies will be slightly denser.
The leavening agents—1 teaspoon of baking powder and 0.5 teaspoon of baking soda—are crucial for lift. Baking powder ensures a gentle rise, while baking soda neutralizes the acidity from the almond extract, preventing an off‑taste. If you forget to add both, the cookies will be flat and chewy. For a gluten‑free version, use a gluten‑free flour blend that contains xanthan gum to maintain structure.
The Unexpected Star
The 2 ounces of cream cheese are the star of the frosting, lending a creamy, tangy contrast to the sweet cookie base. Cream cheese also adds a slight density to the frosting, keeping it from sliding off the cups. If you’re craving a lighter frosting, replace half of the cream cheese with mascarpone for a silky finish.
The 3 cups of powdered sugar are the sweetener for the frosting, giving it a smooth, silky texture. Powdered sugar dissolves quickly, preventing graininess. If you’re avoiding refined sugars, try a blend of powdered erythritol and powdered sugar for a lower‑calorie option.
The 1/4 cup butter, 2 tablespoons of milk, and 0.25 teaspoon of vanilla extract combine to create the frosting’s base. The butter adds richness, the milk provides moisture, and the vanilla rounds out the flavor. If you’re vegan, swap the butter for coconut oil and the milk for almond milk to keep the frosting creamy.
The Final Flourish
The pink or red food coloring gel is what gives these cups that playful pop of color. A few drops are enough to tint the frosting without altering the flavor. If you’re allergic to artificial dyes, use a natural food coloring made from beet juice or hibiscus for a subtle hue.
Sprinkles are the final touch that adds a delightful crunch and a festive look. They’re also a fun way to let kids personalize their cups. For a healthier option, use organic sugar sprinkles or dried fruit pieces.
Everything’s prepped? Good. Let’s get into the real action.
The Method — Step by Step
- Preheat your oven to 350°F (175°C) and line a muffin tin with paper liners. The paper ensures the cups release easily and keeps the edges crisp. I always let the oven preheat for at least 10 minutes so the cookies bake evenly. A warm oven is the secret to that perfect golden crust.
- In a medium bowl, cream the 3/4 cup salted butter with 3/4 cup granulated sugar until light and fluffy. Use a stand mixer or hand mixer on medium speed; this takes about 3 minutes. The goal is a pale, airy mixture that traps air for lift. If you’re using a hand mixer, keep your rhythm steady to avoid over‑mixing.
- Add the large egg, 1.5 teaspoons vanilla extract, and 0.5 teaspoon almond extract to the creamed mixture. Beat until the egg is fully incorporated and the mixture is smooth. The egg not only binds the dough but also adds moisture that keeps the cups tender.
- In a separate bowl, whisk together 2 cups all‑purpose flour, 1 teaspoon baking powder, and 0.5 teaspoon baking soda. Sifting the dry ingredients helps prevent lumps and ensures even distribution of leavening agents.
- Gradually fold the dry mixture into the wet batter, mixing just until combined. Be careful not to over‑mix; the dough should be slightly sticky but manageable. Over‑mixing can make the cookies tough.
- Scoop the batter into the prepared muffin tin, filling each liner about ¾ full. The cups will rise slightly as they bake, so don’t overfill. Use a small cookie scoop or spoon to keep portions uniform.
- Bake for 18-20 minutes, or until the tops are just beginning to turn golden and a toothpick inserted into the center comes out clean. The aroma will fill the kitchen like a warm hug, and the edges will start to pull away from the paper liners.
- Remove the cups from the oven and let them cool in the tin for 5 minutes before transferring them to a wire rack to cool completely. Cooling on the rack ensures the bottoms don’t become soggy. This is the moment of truth—if you’re impatient, the cups will be too soft to frost.
- While the cups cool, prepare the frosting: combine 2 ounces cream cheese, 3 cups powdered sugar, 0.25 cup butter, 2 tablespoons milk, and 0.25 teaspoon vanilla extract in a bowl. Beat on medium speed until the mixture is smooth and creamy. The frosting should be thick enough to hold its shape but soft enough to spread easily.
- Add a few drops of pink or red food coloring gel to the frosting, whisking until the color is even. The gel is concentrated, so a little goes a long way—too much and the frosting will look muddy.
- Using a small offset spatula or a piping bag, fill each cooled cup with frosting, leaving a small space at the top for sprinkles. The frosting should sit nicely in the cup without spilling over. If the frosting is too thick, add a splash of milk to loosen it slightly.
- Sprinkle the tops with your favorite sprinkles. I love a mix of rainbow and metallic for a festive look. The sprinkles not only add crunch but also make the cups look like party confetti.
That's it — you did it. But hold on, I've got a few more tricks that'll take this to another level. From the perfect frosting consistency to the ideal sprinkle placement, these little nuances will make your cups look like they came straight from a bakery.
Insider Tricks for Flawless Results
The Temperature Rule Nobody Follows
Many bakers think room‑temperature ingredients are always best, but for these cups, using slightly chilled butter and cream cheese gives a richer flavor and a firmer structure. The cold fats slow the release of steam, which results in a denser, more satisfying crumb. If you’re in a hurry, let the butter sit in the fridge for 15 minutes before creaming.
Why Your Nose Knows Best
A simple way to gauge doneness is by scent: the cookies will emit a warm, buttery aroma that’s almost like a fresh bakery. If the scent is too sweet or metallic, the cookies are overbaked. Trust your nose—it’s a reliable indicator of perfection.
The 5-Minute Rest That Changes Everything
After baking, let the cups rest in the tin for exactly 5 minutes before transferring them to a wire rack. This short rest allows the cookies to set, preventing the frosting from sliding off. It also gives the edges time to firm up, giving the cups a crisp finish.
The “No‑Mess” Frosting Trick
Mix a teaspoon of cornstarch into the powdered sugar before adding it to the frosting. This helps absorb excess moisture and keeps the frosting silky. The cornstarch also prevents the frosting from becoming grainy over time.
The Quick Color Fix
If the frosting looks too pale, add a drop of natural food coloring from beet powder or hibiscus powder. These natural dyes are less likely to alter the flavor, keeping the frosting’s taste intact while giving it a vibrant hue.
The Sprinkles Placement Masterclass
Place the sprinkles on the frosting while it’s still slightly wet. This ensures they adhere properly and don’t fall off when the cups are handled. A quick tap on the tin will settle the sprinkles evenly.
Creative Twists and Variations
This recipe is a playground. Here are some of my favorite ways to switch things up:
Chocolate‑Lover’s Delight
Add 1/4 cup cocoa powder to the batter for a rich chocolate base, and use chocolate sprinkles for an extra decadent touch. The chocolate flavor pairs wonderfully with the almond extract, creating a sophisticated chocolate‑almond combo.
Citrus Burst
Replace the almond extract with 1 teaspoon orange zest and add a splash of lemon juice to the frosting. The citrus brightens the sweetness and gives the cups a refreshing zing.
Nutty Crunch
Fold 1/4 cup chopped toasted walnuts into the batter and sprinkle chopped pecans on top of the frosting. The nuts add a satisfying crunch and a nutty aroma that complements the almond extract.
Vegan Version
Swap the butter for melted coconut oil, the egg for a flax egg, and the cream cheese for a dairy‑free cheese alternative. Use maple syrup instead of granulated sugar for a natural sweetener. The result is a plant‑based version that still feels indulgent.
Holiday Twist
Add a pinch of cinnamon and nutmeg to the batter, and use a red and green sprinkles set. The spices bring a festive warmth that’s perfect for holiday parties.
Mini Cupcakes
Use a muffin tin with 12 holes and fill each cup only 1/3 full. Bake for 12-15 minutes. The smaller size makes them perfect for a dessert bar or a sweet treat for kids.
Storing and Bringing It Back to Life
Fridge Storage
Store the finished cups in an airtight container at room temperature for up to 3 days. The frosting will stay firm, and the cookies will retain their crispness. For longer storage, keep them in the refrigerator for up to 5 days.
Freezer Friendly
Wrap each cup individually in plastic wrap and place them in a freezer bag. They’ll stay fresh for up to 2 months. When you’re ready to enjoy, let them thaw at room temperature for 30 minutes.
Best Reheating Method
To revive frozen cups, preheat your oven to 350°F (175°C) and bake for 5-7 minutes. Add a tiny splash of water to the bottom of the tin; the steam will help restore moisture. Once out of the oven, let them cool before adding fresh frosting if desired.