The kitchen was a battlefield that night, the air thick with the scent of burnt sugar and the echo of a timer that had been set for 15 minutes too early. I stared at the scorched edges of a forgotten batch of sponge, feeling the sting of disappointment that comes when a simple dessert turns into a culinary catastrophe. That moment sparked a quest, a relentless search for a sweet, chewy, coconut‑laden treat that would not only redeem my reputation but also satisfy my craving for something both exotic and comforting. After hours of research, countless trials, and a few too many kitchen mishaps, I stumbled upon a recipe that promised a mochi‑like texture wrapped in tropical coconut. It was a revelation, and I knew I had to share it with anyone who has ever stared at a failed dessert and wondered if there was a better way.
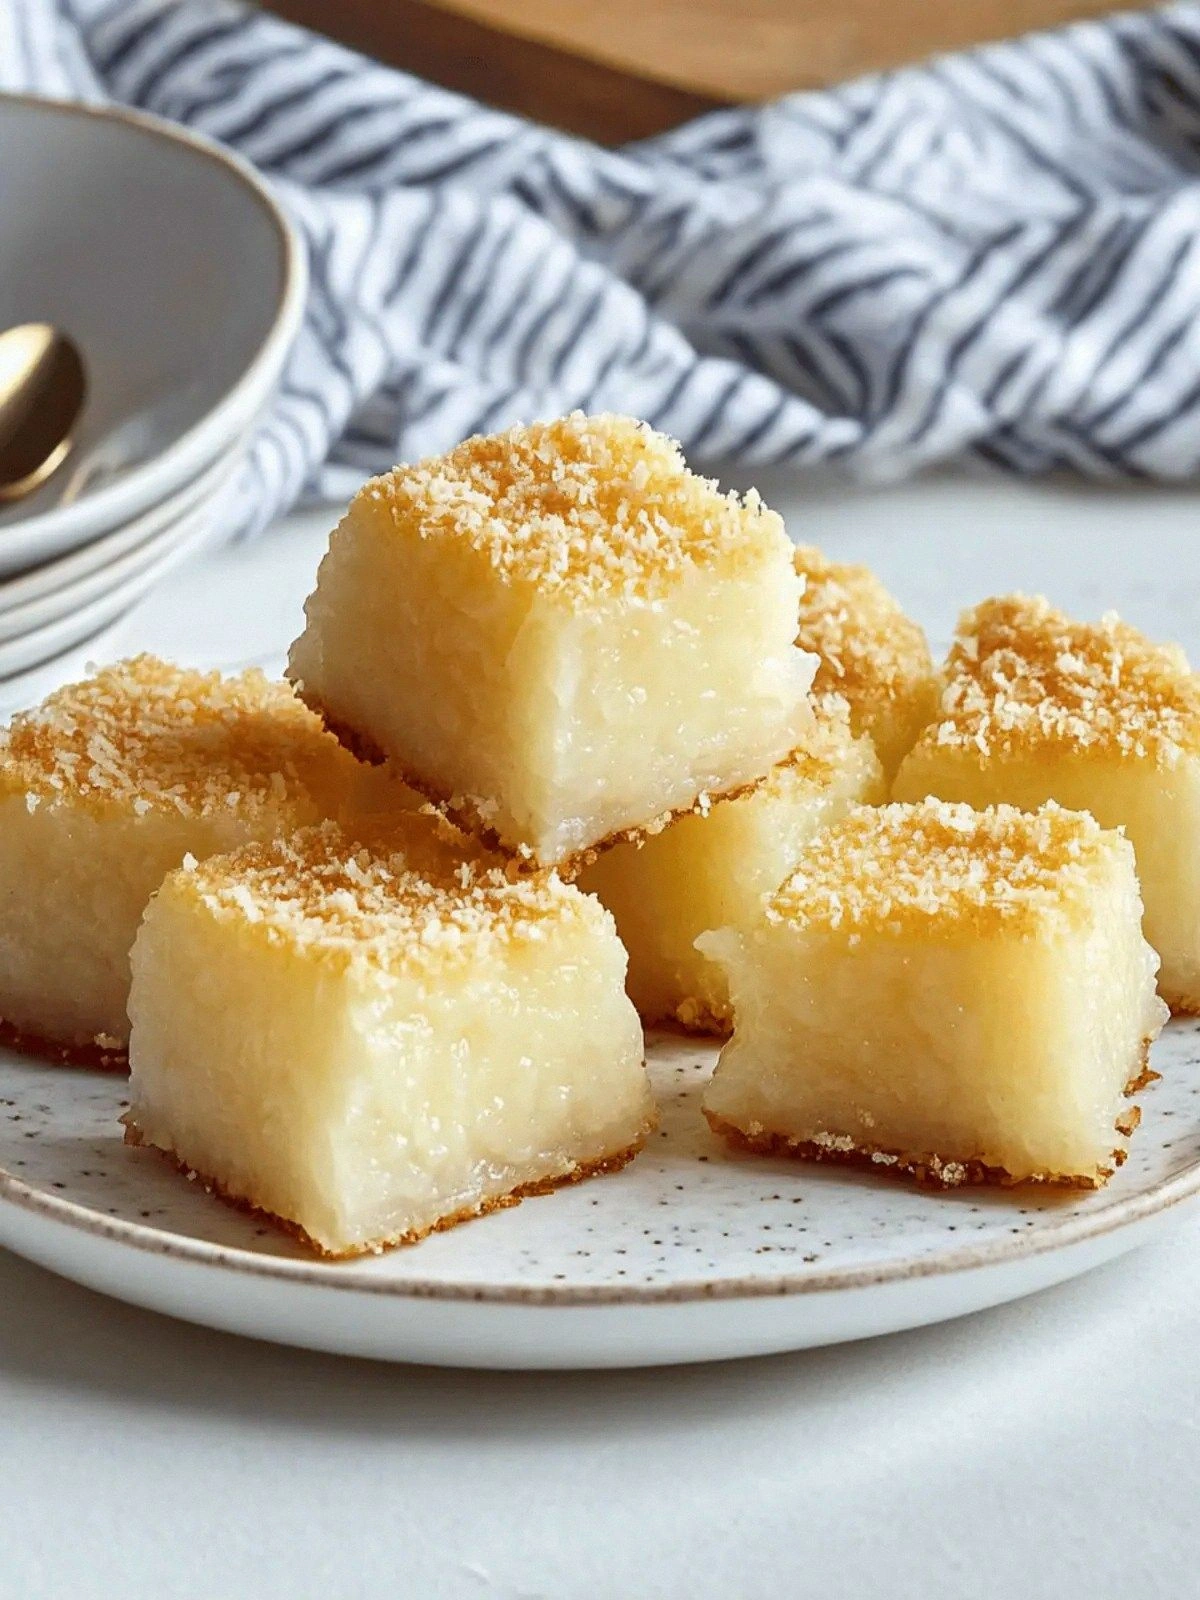
This version of the Coconut Mochi Cake is not just a cake; it’s an experience that dances between textures—soft, elastic, and slightly chewy, like a bite of fresh pandan cake. The coconut milk is the star, infusing the batter with a rich, buttery flavor that lingers on the tongue, while the sweet rice flour gives it that signature snap and spring that makes it feel almost like a dessert from a far‑away island. The batter is silky, the rise is gentle, and the finish is a caramelized crust that crackles just enough to give you that satisfying bite. Most other recipes either overbake the cake, resulting in a dry center, or underbake it, leaving it gummy; this one hits that sweet spot perfectly. The best part? It’s incredibly forgiving, so even a kitchen novice can walk away with a professional‑looking, melt‑in‑your‑mouth dessert.
What makes this version stand out is a single, unassuming tweak: the addition of baking powder to the sweet rice flour. That tiny touch of leavening creates a lightness that makes the cake rise evenly, preventing the dreaded sinking center that plagues many mochi cakes. The use of full‑fat coconut milk, rather than a light or reduced‑fat version, locks in moisture and gives the cake a velvety mouthfeel that feels like a hug in a bowl. The batter’s viscosity is just right—thick enough to hold its shape when poured into a pan, but fluid enough to spread evenly, ensuring a uniform rise and golden crust. The result is a cake that feels like a cross between a traditional Japanese mochi and a tropical coconut pound cake, but with none of the effort required to make either.
I dare you to taste this and not go back for seconds; the combination of coconut richness, subtle sweetness, and that chewy mochi texture is a flavor rollercoaster that keeps you coming back for more. Picture yourself pulling this out of the oven, the whole kitchen smelling incredible, the steam swirling around the pan like a cloud of coconut clouds. This is hands down the best version you'll ever make at home, and it will have your friends begging for the recipe after every bite. Stay with me here—this is worth it, because by the end of this post you’ll know exactly how to transform a simple pot of batter into a show‑stopping dessert that feels both comforting and exotic.
What Makes This Version Stand Out
- Texture: The sweet rice flour creates a chewy, elastic bite that feels almost like a fresh mochi, while the coconut milk adds a buttery richness that melts on the tongue. The cake rises evenly thanks to the baking powder, preventing the dreaded sinking center that often plagues mochi cakes.
- Flavor: The full‑fat coconut milk delivers a deep, tropical flavor that coats the cake like velvet, while the vanilla extract adds a subtle warmth that balances the sweetness. The result is a dessert that feels like a vacation in a bite.
- Ease: The batter is simple to whisk and requires no special equipment, making it a perfect choice for busy nights or for those new to baking. The ingredients are pantry staples, and the process is straightforward enough to follow without a second glance.
- Versatility: While the base recipe is divine on its own, it lends itself to creative variations—think almond milk, coconut flakes, or a drizzle of caramel sauce. The cake can be served warm or chilled, and it pairs wonderfully with fresh fruit or a scoop of vanilla ice cream.
- Make‑ahead potential: Once baked, the cake keeps well in the fridge for up to a week and can be frozen for longer storage. Reheating is simple and restores the cake’s fresh, moist texture.
- Presentation: The golden crust and slightly glossy surface give the cake a professional finish that looks as good as it tastes. It’s a crowd‑pleaser that can be the centerpiece of any dessert table.
- Ingredient quality: Using high‑quality sweet rice flour and full‑fat coconut milk elevates the cake beyond the ordinary, giving it a depth of flavor that can’t be replicated with lower‑grade ingredients.
- Health factor: While indulgent, the cake uses natural sweeteners and can be adjusted to reduce sugar or incorporate whole‑grain flour for a slightly healthier option.
Alright, let's break down exactly what goes into this masterpiece…
Inside the Ingredient List
The Flavor Base
The full‑fat coconut milk is the heart of this cake. It imparts a creamy, slightly sweet flavor that is unmistakably tropical. If you use a light or reduced‑fat coconut milk, the cake will taste thin and lack the luxurious mouthfeel that makes this recipe special. For an extra depth of flavor, consider adding a teaspoon of toasted coconut flakes to the batter before baking.
The Texture Crew
Sweet rice flour, also known as mochiko, is the backbone of the cake’s chewy texture. It’s made from glutinous rice, giving it a unique elasticity that mimics the bite of traditional mochi. If you can’t find mochiko, you can substitute a blend of 2/3 cup all‑purpose flour and 1/3 cup cornstarch, but the texture will be noticeably different. The baking powder is the leavening agent that allows the cake to rise without becoming airy; it keeps the cake dense yet light.
The Unexpected Star
The eggs serve a dual purpose: they bind the batter together and provide structure. They also contribute a subtle richness that balances the coconut’s sweetness. If you’re vegan, you can replace the eggs with a flaxseed or chia egg, though the texture will be less chewy. Keep in mind that the eggs must be at room temperature for the batter to incorporate smoothly.
The Final Flourish
Vanilla extract and salt are the finishing touches that round out the flavor profile. Vanilla adds warmth and depth, while a pinch of salt enhances the sweetness without being noticeable. If you’re adventurous, a splash of pandan extract can give the cake a fragrant, green‑leafy aroma reminiscent of tropical desserts.
Everything's prepped? Good. Let's get into the real action…
The Method — Step by Step
- Preheat your oven to 350°F (175°C) and line an 8‑inch square pan with parchment paper, leaving a little overhang on the sides for easy removal. This step ensures a perfectly even bake and a clean release. The parchment also adds a subtle crispness to the bottom crust.
- In a medium bowl, whisk together the full‑fat coconut milk and granulated sugar until the sugar is completely dissolved. This creates a smooth, lump‑free base that will carry the flavors evenly. The mixture should look glossy and the sugar should feel soft to the touch.
- In a separate bowl, combine the sweet rice flour, baking powder, and salt. Sift the dry ingredients to eliminate any clumps and to ensure a uniform texture. This step is critical for achieving the chewy, mochi‑like consistency.
- Add the dry mixture to the wet coconut milk mixture in two portions, stirring gently after each addition to avoid overmixing. The batter should be thick but pourable, with no dry pockets. If it appears too thick, a splash of coconut milk can help.
- Crack the eggs into a small bowl and beat them lightly with a fork. Fold the eggs into the batter, ensuring they’re fully incorporated before proceeding. This step is essential for the cake’s structure and moisture.
- Pour the batter into the prepared pan, smoothing the top with a spatula. Tap the pan gently on the counter to release any air bubbles that may have formed. The batter should settle evenly without gaps.
- Bake for 30 minutes, or until the edges are golden brown and a toothpick inserted near the center comes out clean. The top will develop a slightly caramelized crust that gives the cake a subtle crunch. Keep an eye on the oven to avoid overbrowning.
- Remove the cake from the oven and let it cool in the pan for 10 minutes. This allows the cake to set and makes it easier to lift out of the pan using the parchment overhang. The cake will still be hot, so handle with care.
- Transfer the cake onto a wire rack to cool completely. This prevents steam from making the bottom soggy. Once cooled, you can slice it into squares or cut it into a more elaborate shape if desired.
- Serve warm or at room temperature, optionally dusted with toasted coconut flakes or drizzled with a simple caramel glaze. The warm, gooey center contrasts beautifully with the crisp edges. If you’re feeling adventurous, top with a scoop of vanilla ice cream for a decadent twist.
That's it — you did it. But hold on, I've got a few more tricks that'll take this to another level…
Insider Tricks for Flawless Results
The Temperature Rule Nobody Follows
Many bakers bake mochi cakes at a higher temperature, thinking it will give a crispier crust. In reality, a steady 350°F is optimal for a tender crumb and even rise. If your oven runs hot, consider baking at 325°F for 35 minutes to ensure the interior cooks fully without burning the edges.
Why Your Nose Knows Best
Before you take the cake out of the oven, pause and inhale the aroma. A subtle, sweet coconut scent is a sign that the batter has cooked through. If you notice a strong, raw coconut smell, give it a few more minutes.
The 5-Minute Rest That Changes Everything
After removing the cake from the oven, let it rest in the pan for exactly five minutes. This brief pause allows the steam to redistribute, ensuring the cake doesn’t collapse when you lift it. It also helps the crust set, giving you a clean slice every time.
The Secret to a Glimmering Crust
Just before the final five minutes of baking, lightly brush the top with a mixture of coconut milk and a touch of honey. This not only adds shine but also deepens the caramelization, giving the cake a beautiful golden hue.
The Final Flourish
Once cooled, dust the cake with powdered sugar or drizzle with a simple glaze made from coconut milk and brown sugar. This adds a finishing touch that elevates the dessert from good to unforgettable. The glaze also helps lock in moisture, keeping the cake fresh for days.
Creative Twists and Variations
This recipe is a playground. Here are some of my favorite ways to switch things up:
Almond Coconut Delight
Replace the sweet rice flour with almond flour for a nutty flavor and a lower carbohydrate profile. The texture will be slightly denser, but the almond taste will pair beautifully with the coconut. This variation is perfect for a gluten‑free or low‑carb diet.
Chocolate Mochi Cake
Fold in 1/2 cup of unsweetened cocoa powder into the batter for a rich, chocolatey twist. The cocoa will slightly darken the color, and the chocolate flavor will complement the coconut sweetness. Add a pinch of sea salt to balance the bitterness.
Tropical Berry Burst
After baking, top the cake with fresh mango slices, kiwi, and a drizzle of passion‑fruit sauce. The bright, tropical fruit flavors will contrast the creamy cake, creating a multi‑sensory experience. This variation is especially refreshing on a hot afternoon.
Spiced Pumpkin Mochi
Add 1/2 cup of pumpkin puree and 1 tsp pumpkin spice to the batter for a fall‑seasonal treat. The pumpkin adds moisture and a subtle sweetness, while the spices give the cake a warm, comforting aroma. Serve with a dollop of whipped coconut cream.
Lemon Ginger Twist
Replace half of the coconut milk with freshly squeezed lemon juice and add a tablespoon of grated ginger. The citrus brightens the flavor, while the ginger adds a subtle heat that cuts through the sweetness. This variation is ideal for a light, refreshing dessert.
Caramelized Banana Layer
Slice ripe bananas and layer them between two slices of the baked cake, then drizzle with a caramel sauce made from coconut milk and brown sugar. The bananas add natural sweetness and a chewy texture, while the caramel sauce adds a rich, buttery finish. This creates a multi‑layered dessert that feels indulgent.
Storing and Bringing It Back to Life
Fridge Storage
Wrap the cooled cake tightly in plastic wrap and store it in an airtight container in the refrigerator for up to 5 days. The moisture from the coconut milk keeps the cake soft, and the plastic wrap prevents it from drying out. When ready to serve, let it sit at room temperature for 15 minutes to soften.
Freezer Friendly
For longer storage, slice the cake before freezing to make portion control easier. Place the slices in a freezer bag, pressing out as much air as possible. The cake can be frozen for up to 3 months without loss of quality. Thaw overnight in the refrigerator before reheating.
Best Reheating Method
Reheat sliced cake pieces in a microwave on medium for 15-20 seconds, or warm them in a preheated oven at 300°F for 5 minutes. Add a tiny splash of coconut milk before reheating; it steams back to perfection, restoring the cake’s original moisture. Serve immediately for the best texture.