Picture this: the kitchen is a battleground, a handful of marshmallows, a mound of Rice Krispies, and a pot of butter that’s about to turn into a golden, glossy river. I was in the middle of a frantic Easter bake‑off, trying to impress my family with something that’d feel like a nostalgic childhood treat and still look like it belonged on a sophisticated dessert plate. I tossed a handful of marshmallows into a saucepan, the sweet aroma rising like a promise, and the butter began its slow, buttery transformation. The sound was a gentle hiss, the kind that signals magic is about to happen. I dared myself—and everyone watching—to turn this simple mixture into something that would have everyone reaching for seconds.
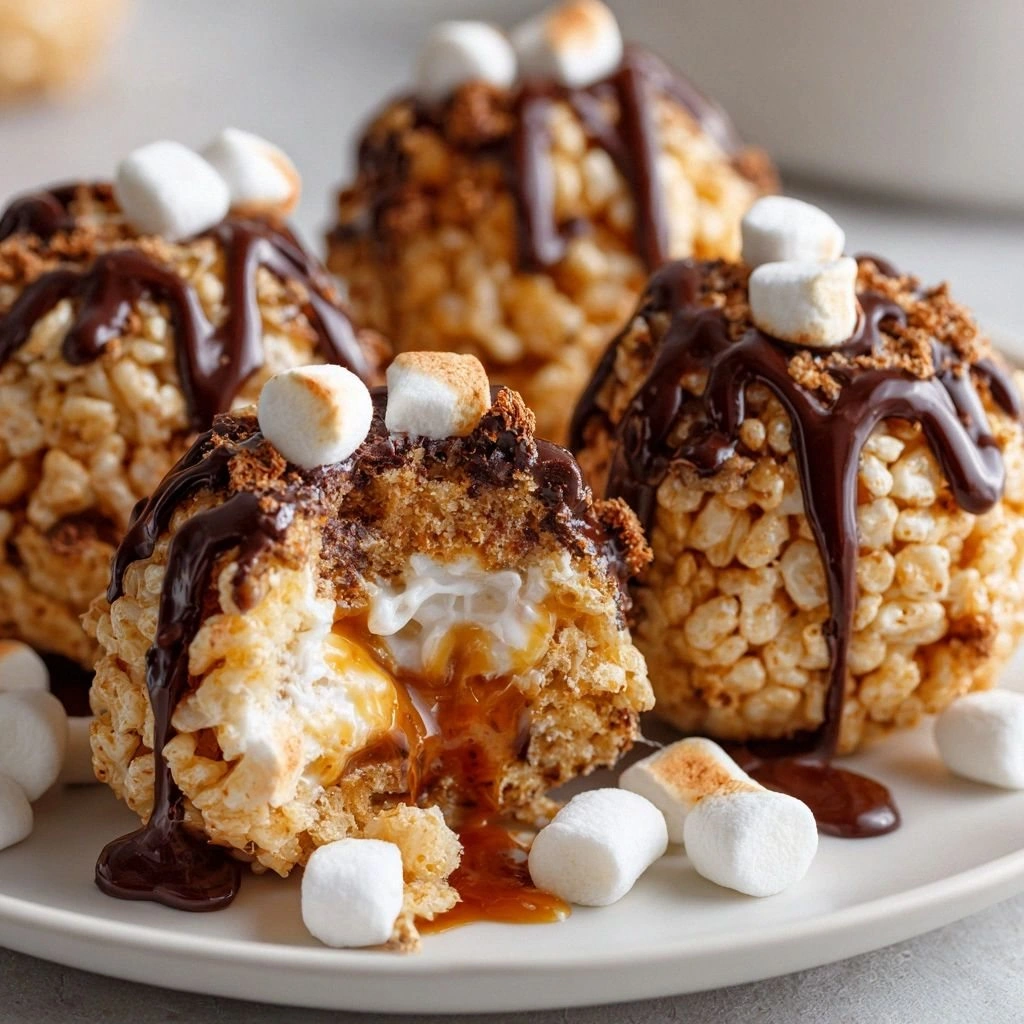
I’ve tried the classic Rice Krispie treats before, but I always found them a tad too flat and predictable. They were great for a quick snack, but when it came to an Easter centerpiece, they just didn’t have the wow factor. That’s why I decided to reinvent the wheel, or rather, the egg. I added a splash of vanilla, a pinch of salt, and a drizzle of chocolate that would coat the outside like a glossy halo. The result? A chewy, crunchy, chocolate‑coated egg that feels like a piece of candy, but with a homemade, comforting heart. I’ll be honest — I ate half the batch before anyone else got to try it.
This isn’t just a tweak; it’s a complete re‑imagining. I’ve found that the secret lies in the balance of textures and the timing of when you fold the ingredients together. The marshmallows must be melted to a silky consistency, the Rice Krispies must be added just before the mixture starts to cool, and the chocolate coating is applied at the exact moment the eggs are still pliable. Most recipes get this completely wrong, ending up with soggy centers or brittle shells. Here’s what actually works: a quick, controlled melt, a gentle fold, and an immediate chill. I dare you to taste this and not go back for seconds.
If you’ve ever struggled with making Rice Krispie treats that hold their shape, you’re not alone — and I’ve got the fix. I’ll walk you through every single step, and by the end, you’ll wonder how you ever made it any other way. Picture yourself pulling these out of the fridge, the whole kitchen smelling incredible, and watching the glossy chocolate shine under the lights. The anticipation is half the fun, and the bite is the other half. Let’s dive in.
What Makes This Version Stand Out
- Texture: The combination of toasted cereal and melted marshmallows gives a satisfying snap that shatters like thin ice, followed by a melt‑in‑your‑mouth gooey center.
- Flavor: A splash of vanilla and a pinch of salt elevate the sweetness, creating a balanced, layered taste that feels indulgent yet familiar.
- Presentation: Shaped like eggs, coated in glossy chocolate, and dusted with powdered sugar, these treats look as good as they taste.
- Make‑ahead: They set quickly in the fridge, allowing you to prep hours before the big day and still have them fresh.
- Kid‑friendly: The chocolate shell is a fun, interactive element that kids love, turning the baking process into a playful activity.
- Versatility: The recipe can be customized with colored sugar, sprinkles, or different chocolate flavors to suit any theme or preference.
- Batch size: A single recipe yields four bite‑sized eggs, making it perfect for a small gathering or as a centerpiece for a larger event.
- Quick & Simple: With just a handful of ingredients and minimal prep, you can create a show‑stopping dessert in under 30 minutes.
Alright, let's break down exactly what goes into this masterpiece...
Inside the Ingredient List
The Crunch Crew
Rice Krispies cereal is the backbone of this recipe. The crisp, toasted grains provide the essential crunch that gives the treat its signature snap. If you’re using a low‑calorie cereal, keep in mind that the texture may be slightly softer, so you might need to add a bit more butter to compensate. A good rule of thumb is to use a brand with a higher toasted grain count for maximum crunch.
The Sweet Core
Mini marshmallows are the sweet heart of the eggs. They melt into a silky, gooey center that contrasts beautifully with the crunchy exterior. Using mini marshmallows instead of the regular size keeps the texture consistent and prevents the mixture from becoming too runny. If you’re in a pinch, regular marshmallows work, but you’ll need to cut them into smaller pieces to mimic the mini size.
The Butter & Vanilla Boost
Butter isn’t just a flavor enhancer; it’s a binder that helps the mixture hold together. A generous 1/4 cup of butter ensures the eggs set properly and gives a subtle, buttery richness that complements the marshmallows. Vanilla extract adds a fragrant depth, pulling all the flavors together. A teaspoon is enough to lift the sweetness without overpowering the chocolate.
The Salt & Sugar Touch
A pinch of salt (about 1/8 teaspoon) is essential; it sharpens the sweetness and brings out the chocolate’s depth. Powdered sugar is used for dusting, creating a delicate, sweet finish that mirrors a snow‑covered Easter egg. If you prefer a sweeter finish, you can increase the powdered sugar to one tablespoon.
The Chocolate Shell
Chocolate chips provide the glossy, indulgent coating that turns these treats into real Easter eggs. Melt them gently in a double boiler or microwave, stirring until smooth. The chocolate should be glossy and pourable but not so hot that it burns the marshmallow center. If you want a richer flavor, use dark chocolate or add a splash of cocoa butter.
The Final Flourish
Colored sugar or sprinkles are optional but add a festive touch. A tablespoon of colored sugar sprinkled over the set eggs gives them a rainbow of color, perfect for a themed party. For a more sophisticated look, use finely crushed pistachios or almond slivers.
Everything's prepped? Good. Let's get into the real action...
The Method — Step by Step
- Step 1: Prepare the Pan. Line a 9x9 inch baking pan with parchment paper, leaving an overhang on two sides. This will make removing the set eggs a breeze. If you’re using a silicone mold, grease it lightly with butter or non‑stick spray. The parchment ensures a clean release and a neat finish.
- Step 2: Melt the Butter. In a medium saucepan, melt 1/4 cup of butter over low heat until it turns a light golden color. The butter should not brown; a pale, buttery hue indicates it’s ready. Once melted, remove from heat and set aside to cool slightly.
- Step 3: Add Marshmallows. Add 3 cups of mini marshmallows to the hot butter. Stir constantly until the marshmallows are completely melted and the mixture is smooth. This is the moment of truth: the mixture should smell like sweet vanilla and have a glossy sheen. Kitchen Hack: If the marshmallows start to separate, add a tablespoon of milk or water and stir vigorously. This will re‑integrate the mixture and prevent clumps.
- Step 4: Fold in Rice Krispies. Remove the saucepan from heat. Add 3 cups of Rice Krispies cereal to the melted mixture. Stir gently but firmly until every grain is coated. The mixture should look like a wet sand, with a golden sheen that glistens in the light. If the mixture is too wet, let it sit for a minute to allow the cereal to absorb excess moisture.
- Step 5: Add Vanilla & Salt. Stir in 1 teaspoon of vanilla extract and 1/8 teaspoon of salt. The vanilla should infuse the entire mixture, giving it a warm aroma. The salt will cut through the sweetness and make the chocolate shine.
- Step 6: Press into Pan. Transfer the mixture to the prepared pan. Use a spatula or the back of a spoon to press it firmly and evenly. The top should be flat and smooth. If the mixture is still hot, let it cool for a minute before pressing, as it will become harder to work with.
- Step 7: Chill. Place the pan in the refrigerator for at least 30 minutes, or until the mixture is firm. The chilling process allows the butter and marshmallows to solidify, giving the eggs a solid structure that holds up when cut. If you’re short on time, a quick 10‑minute chill will still work, but the texture might be slightly softer.
- Step 8: Melt the Chocolate. While the mixture chills, melt 1 cup of chocolate chips in a double boiler or microwave, stirring every 20 seconds until smooth. The chocolate should be glossy and pourable, but not too hot. If it’s too hot, let it cool for a minute before dipping.
- Step 9: Coat the Eggs. Once the mixture is firm, cut it into four equal squares. Dip each square into the melted chocolate, ensuring it’s fully coated. Use a fork to lift and let excess chocolate drip back into the pan. Place the coated squares back on parchment paper.
- Step 10: Final Chill & Dust. Return the chocolate‑coated squares to the refrigerator for another 10 minutes, allowing the chocolate to set. After the chocolate is firm, dust lightly with powdered sugar or sprinkle with colored sugar. Let them sit at room temperature for a few minutes before serving so the chocolate can soften slightly.
That's it — you did it. But hold on, I've got a few more tricks that'll take this to another level. If you want to elevate the presentation, try using a silicone egg mold for a perfectly uniform shape. For a deeper chocolate flavor, add a splash of espresso or a pinch of sea salt to the chocolate. And if you’re feeling adventurous, experiment with different chocolate types: milk for a sweeter finish, dark for a richer bite, or white for a creamy twist.
Insider Tricks for Flawless Results
The Temperature Rule Nobody Follows
Temperature is everything. The marshmallows need to melt at a gentle low heat to avoid scorching. If the heat is too high, the sugar will burn and the mixture will develop a bitter taste. Keep the butter just below a light golden color and stir constantly. A kitchen thermometer set at 185°F ensures you’re in the sweet spot.
Why Your Nose Knows Best
Before you even taste the mixture, let your nose do the work. A warm, sweet aroma signals that the marshmallows are perfectly melted. If the smell is metallic or burnt, it’s a sign you’re overcooking. Trust your nose, and you’ll avoid the common pitfall of burnt marshmallow.
The 5‑Minute Rest That Changes Everything
After you press the mixture into the pan, give it a 5‑minute rest before refrigerating. This brief pause allows the butter to firm up slightly, making the mixture easier to cut later. Skipping this step can result in a crumbly texture that’s hard to handle.
Chocolate Consistency Is Key
When melting chocolate, aim for a glossy, pourable consistency. If the chocolate is too thick, it won’t coat evenly, leaving gaps. If it’s too thin, it will run off the eggs and create a mess. Stir until the chocolate is a smooth, silky sheen.
Dusting for the Final Touch
The powdered sugar dusting isn’t just decorative; it adds a final sweet layer that melts in your mouth. Lightly dust the coated eggs just before serving to keep the sugar from settling on the chocolate during storage. This ensures a fresh look every time.
Creative Twists and Variations
This recipe is a playground. Here are some of my favorite ways to switch things up:
Nutty Delight
Add 1/2 cup of toasted almond slivers to the Rice Krispie mixture for a crunchy, nutty contrast. The almonds pair wonderfully with dark chocolate coating, creating a sophisticated flavor profile that adults will appreciate.
Fruit Burst
Fold in 1/4 cup of dried cranberries or raisins before pressing into the pan. The fruit adds a burst of tart sweetness that cuts through the richness, making the eggs perfect for a springtime gathering.
Minty Fresh
Replace the vanilla extract with 1 teaspoon of peppermint extract and dust the final product with crushed peppermint candies. The minty flavor is refreshing and pairs beautifully with dark chocolate.
Spiced Surprise
Add a pinch of ground cinnamon and a dash of nutmeg to the mixture. The warm spices add depth and a hint of holiday cheer, even in spring.
Choco‑Lemon Twist
Replace the chocolate chips with white chocolate and add a teaspoon of lemon zest. The bright citrus notes elevate the sweetness and give the eggs a fresh, vibrant finish.
Gourmet Glaze
After coating with chocolate, drizzle a thin line of salted caramel over the top. The caramel adds a silky, buttery finish that turns each egg into a decadent dessert.
Storing and Bringing It Back to Life
Fridge Storage
Store the finished eggs in an airtight container at room temperature for up to 3 days. If you’re storing them in the fridge, let them sit at room temperature for 10 minutes before serving to allow the chocolate to soften slightly. This prevents the chocolate from becoming too hard when you bite into it.
Freezer Friendly
Wrap each egg individually in plastic wrap, then place them in a freezer bag. Freeze for up to 2 months. When ready to serve, thaw at room temperature for 30 minutes, then give them a quick dusting of powdered sugar for a fresh look.
Best Reheating Method
To revive frozen or chilled eggs, place them on a parchment paper‑lined plate and microwave on low power (30% intensity) for 10–15 seconds. This gentle heat restores the chocolate’s shine without melting it. Alternatively, let them sit in a warm oven (200°F) for 5 minutes.