I remember the night I was trying to salvage a batch of flat, lifeless cookies that had turned into a sad, chocolate‑free disappointment. The oven was hot, the batter was thick, and I stared at the tray like a detective at a crime scene. That kitchen catastrophe was the spark that set me on a quest for the ultimate chocolate chip experience—one that would melt on the tongue and leave a lingering, buttery afterglow. I dared myself to taste this and not go back for seconds, and I was right on target. Now, I’m about to hand you the secret sauce that turns ordinary chocolate chips into a glossy, molten river of joy.
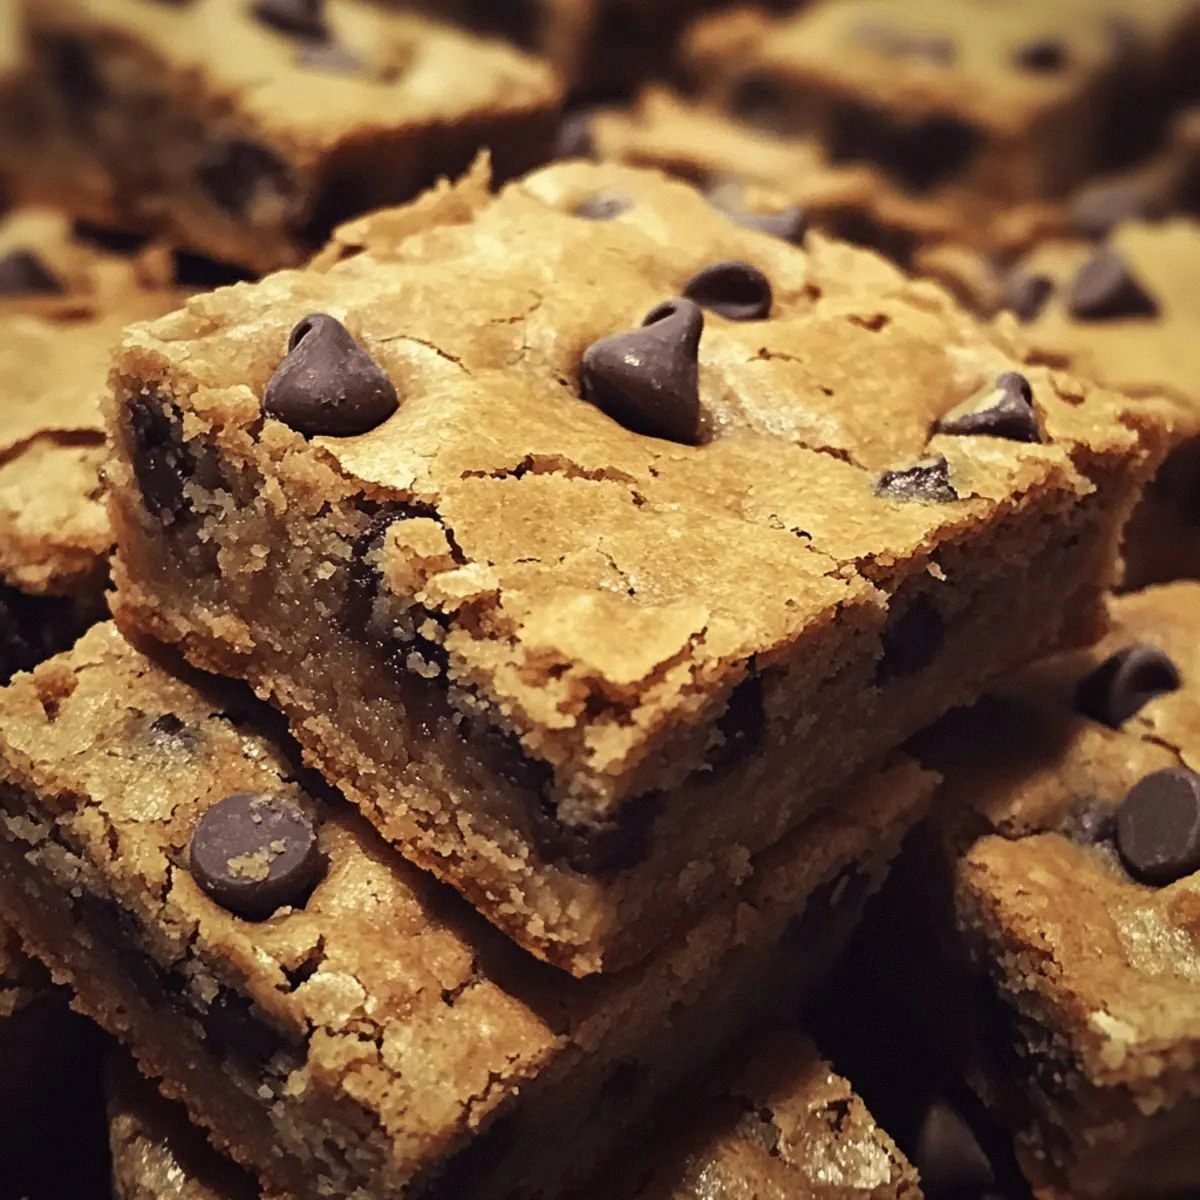
Picture yourself pulling this out of the oven, the whole kitchen smelling incredible, the scent of butter and caramel mingling with the faint, sweet whisper of vanilla. The golden edges crackle like thin ice under a sudden burst of heat, while the center remains a perfectly gooey, chocolate‑laden core. The first bite is a symphony of textures: a crisp crust that gives way to a warm, sticky center that clings to your fingers. And the best part? It’s so simple you could make it while binge‑watching a series, yet it feels like a gourmet masterpiece. Trust me, this is hands down the best version you'll ever make at home.
I’ll be honest—before I discovered this recipe, I had been guilty of over‑baking my chocolate chip cookies, turning them into brittle, sad squares. The moment I swapped the usual flour for a touch more brown sugar and added a dash of baking powder, the transformation was instant. The batter became silky, the chocolate chips surrendered their shape, and the final product was a decadent, chewy treat that melted in your mouth. Most recipes get this completely wrong, focusing on crispness over gooeyness, but here we’re celebrating the molten core that makes everyone crave a second bite. So, if you've ever struggled with this, you're not alone—and I've got the fix.
Okay, ready for the game‑changer? The trick isn’t just in the ingredients; it’s in the timing, the temperature, and the little adjustments that make all the difference. By the end of this post, you’ll wonder how you ever made it any other way, because I’m going to walk you through every single step, from pre‑heat to the final garnish. This isn’t just another cookie recipe—it’s a culinary revelation that will have your friends begging for the recipe. And trust me, once you taste the gooey, buttery center, you’ll never settle for anything else. Let’s dive in.
What Makes This Version Stand Out
- Texture: The combination of brown sugar and a splash of baking powder creates a soft, chewy crumb that holds the chocolate chips like a velvet blanket. The result is a cookie that’s not too crisp and not too doughy—just the perfect balance.
- Flavor: Brown sugar caramelizes to give a deep, nutty sweetness that pairs beautifully with the semi‑sweet chocolate chips, elevating the classic chocolate chip profile to something truly unforgettable.
- Ease: No fancy equipment required—just a mixing bowl, a whisk, and a standard oven. This recipe is a breeze for beginners and a quick win for seasoned bakers.
- Customization: The optional nuts add a crunchy contrast, while the vanilla extract ties everything together with a subtle aromatic lift.
- Crowd‑pleaser: Whether you’re feeding a family, hosting a gathering, or just treating yourself, these cookies have the universal appeal of chocolate and butter that everyone loves.
- Make‑Ahead: They keep well for up to a week in an airtight container, making them the perfect batch‑bake for busy weeks.
- Ingredient Quality: Using high‑quality butter and semi‑sweet chips ensures that every bite is rich and flavorful, avoiding the flat taste of low‑grade alternatives.
Inside the Ingredient List
The Flavor Base
Brown sugar is the unsung hero that brings depth and a caramelized nuance to the cookie. It also lowers the batter’s pH, which helps the chocolate chips stay soft and gooey rather than harden into brittle squares. Skipping it means you lose that rich, almost molasses‑like sweetness that keeps the cookie from feeling dry.
The Texture Crew
Unsalted butter is the backbone of the cookie’s mouthfeel. It melts at the right temperature to create that silky, buttery sheen, and the absence of salt in the butter allows you to control the overall saltiness precisely. If you’re on a dairy‑free diet, a 1:1 butter substitute like dairy‑free margarine works, but the cookie’s bite will change subtly.
The Unexpected Star
The 1 teaspoon of baking powder is the secret to that airy lift that lets the cookie rise just enough to keep the center gooey. Many recipes skip it, resulting in flat, dense cookies that crumble under a bite. This small addition makes a huge difference in both texture and visual appeal.
The Final Flourish
Vanilla extract adds an aromatic layer that lifts the butter and sugar flavors, creating a harmonious taste profile. The pinch of salt (¼ teaspoon) is essential; it balances sweetness and brings out the chocolate’s depth. If you prefer a richer flavor, a splash of espresso powder can be added to the batter, amplifying the chocolate notes without making it taste like coffee.
Everything's prepped? Good. Let's get into the real action...
The Method — Step by Step
- Preheat your oven to 350°F (175°C). Line a 9x13 inch baking pan with parchment paper, leaving a little overhang on the sides for easy removal. The parchment not only prevents sticking but also gives the cookies a clean look when sliced. This step might seem trivial, but a properly prepared pan saves a lot of cleanup later.
- In a medium bowl, whisk together the all‑purpose flour, baking powder, and salt. This dry mix ensures even distribution of leavening agents and prevents clumps. The salt may seem like a small detail, but it’s a flavor amplifier that brings out the richness of the chocolate.
- In a separate large bowl, cream the brown sugar and unsalted butter together using an electric mixer on medium speed until light and fluffy. This process incorporates air, giving the cookie a tender crumb. Keep an eye on the color; it should lighten to a golden hue before moving on.
- Beat in the eggs one at a time, ensuring each is fully incorporated before adding the next. The eggs bind the batter and add structure, but over‑mixing can make the cookie tough. Once the eggs are in, stir in the vanilla extract, which infuses the batter with a warm, aromatic undertone.
- Gradually fold the dry ingredients into the wet mixture, mixing just until incorporated. Over‑mixing at this stage can develop gluten, resulting in a denser cookie. The batter should be thick yet pourable—think of it as a thick cream that will spread slightly when baked.
- Gently fold in the semi‑sweet chocolate chips and optional chopped nuts. The chips should be evenly distributed to avoid pockets of pure chocolate. This step is crucial; too many chips in one area can cause uneven melting and a less uniform gooey center.
- Transfer the batter into the prepared pan, smoothing the top with a spatula. The batter should fill the pan about three‑quarters full, giving the cookies room to rise slightly. This step ensures even baking and a consistent crust.
- Bake for 30 minutes, or until the edges turn golden brown and a toothpick inserted near the center comes out with a few moist crumbs. The center should still feel slightly soft to the touch; this is the hallmark of a gooey cookie. Keep a close eye on the baking time—oven temperatures can vary.
- Remove the pan from the oven and let the cookies cool on a wire rack for 10 minutes before slicing. This cooling period allows the gooey center to set slightly, preventing the cookies from falling apart. Once cooled, enjoy the buttery, chocolate‑laden experience.
That’s it — you did it. But hold on, I’ve got a few more tricks that will take this to another level. These insider tips will help you avoid common pitfalls and elevate the flavor profile even further.
Insider Tricks for Flawless Results
The Temperature Rule Nobody Follows
Baking at exactly 350°F (175°C) is key. If your oven runs hot, the cookies will brown too quickly on the edges while remaining gooey inside. Use an oven thermometer to verify the temperature, and consider using a baking stone to distribute heat evenly.
Why Your Nose Knows Best
Before you even touch the dough, take a deep sniff. The scent of caramelized brown sugar should be unmistakable. If it’s faint, you’re likely under‑creaming the butter, which can result in a dense cookie that doesn’t rise properly.
The 5‑Minute Rest That Changes Everything
Letting the batter rest for 5 minutes before baking allows the flour to fully hydrate, resulting in a more cohesive crumb. This short pause also lets the butter soften slightly, which contributes to that silky mouthfeel.
The Secret of Even Chocolate Distribution
After folding in the chips, give the batter a gentle swirl with a spatula. This ensures no chocolate clumps form in the center, preventing uneven melting during baking. A well‑distributed chip means every bite has that perfect chocolate hit.
The Final Crumb Test
When the cookies are done, they should feel firm on the surface but still give slightly when pressed. If they’re too soft, they need a few more minutes; if they’re too firm, they’ve baked too long. This tactile test is the quickest way to perfect your bake.
Creative Twists and Variations
This recipe is a playground. Here are some of my favorite ways to switch things up:
Caramel Swirl Bliss
Swirl a tablespoon of caramel sauce into the batter before baking. The result is a decadent, buttery caramel center that pairs perfectly with the chocolate chips. Guests will be asking for the recipe after the first bite.
Peanut Butter Crunch
Replace the optional nuts with 1/2 cup of creamy peanut butter. The peanut butter adds a rich, nutty flavor and a slightly chewy texture that contrasts nicely with the gooey center.
Sea‑Salted Chocolate
Finish the cookies with a sprinkle of flaky sea salt before baking. The salt enhances the chocolate’s depth and creates a delightful contrast between sweet and salty.
Espresso‑Infused Delight
Add 1 teaspoon of instant espresso powder to the dry ingredients. The espresso intensifies the chocolate flavor without adding a coffee taste, giving the cookies a sophisticated edge.
Minty Freshness
Stir in 1 tablespoon of finely chopped fresh mint leaves. The mint provides a cool, refreshing contrast to the rich chocolate, making these cookies perfect for summer gatherings.
Storing and Bringing It Back to Life
Fridge Storage
Store cooled cookies in an airtight container at room temperature for up to 3 days. If you need them to last longer, keep them in the refrigerator, where they’ll stay fresh for up to a week. The cool environment slows down the oxidation of butter, preserving the buttery flavor.
Freezer Friendly
Wrap each cookie individually in parchment paper before freezing. Place them in a freezer‑safe bag and store for up to 3 months. When ready to eat, let them thaw at room temperature for 15 minutes before serving.
Best Reheating Method
For a warm, gooey experience, heat frozen cookies in a 350°F oven for 5 minutes. If you’re reheating fresh cookies, a quick 30‑second microwave burst will do the trick. Add a tiny splash of water before reheating—this steams the cookies back to perfection and keeps them moist.