
Mini Quiches
As a weekday meal strategist, I'm always on the lookout for recipes that can be made ahead, stored, and reheated with ease. Mini quiches are one of my favorite solutions for busy mornings or afternoons when I need a quick snack or light meal. These individual quiches are perfect for meal prep, and they can be customized with your favorite fillings.
I love making mini quiches because they're so versatile. You can fill them with anything from diced ham and cheese to sautéed spinach and mushrooms. They're also a great way to use up leftover vegetables or meats, making them a very budget-friendly option.
In this recipe, I'll show you how to make mini quiches from scratch, including the pastry crust and the filling. Don't worry if you're not a experienced baker - these quiches are easy to make and require minimal special equipment. With a few simple ingredients and some basic cooking techniques, you'll be enjoying delicious mini quiches in no time.
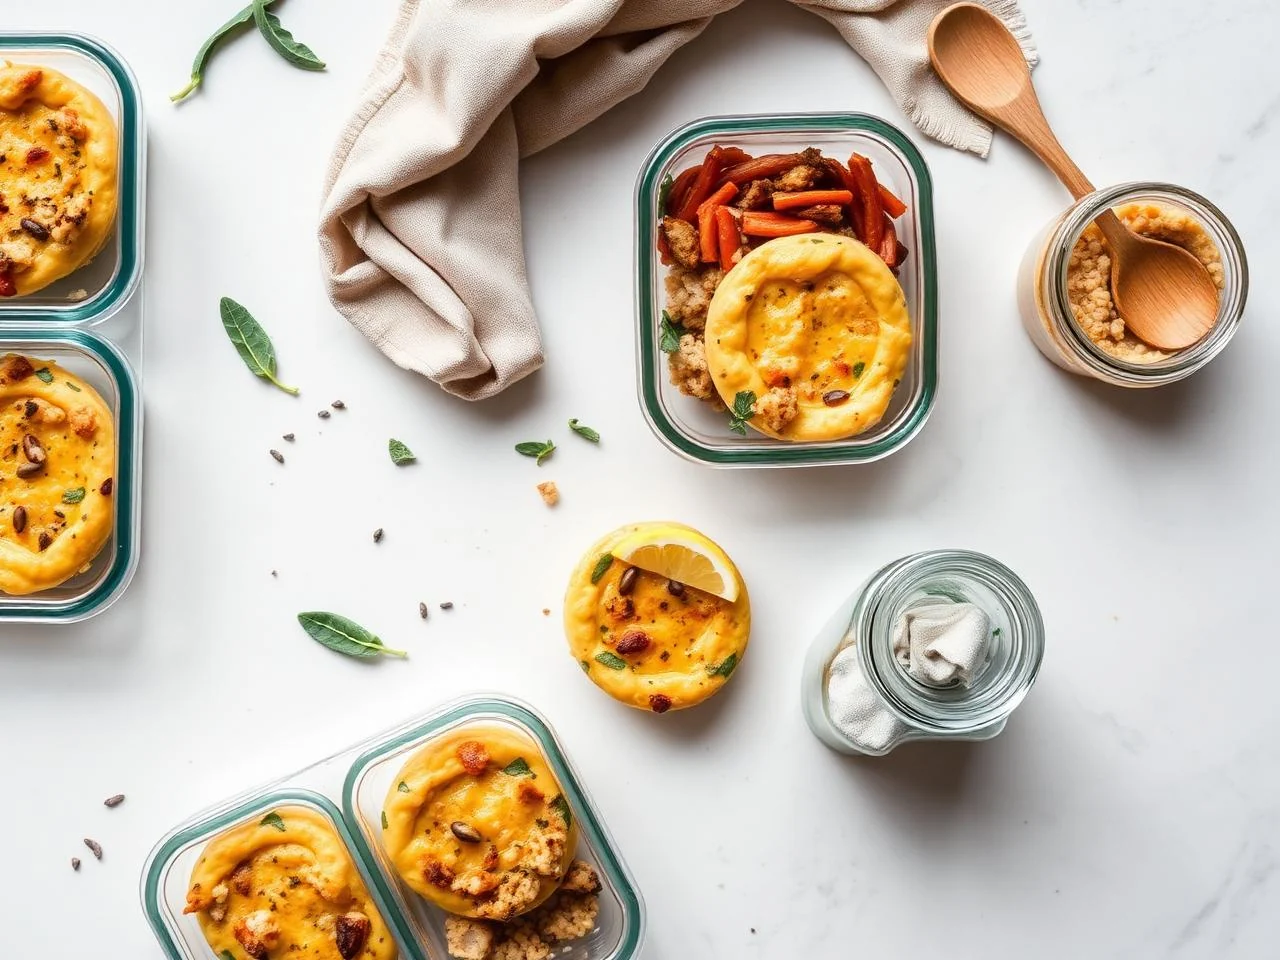
One of the best things about mini quiches is that they can be made ahead and stored in the fridge or freezer for later use. Simply thaw and reheat them as needed, and you'll have a hot, satisfying meal in minutes. Whether you're a busy professional, a student, or a parent on-the-go, mini quiches are the perfect solution for a quick and easy meal.
In the following sections, I'll guide you through the process of making mini quiches, from preparing the ingredients to storing and reheating them. With these tips and techniques, you'll be able to create delicious, savory mini quiches that are perfect for any occasion.
Why You’ll Love This Recipe
- Mini quiches are easy to make and require minimal special equipment.
- They can be customized with your favorite fillings, making them a great way to use up leftover ingredients.
- They're perfect for meal prep and can be stored in the fridge or freezer for later use.
- They're a great source of protein and can be made with a variety of ingredients to suit different dietary needs.
- They're delicious and savory, making them a great option for snacks or light meals.
Why This Recipe Works
The key to making great mini quiches is to use a combination of ingredients that provide texture, flavor, and moisture. The pastry crust is made with a mixture of flour, butter, and ice-cold water, which gives it a flaky and tender texture. The filling is made with eggs, cream, and shredded cheese, which provides richness and creaminess.
When you bake the quiches, the eggs and cream set, and the cheese melts and browns, creating a golden-brown crust on top. The result is a delicious, savory quiche that's perfect for snacking or as a light meal. By using a combination of ingredients and cooking techniques, you can create a dish that's both flavorful and visually appealing.
The science behind making mini quiches is all about balance and harmony. You need to balance the ingredients so that the filling is not too wet or too dry, and the pastry crust is not too thick or too thin. You also need to cook the quiches at the right temperature and for the right amount of time, so that the eggs are set and the crust is golden brown.
Ingredients You’ll Need
To make mini quiches, you'll need a few basic ingredients, including flour, butter, eggs, cream, and shredded cheese. You'll also need some salt and pepper to season the filling. In addition to these ingredients, you can customize your quiches with your favorite fillings, such as diced ham, sautéed spinach, or sliced mushrooms.
When shopping for ingredients, look for high-quality items that are fresh and flavorful. Choose a good-quality cheese that melts well, such as cheddar or mozzarella, and select fresh vegetables that are in season. With these ingredients and a few basic cooking techniques, you can create delicious mini quiches that are perfect for any occasion.
- 2 cups (250g) all-purpose flourAll-purpose flour is a good choice for making pastry crust because it has a neutral flavor and a tender texture. Look for a high-quality flour that is fresh and has not been sitting on the shelf for too long.
- 1/2 cup (115g) cold unsalted butter, cut into small piecesCold butter is essential for making a flaky pastry crust. Cut the butter into small pieces and keep it cold until you're ready to use it.
- 1/4 cup (60ml) ice-cold waterIce-cold water helps to create a flaky pastry crust. Use cold water and add it gradually to the flour and butter mixture, stirring with a fork until the dough comes together.
- 2 large eggsEggs provide moisture and richness to the quiche filling. Choose fresh eggs that are free of cracks and have a clean, dry shell.
- 1 cup (240ml) heavy creamHeavy cream adds richness and creaminess to the quiche filling. Look for a high-quality cream that is fresh and has not been ultra-pasteurized.
- 1 cup (115g) shredded cheddar cheeseCheddar cheese is a good choice for quiche because it melts well and has a rich, tangy flavor. Look for a high-quality cheese that is fresh and has not been sitting on the shelf for too long.
- 1/2 teaspoon saltSalt enhances the flavor of the quiche filling and helps to balance the sweetness of the cream and cheese. Use a high-quality salt that is fresh and has not been iodized.
- 1/4 teaspoon black pepperBlack pepper adds a subtle kick to the quiche filling and helps to balance the flavors. Use a high-quality pepper that is fresh and has not been sitting on the shelf for too long.
- 1/4 cup (30g) chopped fresh parsleyFresh parsley adds a bright, fresh flavor to the quiche filling and helps to balance the richness of the cream and cheese. Choose fresh parsley that is free of wilted or brown leaves.
- 1/2 cup (60g) diced hamDiced ham adds a salty, savory flavor to the quiche filling and helps to balance the sweetness of the cream and cheese. Look for a high-quality ham that is fresh and has not been sitting on the shelf for too long.

Equipment You’ll Need
How to Make Mini Quiches
- 1In a large mixing bowl, combine the flour, salt, and cold butter. Use a pastry blender or fork to work the butter into the flour until the mixture resembles coarse crumbs.
- 2Gradually add the ice-cold water to the flour mixture, stirring with a fork until the dough comes together in a ball. Wrap the dough in plastic wrap and refrigerate for at least 30 minutes.
- 3On a lightly floured surface, roll out the chilled dough to a thickness of about 1/8 inch (3mm). Transfer the dough to a 9-inch (23cm) tart pan with removable bottom. Trim the edges and press the dough into the corners of the pan.
- 4In a separate bowl, whisk together the eggs, heavy cream, shredded cheese, salt, and pepper. Stir in the chopped parsley and diced ham.
- 5Pour the egg mixture into the pastry-lined tart pan and smooth the top with a rubber spatula.
- 6Bake the quiche in a preheated oven at 375°F (190°C) for 35-40 minutes, or until the edges are golden brown and the center is set. Use an instant-read thermometer to check the internal temperature, which should be at least 165°F (74°C).
- 7Remove the quiche from the oven and let it cool in the pan for 10 minutes. Then, transfer it to a wire rack to cool completely.
- 8Once the quiche has cooled, use a sharp knife to cut it into 6-8 mini quiches. Serve warm or at room temperature.
- 9To store the mini quiches, place them in an airtight container in the fridge for up to 3 days or freeze for up to 2 months. To reheat, simply thaw overnight in the fridge and bake in a preheated oven at 350°F (180°C) for 10-15 minutes, or until warmed through.
- 10To make ahead, prepare the pastry crust and filling separately and store them in the fridge or freezer until ready to assemble and bake. This will save you time and effort in the long run, and ensure that your mini quiches are always fresh and delicious.
Expert Tips
- To ensure that your pastry crust is flaky and tender, keep the butter and water cold and handle the dough gently.
- Don't overmix the egg mixture, as this can cause the quiche to become tough and dense.
- Use a variety of ingredients to customize your quiches and make them more interesting.
- To freeze the quiches, place them in a single layer on a baking sheet and freeze until solid, then transfer them to an airtight container or freezer bag.
- To reheat frozen quiches, simply thaw overnight in the fridge and bake in a preheated oven at 350°F (180°C) for 10-15 minutes, or until warmed through.
- To make individual quiches, simply divide the egg mixture among 6-8 mini tart pans and bake for 20-25 minutes, or until the edges are golden brown and the centers are set.
Common Mistakes to Avoid
- Not keeping the butter and water cold, which can cause the pastry crust to become tough and dense.
- Overmixing the egg mixture, which can cause the quiche to become tough and dense.
- Not baking the quiche long enough, which can cause the center to be undercooked.
- Not letting the quiche cool completely before serving, which can cause it to become soggy and unappetizing.
- Not storing the quiches properly, which can cause them to become stale or develop off-flavors.
Variations and Substitutions
- Add diced vegetables, such as bell peppers or zucchini, to the egg mixture for added flavor and nutrition.
- Use different types of cheese, such as feta or goat cheese, to give the quiche a unique flavor.
- Add cooked meats, such as bacon or sausage, to the egg mixture for added protein and flavor.
- Use whole wheat pastry crust instead of all-purpose flour for a healthier and more nutritious option.
- Add fresh herbs, such as parsley or thyme, to the egg mixture for added flavor and freshness.
- Use a variety of spices, such as paprika or cayenne pepper, to add depth and heat to the quiche.
What to Serve With Mini Quiches
Mini quiches are perfect for serving as a snack or light meal. They can be served warm or at room temperature, and they're a great option for packing in lunches or taking on-the-go. Try serving them with a side salad or a bowl of soup for a satisfying and filling meal.
Some other ideas for serving mini quiches include: serving them as an appetizer or hors d'oeuvre at a party, packing them in a picnic basket for a outdoor meal, or serving them as a side dish at a brunch or breakfast gathering. Whatever way you choose to serve them, mini quiches are sure to be a hit with your family and friends.
Make-Ahead, Storage, Freezing and Reheating
To store mini quiches, place them in an airtight container in the fridge for up to 3 days or freeze for up to 2 months. To freeze, place the quiches in a single layer on a baking sheet and freeze until solid, then transfer them to an airtight container or freezer bag.
To reheat frozen quiches, simply thaw overnight in the fridge and bake in a preheated oven at 350°F (180°C) for 10-15 minutes, or until warmed through. You can also reheat them in the microwave, but be careful not to overheat, as this can cause the quiche to become tough and dry.
When storing mini quiches, it's a good idea to label the container with the date and the contents, so you can easily keep track of how long they've been stored. It's also a good idea to store them in a cool, dry place, away from direct sunlight and moisture.
By following these storage tips, you can keep your mini quiches fresh and delicious for a longer period of time, and enjoy them whenever you want. Whether you're a busy professional or a parent on-the-go, mini quiches are a great option for a quick and easy meal that's also healthy and nutritious.
Frequently Asked Questions
Can I make mini quiches ahead of time?
Yes, you can make mini quiches ahead of time and store them in the fridge or freezer for later use. Simply prepare the pastry crust and filling separately and store them in the fridge or freezer until ready to assemble and bake.
How do I reheat frozen mini quiches?
To reheat frozen mini quiches, simply thaw overnight in the fridge and bake in a preheated oven at 350°F (180°C) for 10-15 minutes, or until warmed through. You can also reheat them in the microwave, but be careful not to overheat, as this can cause the quiche to become tough and dry.
Can I customize the filling of my mini quiches?
Yes, you can customize the filling of your mini quiches with your favorite ingredients. Try adding diced vegetables, cooked meats, or different types of cheese to the egg mixture for added flavor and nutrition.
How long do mini quiches last in the fridge?
Mini quiches can be stored in the fridge for up to 3 days. Simply place them in an airtight container and keep them refrigerated at a temperature of 40°F (4°C) or below.
Can I freeze mini quiches?
Yes, you can freeze mini quiches for up to 2 months. Simply place them in a single layer on a baking sheet and freeze until solid, then transfer them to an airtight container or freezer bag.
How do I thaw frozen mini quiches?
To thaw frozen mini quiches, simply place them in the fridge overnight or thaw them at room temperature for a few hours. Once thawed, you can reheat them in the oven or microwave as desired.
Can I make mini quiches in a muffin tin?
Yes, you can make mini quiches in a muffin tin. Simply divide the egg mixture among the muffin cups and bake for 20-25 minutes, or until the edges are golden brown and the centers are set.
How do I prevent my mini quiches from becoming soggy?
To prevent your mini quiches from becoming soggy, make sure to bake them until they're golden brown and the centers are set. You can also try adding a little more cheese or eggs to the filling to help bind it together and prevent it from becoming too wet.

Ingredients
- 2 cups (250g) all-purpose flour
- 1/2 cup (115g) cold unsalted butter, cut into small pieces
- 1/4 cup (60ml) ice-cold water
- 2 large eggs
- 1 cup (240ml) heavy cream
- 1 cup (115g) shredded cheddar cheese
- 1/2 teaspoon salt
- 1/4 teaspoon black pepper
- 1/4 cup (30g) chopped fresh parsley
- 1/2 cup (60g) diced ham
Instructions
- In a large mixing bowl, combine the flour, salt, and cold butter. Use a pastry blender or fork to work the butter into the flour until the mixture resembles coarse crumbs.
- Gradually add the ice-cold water to the flour mixture, stirring with a fork until the dough comes together in a ball. Wrap the dough in plastic wrap and refrigerate for at least 30 minutes.
- On a lightly floured surface, roll out the chilled dough to a thickness of about 1/8 inch (3mm). Transfer the dough to a 9-inch (23cm) tart pan with removable bottom. Trim the edges and press the dough into the corners of the pan.
- In a separate bowl, whisk together the eggs, heavy cream, shredded cheese, salt, and pepper. Stir in the chopped parsley and diced ham.
- Pour the egg mixture into the pastry-lined tart pan and smooth the top with a rubber spatula.
- Bake the quiche in a preheated oven at 375°F (190°C) for 35-40 minutes, or until the edges are golden brown and the center is set. Use an instant-read thermometer to check the internal temperature, which should be at least 165°F (74°C).
- Remove the quiche from the oven and let it cool in the pan for 10 minutes. Then, transfer it to a wire rack to cool completely.
- Once the quiche has cooled, use a sharp knife to cut it into 6-8 mini quiches. Serve warm or at room temperature.
- To store the mini quiches, place them in an airtight container in the fridge for up to 3 days or freeze for up to 2 months. To reheat, simply thaw overnight in the fridge and bake in a preheated oven at 350°F (180°C) for 10-15 minutes, or until warmed through.
- To make ahead, prepare the pastry crust and filling separately and store them in the fridge or freezer until ready to assemble and bake. This will save you time and effort in the long run, and ensure that your mini quiches are always fresh and delicious.